目录
Zabbix 的分布式监控架构允许在大规模和地理上分散的环境中进行高效的监控。通过分布式监控,Zabbix 可以扩展其监控能力,支持大量主机和设备,并提供高可用性和容错能力。
分布式监控架构
Zabbix 的分布式监控主要由以下几个组件组成:
-
Zabbix Server:
- 核心组件,负责处理和存储监控数据、配置和报警。
- 管理和协调所有代理和代理程序(proxies)。
-
Zabbix Proxy:
- 中间组件,位于 Zabbix 服务器和被监控主机之间。
- 收集被监控主机的数据并将其转发到 Zabbix 服务器。
- 支持断线缓存,保证在网络连接恢复后数据不会丢失。
-
Zabbix Agent:
- 部署在被监控主机上的轻量级代理程序。
- 收集本地主机的监控数据并发送到 Zabbix 服务器或代理程序。
-
Zabbix Web 界面:
- 提供给用户的管理界面,用户可以通过该界面进行配置、监控、报警管理等操作。
实现分布式监控的步骤
-
安装和配置 Zabbix Server:
- 安装 Zabbix Server,并进行基本的配置。
-
安装和配置 Zabbix Proxy:
- 安装 Zabbix Proxy,并进行基本配置。
- 配置 Zabbix Proxy 与 Zabbix Server 之间的通信。
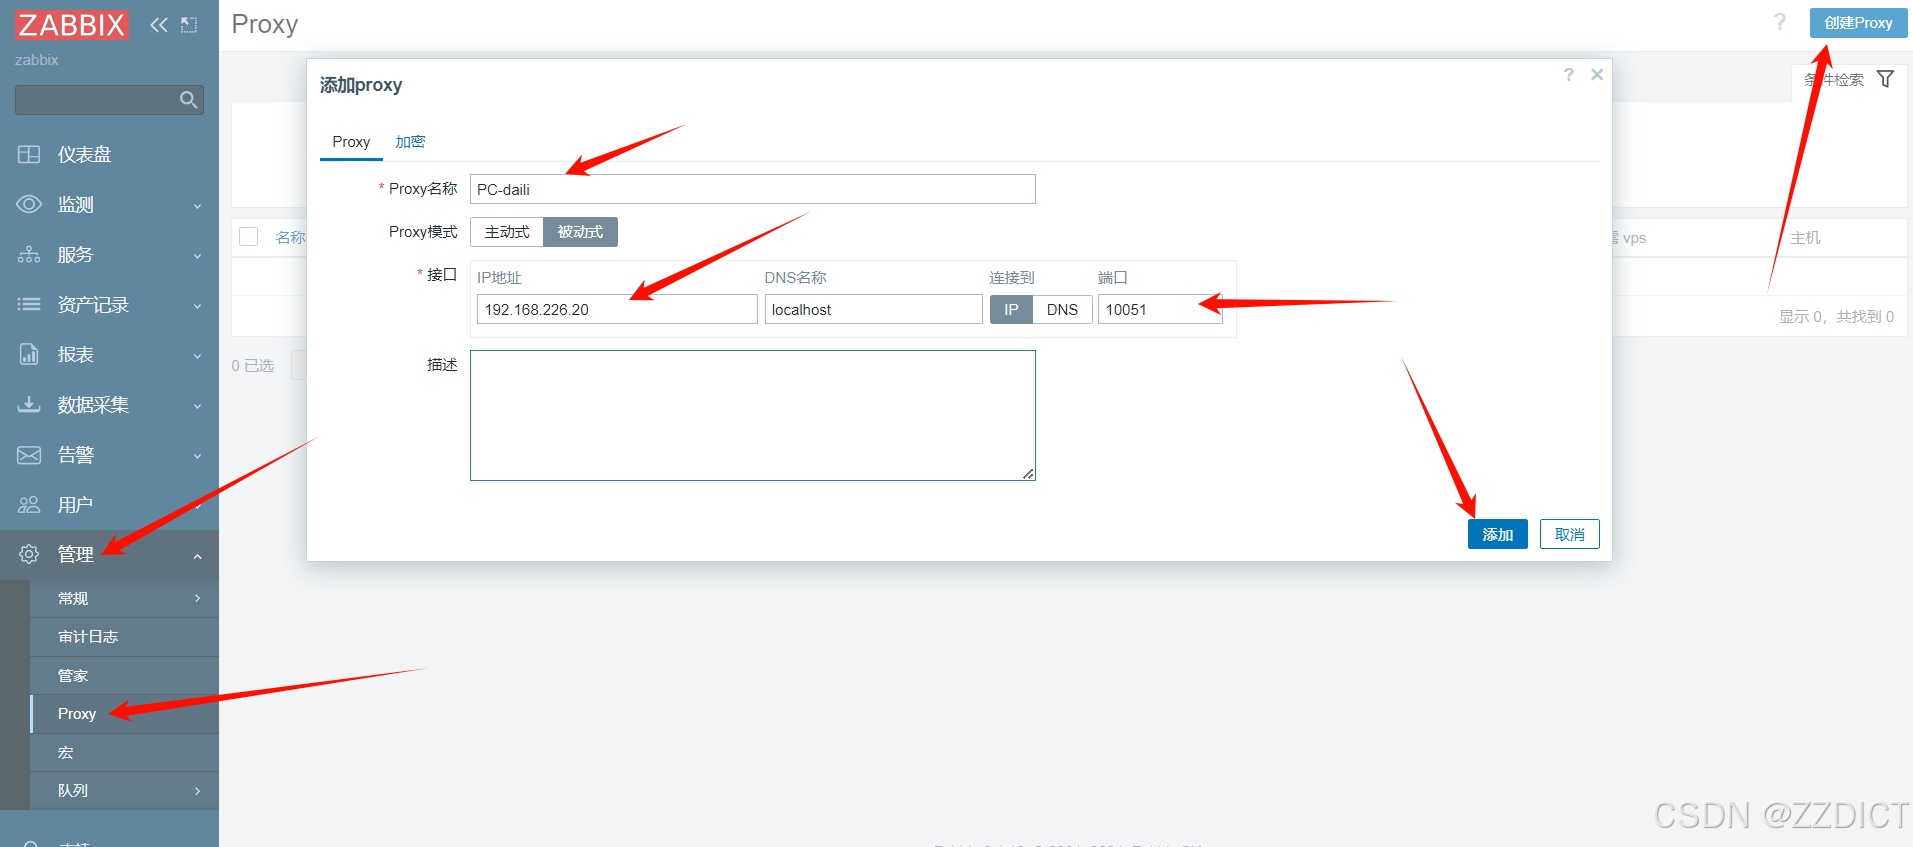
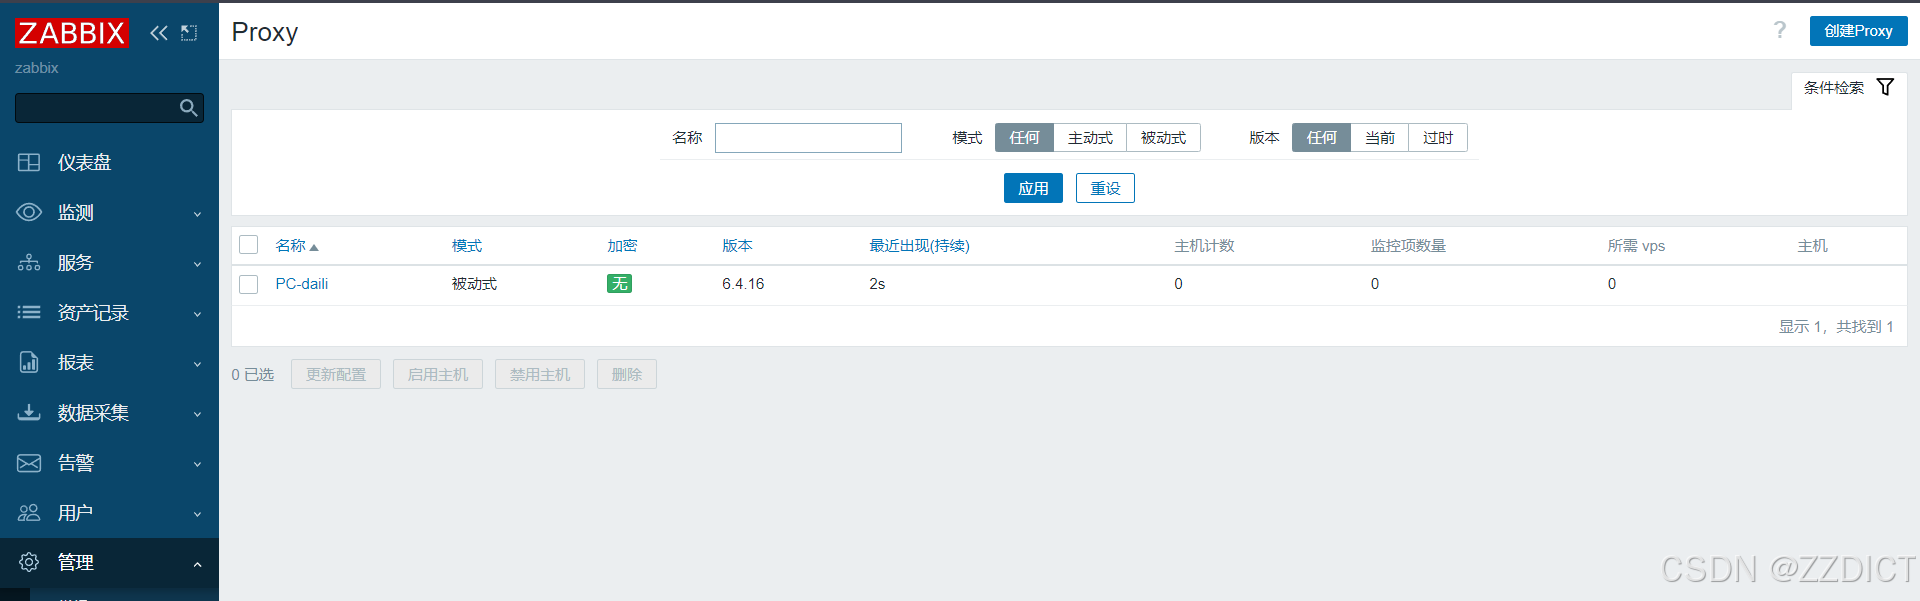
- 在 Zabbix Server 的 Web 界面中添加并配置代理。
-
安装和配置 Zabbix Agent:
- 在被监控的主机上安装 Zabbix Agent。
- 配置 Zabbix Agent,使其将监控数据发送到 Zabbix Proxy 或 Zabbix Server。
-
配置自动发现和模板:
- 使用自动发现规则自动发现网络中的新设备和服务。
- 应用模板来标准化监控项、触发器和图形的配置。
-
设置报警和通知:
- 配置报警规则和动作,定义何时发送通知以及如何响应监控事件。
优点和应用场景
- 扩展性:可以通过增加代理来扩展监控能力,适应大规模监控需求。
- 容错性:代理可以在网络断开时缓存数据,并在网络恢复后发送到服务器,确保数据不丢失。
- 地理分布:适用于需要跨多个地理位置进行监控的场景,通过代理分布在各地收集数据。
- 安全性:通过代理减少直接连接到 Zabbix 服务器的主机数量,提高安全性。
安装Zabbix_Proxy
新增一台虚拟机关闭防火墙和selinux,进行时间同步。
| 主机名 | IP | C/S | 系统版本 | 软件版本 |
| localhost | 192.168.226.20 | Proxy端 | Rocky_linux9.4 | zabbix-Proxy6.4 |
1. 检查有无epel源
[root@localhost ~]# ll /etc/yum.repos.d/
total 32
-rw-r--r--. 1 root root 1142 Aug 28  2023 epel-cisco-openh264.repo
-rw-r--r--. 1 root root 1552 Aug 28  2023 epel-testing.repo
-rw-r--r--. 1 root root 1453 Aug 28  2023 epel.repo
-rw-r--r--. 1 root root 6610 May  1 08:29 rocky-addons.repo
-rw-r--r--. 1 root root 1165 May  1 08:29 rocky-devel.repo
-rw-r--r--. 1 root root 2387 May  1 08:29 rocky-extras.repo
-rw-r--r--. 1 root root 3417 May  1 08:29 rocky.repo
我这里有,因此要在epel标识符里加上excludepkgs=zabbix* 如何没有epel源的话跳过这步
[root@localhost ~]# vim /etc/yum.repos.d/epel.repo
[epel]
...
excludepkgs=zabbix*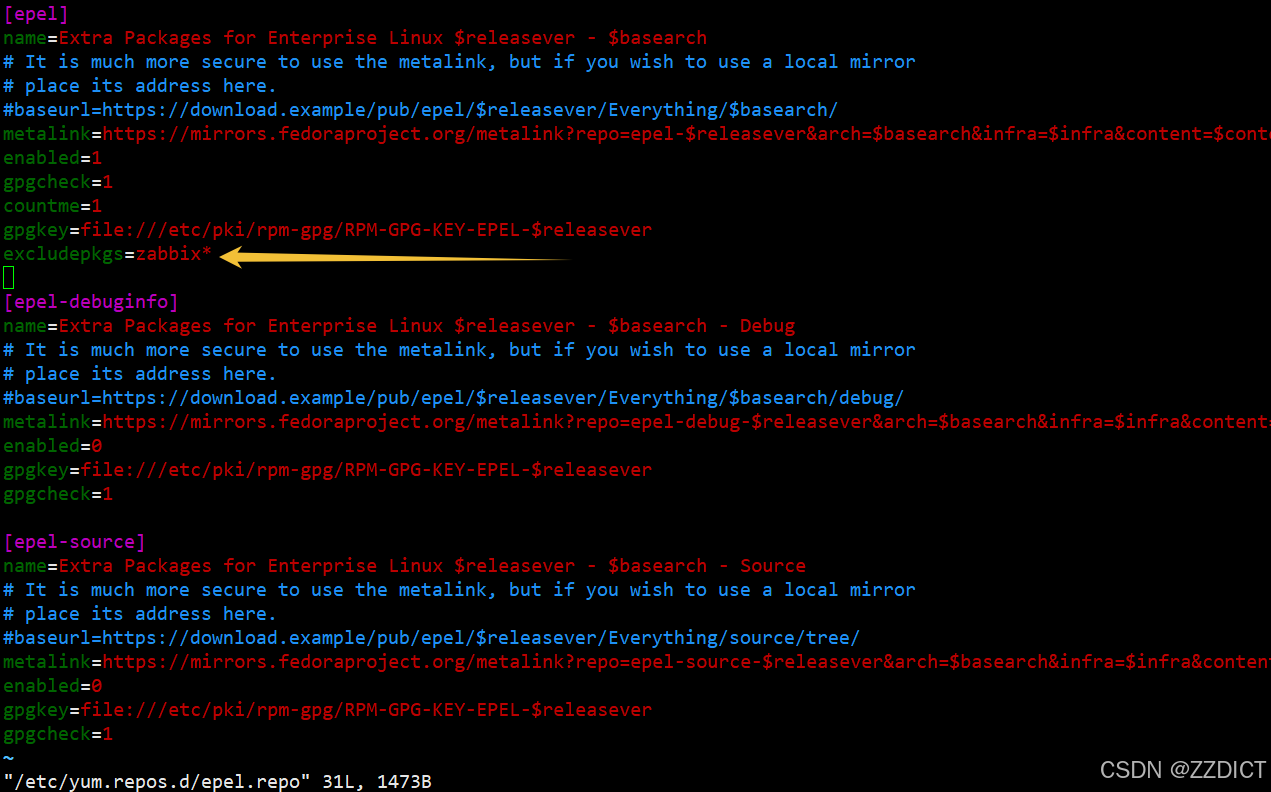
2. 安装Zabbix_Proxy6.4的仓库配置包
[root@localhost ~]# rpm -Uvh https://repo.zabbix.com/zabbix/6.4/rhel/9/x86_64/zabbix-release-6.4-2.el9.noarch.rpm
[root@localhost ~]# dnf clean all
3. 安装
[root@localhost ~]# dnf install -y zabbix-proxy-mysql zabbix-sql-scripts zabbix-selinux-policy
4. 获取数据库安装包
注:本版本要使用msyql8.3以下的版本
MySQL :: Download MySQL Yum Repository
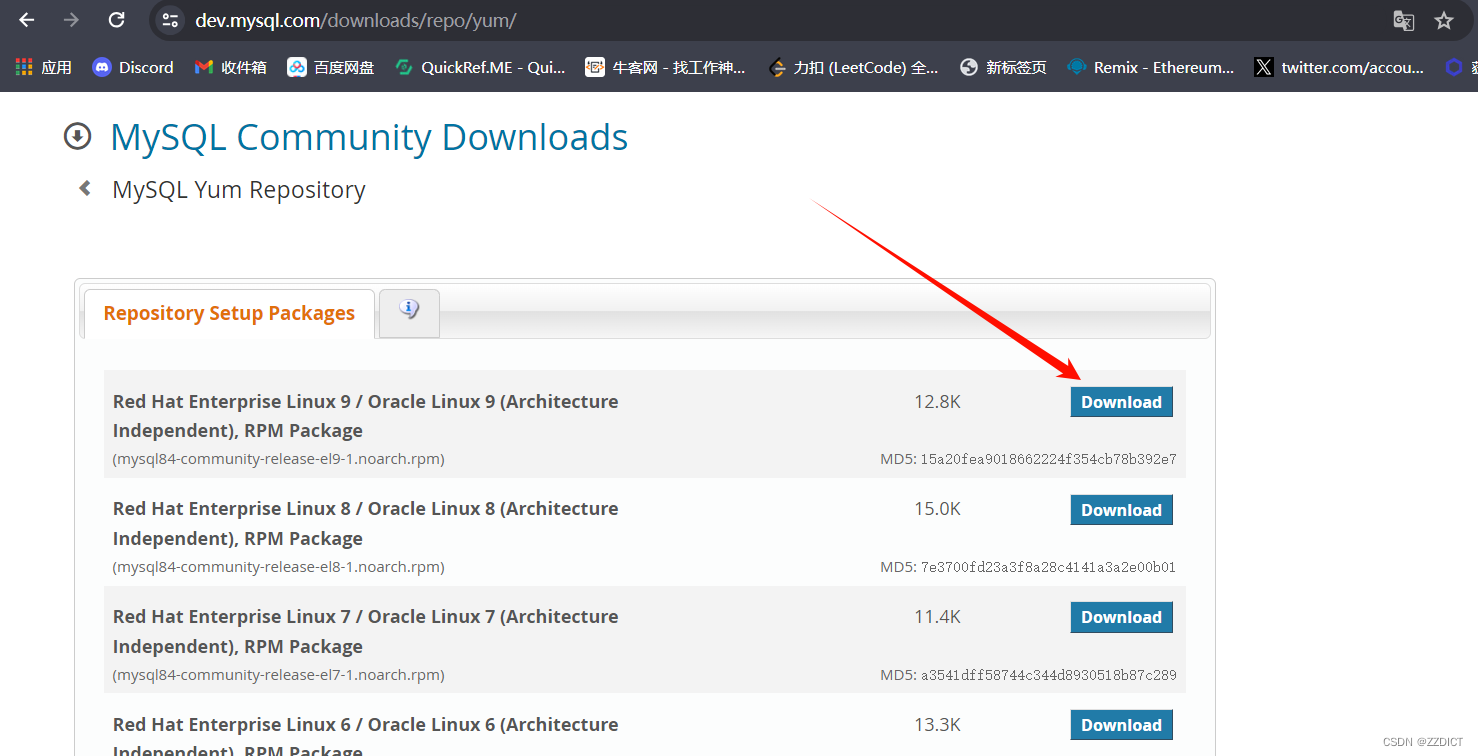

5. 安装
[root@localhost ~]# rpm -Uvh https://dev.mysql.com/get/mysql84-community-release-el9-1.noarch.rpm
6. 关闭最新版的源,开启8.0的源
[root@localhost ~]# vim /etc/yum.repos.d/mysql-community.repo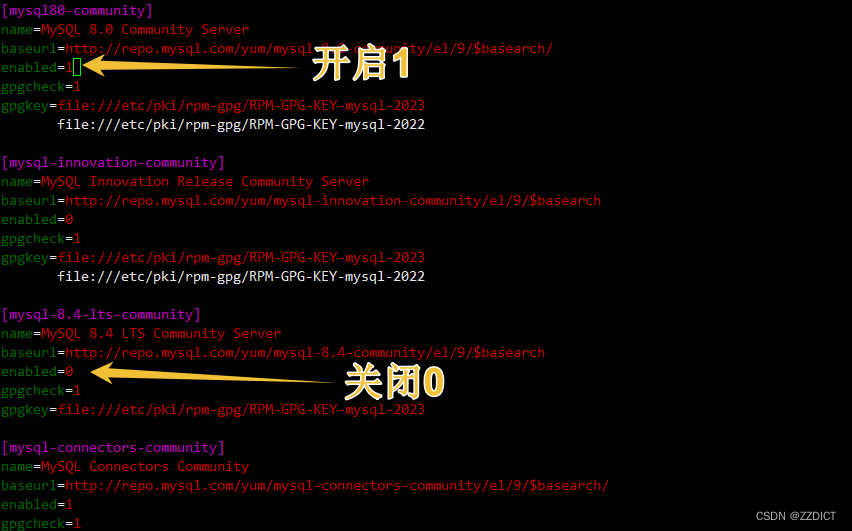
7. 下载mysql
[root@localhost ~]# yum install -y mysql-community-server mysql8. 修改mysql配置文件
[root@localhost ~]# vim /etc/my.cnf +5
skip_name_resolve = ON          # 跳过主机名解析,提高连接速度,特别是在DNS解析慢或不可靠的环境中
innodb_file_per_table = ON      # 为每个表使用单独的表空间文件,优化表空间管理和备份
innodb_buffer_pool_size = 256M  # 设置InnoDB缓冲池大小为256MB,用于缓存数据和索引,减少磁盘I/O,提高性能
max_connections = 2000          # 设置MySQL服务器允许的最大并发连接数为2000
log-bin = master-log            # 开启二进制日志记录,用于复制和恢复操作,日志文件名以master-log开头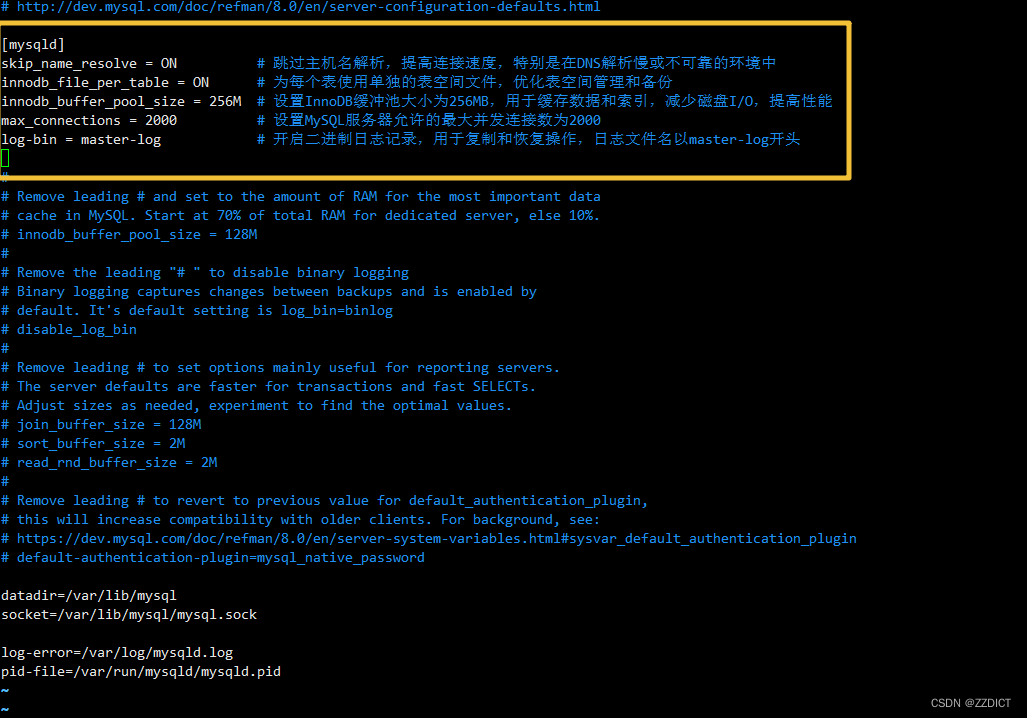
8. 启动mysql
[root@localhost ~]# systemctl enable --now mysqld
9. 获取初始化密码,如果获取不到,可直接使用msyql命令登录尝试
[root@localhost ~]# grep 'temporary password' /var/log/mysqld.log
10. 使用初始化密码更改新密码
[root@localhost ~]# mysqladmin -uroot -p'初始密码' password "Qaz123456+"
若无初始化密码则使用下述语句修改
[root@localhost ~]# mysqladmin -uroot password "Qaz123456+"
11. 登陆数据库操作
[root@localhost ~]# mysql -u root -p"Qaz123456+"
mysql: [Warning] Using a password on the command line interface can be insecure.
Welcome to the MySQL monitor.  Commands end with ; or \g.
Your MySQL connection id is 11
Server version: 8.0.38 MySQL Community Server - GPL

Copyright (c) 2000, 2024, Oracle and/or its affiliates.

Oracle is a registered trademark of Oracle Corporation and/or its
affiliates. Other names may be trademarks of their respective
owners.

Type 'help;' or '\h' for help. Type '\c' to clear the current input statement.

mysql> create database zabbix_proxy character set utf8mb4 collate utf8mb4_bin;
Query OK, 1 row affected (0.00 sec)

mysql> create user zabbix@'%' identified by 'Qaz123456+';
Query OK, 0 rows affected (0.01 sec)

mysql>  grant all privileges on zabbix_proxy.* to zabbix@'%';
Query OK, 0 rows affected (0.01 sec)

mysql> set global log_bin_trust_function_creators = 1;
Query OK, 0 rows affected, 1 warning (0.00 sec)

mysql> quit;
Bye
12. 导入初始架构和数据,系统将提示输入新创建的密码。
[root@localhost ~]# cat /usr/share/zabbix-sql-scripts/mysql/proxy.sql | mysql --default-character-set=utf8mb4 -uzabbix -p zabbix_proxy
输入命令会提示你输入新密码,输入后等待导入即可。
13. 登录msyql查看zabbix库并进行设置
[root@localhost ~]# mysql -u root -p"Qaz123456+"
mysql: [Warning] Using a password on the command line interface can be insecure.
Welcome to the MySQL monitor.  Commands end with ; or \g.
Your MySQL connection id is 13
Server version: 8.0.38 MySQL Community Server - GPL

Copyright (c) 2000, 2024, Oracle and/or its affiliates.

Oracle is a registered trademark of Oracle Corporation and/or its
affiliates. Other names may be trademarks of their respective
owners.

Type 'help;' or '\h' for help. Type '\c' to clear the current input statement.

mysql> set global log_bin_trust_function_creators = 0;
Query OK, 0 rows affected, 1 warning (0.00 sec)

mysql> show databases;
+--------------------+
| Database           |
+--------------------+
| information_schema |
| mysql              |
| performance_schema |
| sys                |
| zabbix_proxy       |
+--------------------+
5 rows in set (0.01 sec)

mysql> quit
Bye
14. 为Zabbix proxy配置数据库
[root@localhost ~]# vim  /etc/zabbix/zabbix_proxy.conf
Server=192.168.226.28
Hostname=localhost
ProxyMode=1
DBHost=192.168.226.20
DBPassword=Qaz123456+
DBPort=3306
EnableRemoteCommands=1
LogRemoteCommands=1
ProxyConfigFrequency=30  #多长时间,去服务端拖一次有自己监控的操作配置;为了实验更快的生效,这里设置30秒,默认3600s
DataSenderFrequency=1  #每一秒向server 端发一次数据,发送频度
15. 启动Zabbix代理进程
[root@localhost ~]#  systemctl restart zabbix-proxy
[root@localhost ~]# systemctl enable zabbix-proxy
Server端Web页面配置
修改Agent端配置
来到客户端192.168.226.29
[root@web1 ~]# vim /etc/zabbix/zabbix_agentd.conf
Server=192.168.226.28,192.168.226.20    #给server对应的IP为服务端IP和代理端IP
ServerActive=192.168.226.28,192.168.226.20
重启Agent端
[root@web1 ~]# systemctl restart zabbix-agent测试
回到server端的Web页面进行测试
在客户端有一个80端口的监控项,现在进行代理测试
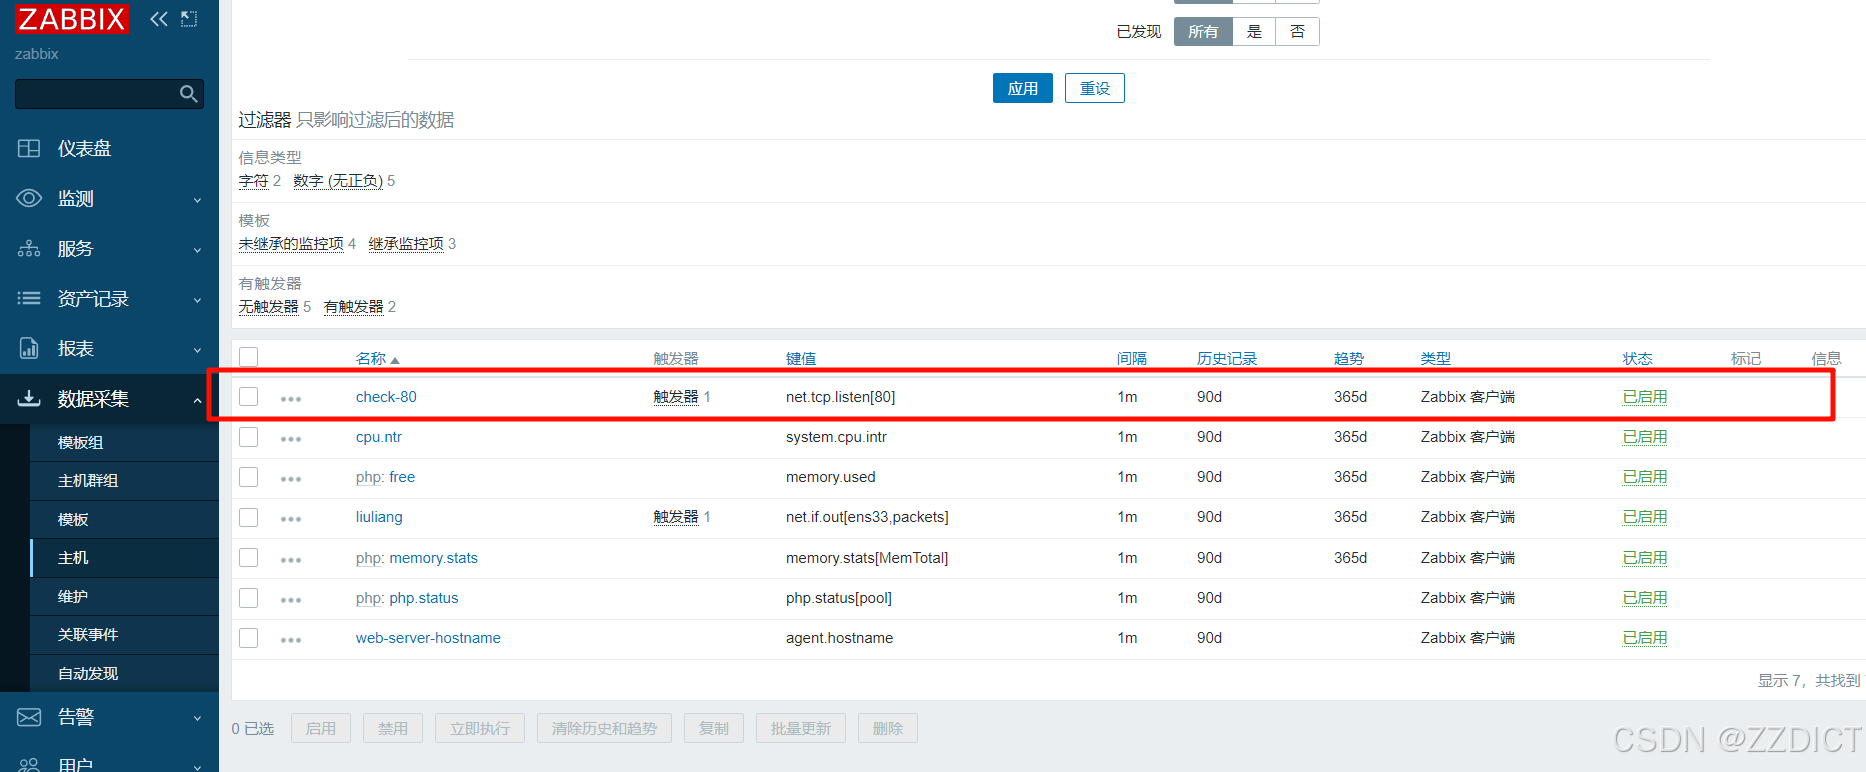
更改主机

设置由代理检测
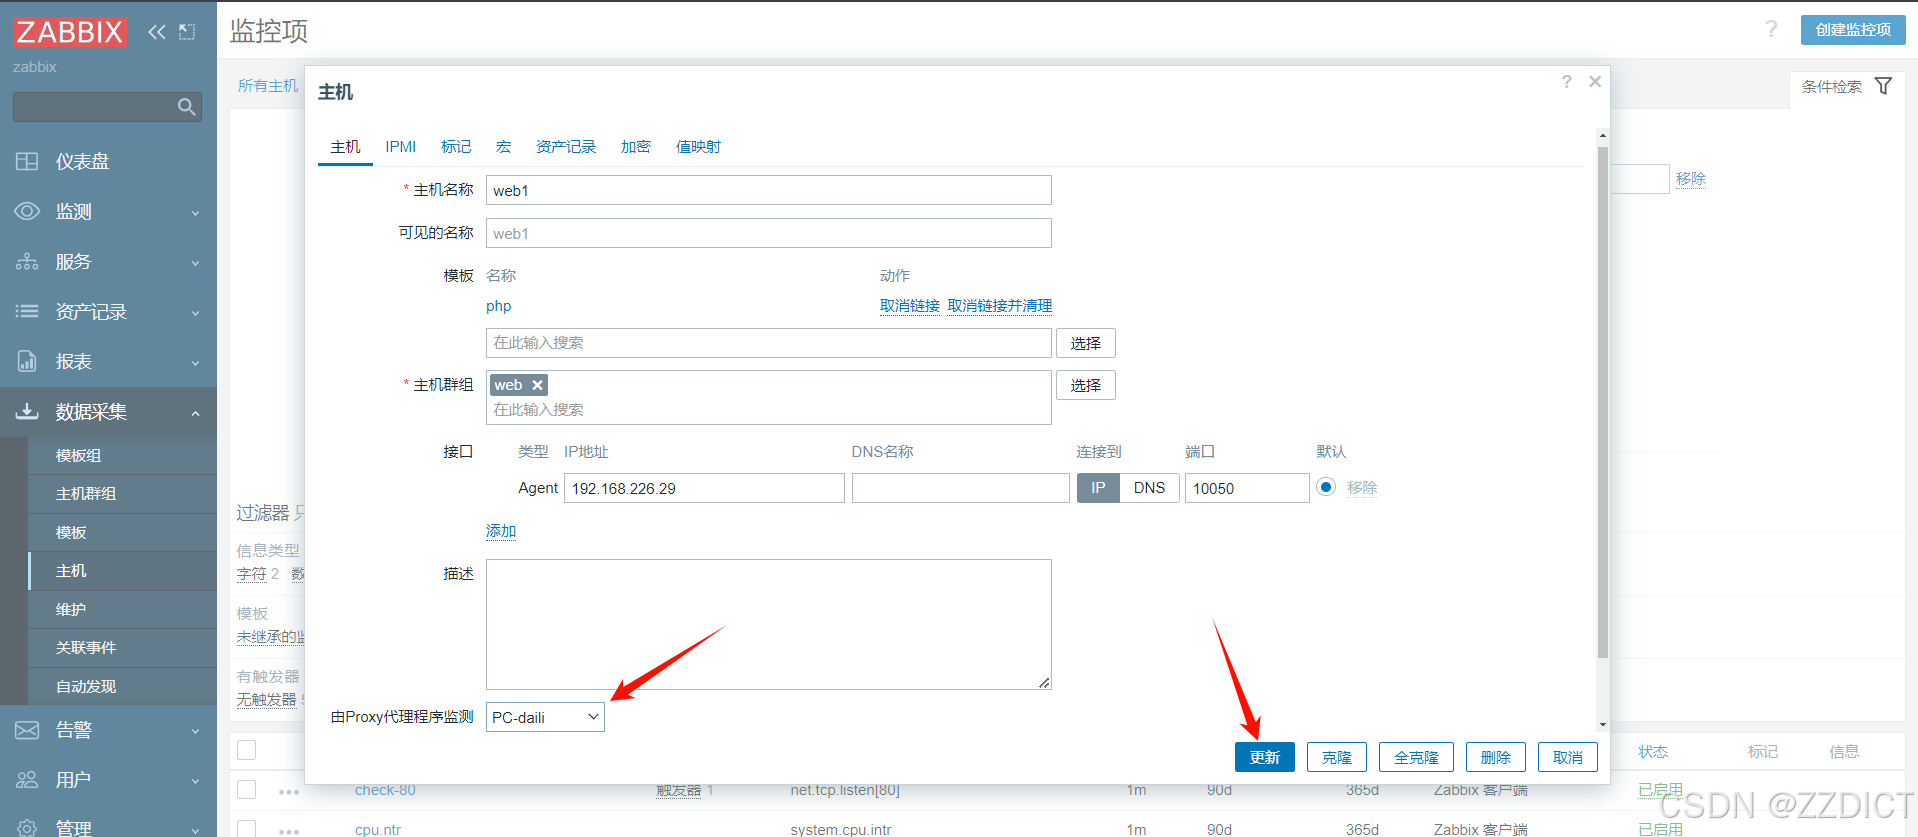
现在看80端口的监控状态,并停止nginx再次观察,启动后再次观察图形,稍微有些延迟,等待观察

本站资源均来自互联网,仅供研究学习,禁止违法使用和商用,产生法律纠纷本站概不负责!如果侵犯了您的权益请与我们联系!
转载请注明出处: 免费源码网-免费的源码资源网站 » Zabbix分布式监控

发表评论 取消回复