14.prism框架知识(1)
使用在多个平台的MVVM框架
新建WPF项目prismDemo
项目中:工具-NuGet包管理:安装Prism.DryIoc框架
在git中能看Prism的结构和源代码:git链接地址
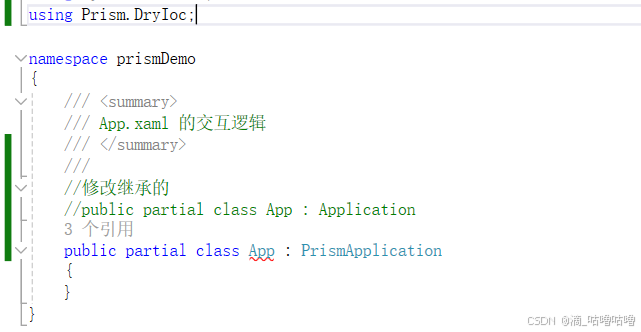
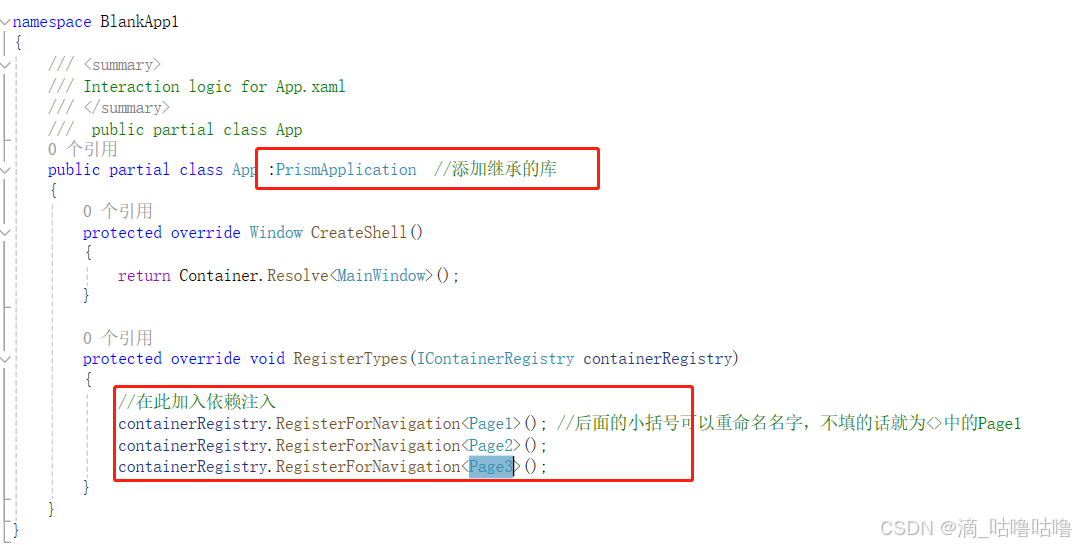
例如:Prism/src/Wpf/Prism.DryIoc.Wpf/PrismApplication.cs这个类,就是在我们自己的prismDemo项目中需要更改继承使用。
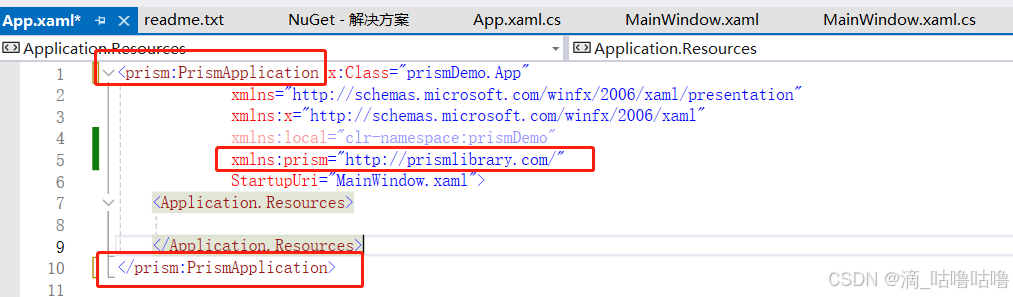
报错:加上(更改)以下三行,重新生成并实现抽象类,上图报错即解决。
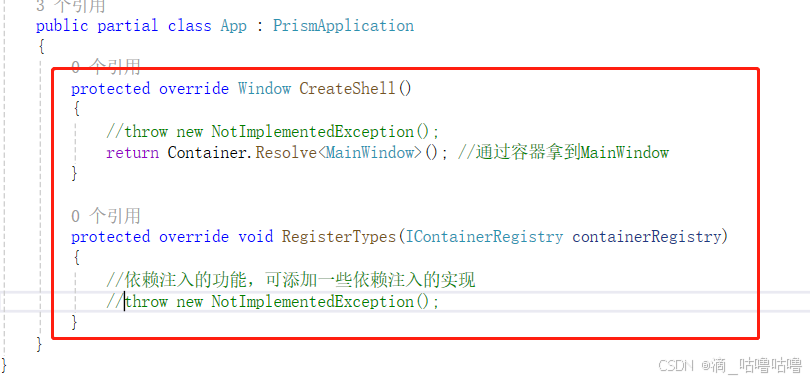
抽象类的实现:
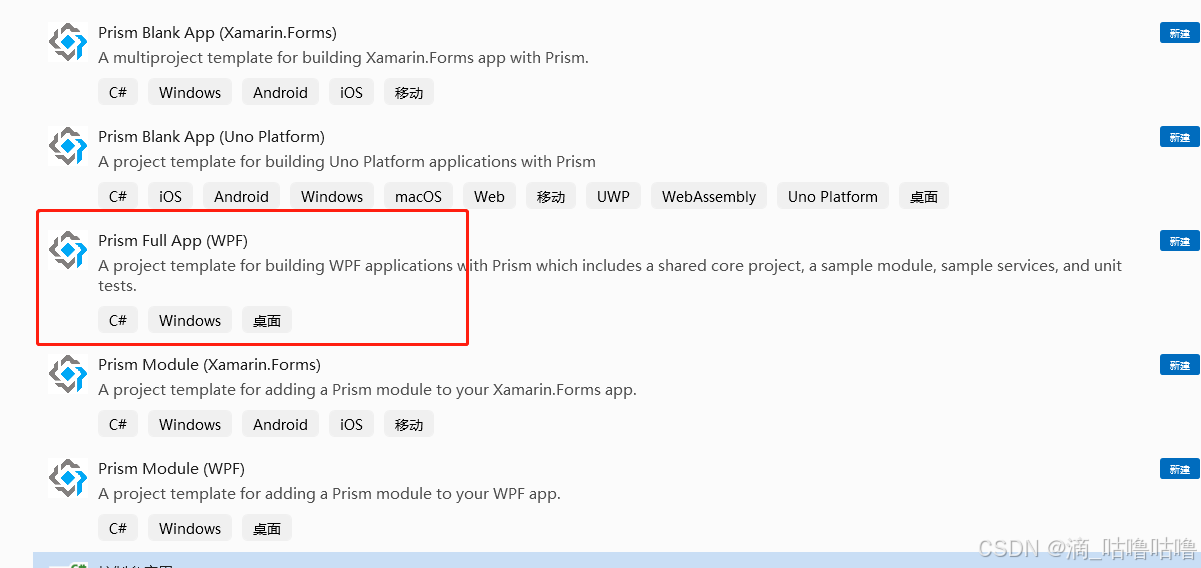
管理扩展:添加"Prism Template Pack",就不用每次新建项目都添加一次prism了
添加扩展之后重新打开VS,新建项目:
打开之后就包含有prism和一些项目文件结构:
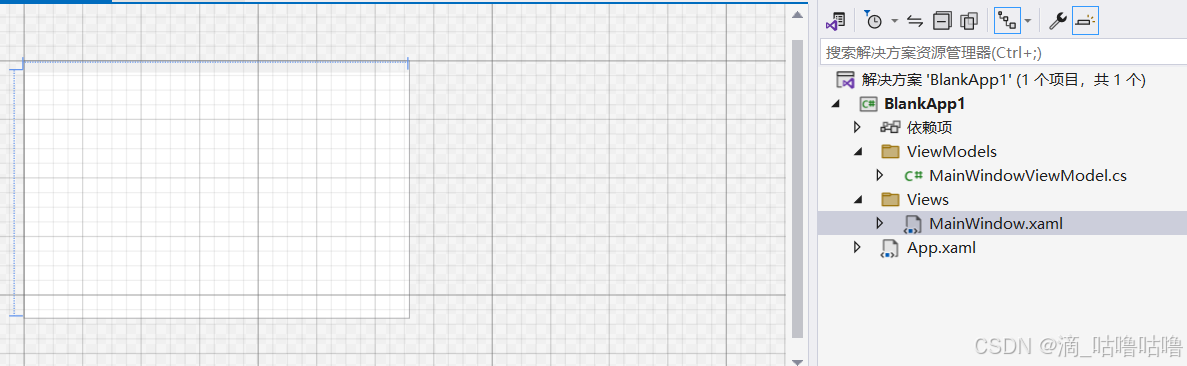
15.prism区域介绍(2)
主要内容:区域的概念和使用方法。
prism界面(.xaml文件中)中划分区域,可放入容器或者控件(动态的)
在.xaml中加入不同的子模块:(添加xsml子模块-主页面.png)
在views中新加三个用户控件:page1,page2,page3
现需要点击不同的按钮进入不同的页面:在ViewModels文件夹中修改MainWindowViewModel.cs文件:
public class MainWindowViewModel : BindableBase
{
    //执行不同的模块
    public DelegateCommand<string> OpenCommand { get; private set; }

    public MainWindowViewModel()
    {
        //执行不同的模块
        OpenCommand = new DelegateCommand<string>(Open);

    }

    private void Open(string obj)
    {
        switch (obj)
        {
            case "viewA": break;
            case "viewB": break;
            case "viewC": break;

        }
    }
}
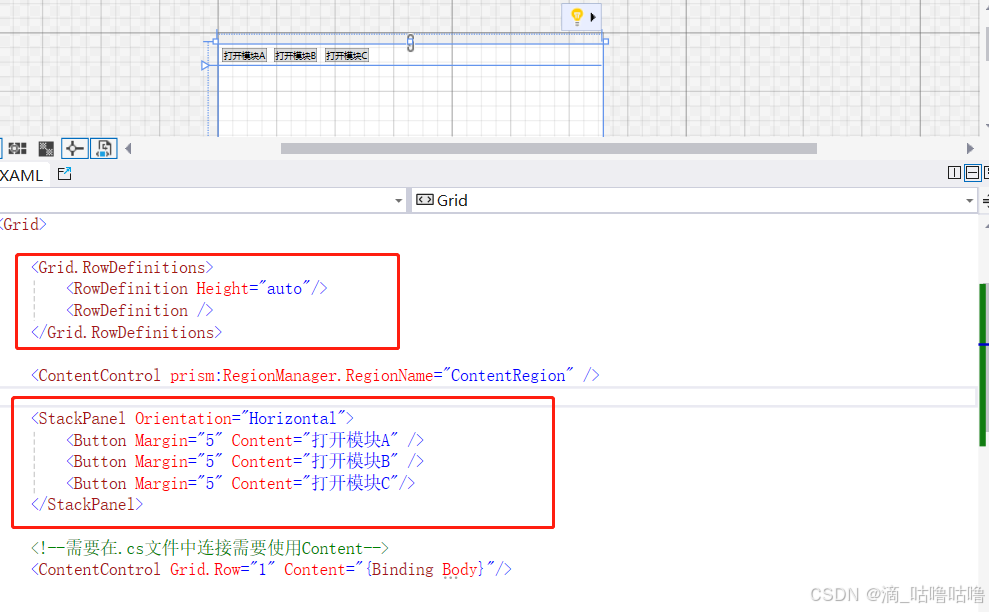
绑定:.xaml中加入Content参数,进行绑定,传递参数用:CommandParameter参数
 <StackPanel Orientation="Horizontal">
     <Button Margin="5" Content="打开模块A" Command="{Binding OpenCommand}" CommandParameter="viewA"/>
     <Button Margin="5" Content="打开模块B" Command="{Binding OpenCommand}" CommandParameter="viewB"/>
     <Button Margin="5" Content="打开模块C" Command="{Binding OpenCommand}" CommandParameter="viewC"/>
 </StackPanel>

 <!--需要在.cs文件中连接需要使用Content-->
 <ContentControl Grid.Row="1" Content="{Binding Body}"/>
连接的Body的使用方式:在MainWindowViewModel.cs文件中
//定义一个跟MainWindow.xaml中绑定对应的Body
private object body;
public object Body
{
    get { return body; }
    set { body = value; RaisePropertyChanged(); }
}
....
//使用:
private void Open(string obj)
{
    switch (obj)
    {
        case "viewA": Body = new Page1(); break;	//此处使用
        case "viewB": Body = new Page2();  break;	//此处使用
        case "viewC": Body = new Page3();  break;	//此处使用
    }
}
(以上使用到Prism框架的自动查找上下文功能(views – viewModels))功能完成。
发现问题:view页面和viewModel后端处理,耦合性较大。需要降低耦合性------解决方式:使用prism插件:

在MainWindow.xaml中,需要注意prism的扩展插件自动生成了以下代码,注意不要重复添加,会报错。
<ContentControl prism:RegionManager.RegionName="ContentRegion"/>
<!--ui界面第二行内容-->
<!--需要在.cs文件中连接需要使用Content-->
<!--<ContentControl Grid.Row="1" Content="{Binding Body}"/>-->

<!--更改:使用prism的方式,降低耦合性,使用ContentRegion进行识别-->
<ContentControl Grid.Row="1" prism:RegionManager.RegionName="ContentRegion"/>
MainWindowViewModel.cs文件中:
//执行不同的模块
public DelegateCommand<string> OpenCommand { get; private set; }
private readonly IRegionManager regionManager;
//以下:使用prism的方式进行
public MainWindowViewModel(IRegionManager regionManager)
{
//regionManager主要用于管理模块
OpenCommand = new DelegateCommand<string>(Open);
this.regionManager = regionManager;
}
private void Open(string obj)
{
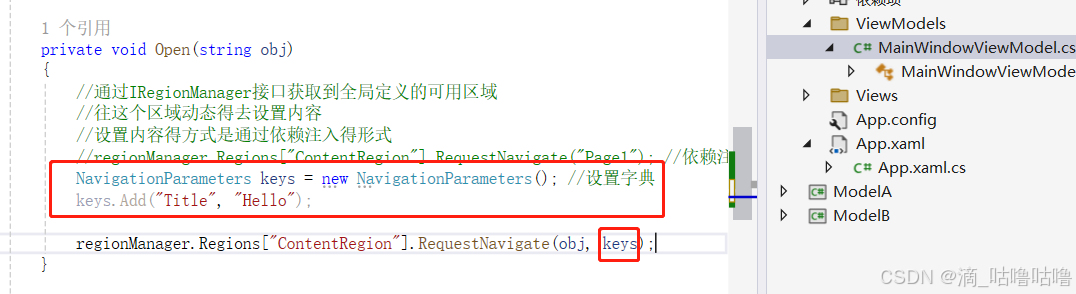
//regionManager.Regions["ContentRegion"].RequestNavigate("Page1"); //依赖注入的形式(在App中进行同步修改)识别Page1
regionManager.Regions["ContentRegion"].RequestNavigate(obj);
}
Open(string obj) 会根据button commmand的内容对应填入obj的值
<Button Margin="5" Content="打开模块A" Command="{Binding OpenCommand}" CommandParameter="Page1"/>
<Button Margin="5" Content="打开模块B" Command="{Binding OpenCommand}" CommandParameter="Page2"/>
<Button Margin="5" Content="打开模块C" Command="{Binding OpenCommand}" CommandParameter="Page3"/>
在App.xaml.cs中依赖注入使ViewA能被识别
以上就完成了,使用prism插件,使用依赖注入,完成点击按钮切换页面的功能。
总结:首先通过IRegionManager接口获取当全局定义的可用区域,然后往这个区域动态的设置内容,设置方式:依赖注入
16.prism模块化介绍(3)
项目开发时往往会分多个模块进行开发,多个文件夹,本质上也是一个类库。此处讲解如何添加程序集到主程序的容器中:
以新建项目类库为例:基于整个解决方案,新建两个WPF类库项目,分别命名为:ModelA,和ModelB。
在ModelA和ModelB中添加Views文件夹,在ModelA文件夹中添加用户控件ViewA,在ModelB文件夹中添加用户控件ViewB。
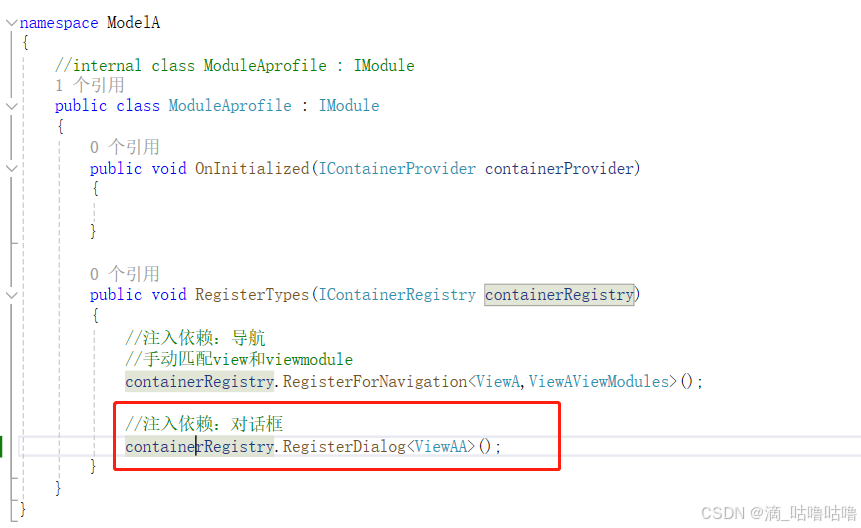
程序集被识别成模块的特征:新定义一个类ModuleAprofile.cs,项目中添加prism.dryIoc包之后,使ModuleAprofile继承自IModule,并实现对应的接口方法(函数内容可为空,但是必须实现)
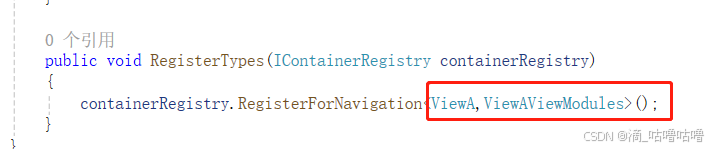
在上文此.cs文件中的RegisterTypes函数中加入其依赖注入:(ModelB中同样步骤进行添加)

public void RegisterTypes(IContainerRegistry containerRegistry)
{
    containerRegistry.RegisterForNavigation<ViewA>();
}
如何使之联系起来?:在主程序中加载ModuleA和ModuleB的方式有两种:一种是代码的方式,一种是配置文件的方式:
第一种:代码的方式
(此处需要注意使用插件创建的原始项目自动导入的是.net 6.0 而ModuleA和ModuleB导入的是8.0 需要版本变为一致,否则会报错。《项目->属性 中可修改版本》)
在主程序中加入项目引用,ModuleA和ModuleB
然后在App.xmls.cs中增加和修改:
protected override void RegisterTypes(IContainerRegistry containerRegistry)
{
    在此加入依赖注入
    //containerRegistry.RegisterForNavigation<Page1>(); //后面的小括号可以重命名名字,不填的话就为<>中的Page1
    //containerRegistry.RegisterForNavigation<Page2>();
    //containerRegistry.RegisterForNavigation<Page3>();
}

//主程序中导入ModuleA和ModuleB,方法一:代码的模式
protected override void ConfigureModuleCatalog(IModuleCatalog moduleCatalog)
{
    moduleCatalog.AddModule<ModuleAprofile>();
    moduleCatalog.AddModule<ModuleBprofile>();
    base.ConfigureModuleCatalog(moduleCatalog);
}
在主程序的页面MainWindow.xaml中:修改为对应的ViewA,ViewB
<StackPanel Orientation="Horizontal">
    <Button Margin="5" Content="打开模块A" Command="{Binding OpenCommand}" CommandParameter="ViewA"/>
    <Button Margin="5" Content="打开模块B" Command="{Binding OpenCommand}" CommandParameter="ViewB"/>
    <Button Margin="5" Content="打开模块C" Command="{Binding OpenCommand}" CommandParameter="Page3"/>
</StackPanel>
第二种:加载动态库dll的方式
在App.xmls.cs中增加和修改:
//第二种方式:加载动态库的方式CreateModuleCatalog
protected override IModuleCatalog CreateModuleCatalog()
{
    return new DirectoryModuleCatalog() { ModulePath = @".\Modules" };
}
把moduleA文件目录下bin下生成的ModelA.dll和对应的ModelB.dll放在主程序下的bin/debug目录下。
第三种:加载配置文件的方式
此不举例
17.prism导航功能(4)
之前的open有使用在区域之间进行模块的切换。此章详细讲解。
之前使用过的导航方式:
App.xaml:
 protected override void RegisterTypes(IContainerRegistry containerRegistry)
 {
     在此加入依赖注入
     containerRegistry.RegisterForNavigation<Page1>(); //后面的小括号可以重命名名字,不填的话就为<>中的Page1
     //containerRegistry.RegisterForNavigation<Page2>();
     //containerRegistry.RegisterForNavigation<Page3>();
 }
ModuleA和ModuleB项目分别添加ViewModels文件夹存放对应的ViewAViewModels.cs和ViewBViewModels.cs文件
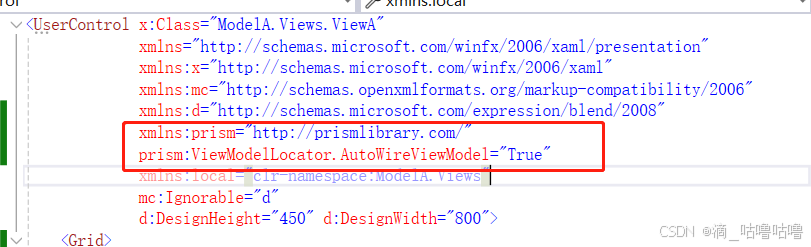
需要在对应的view.xaml文件中加入prism自动识别
也可以手动的绑定:ModuleAprofile.cs中(较为常用)
绑定之后,就可以在对应viewmodule中实现对应的业务代码

添加导航的参数:
在主程序的module中MainWindowViewModel.cs文件,加入导航的参数
在ModuleA模块中识别出来:
使ModuleA下的ModuleAViewModules.cs 使之继承自INavigationAware然后实现其对应的接口
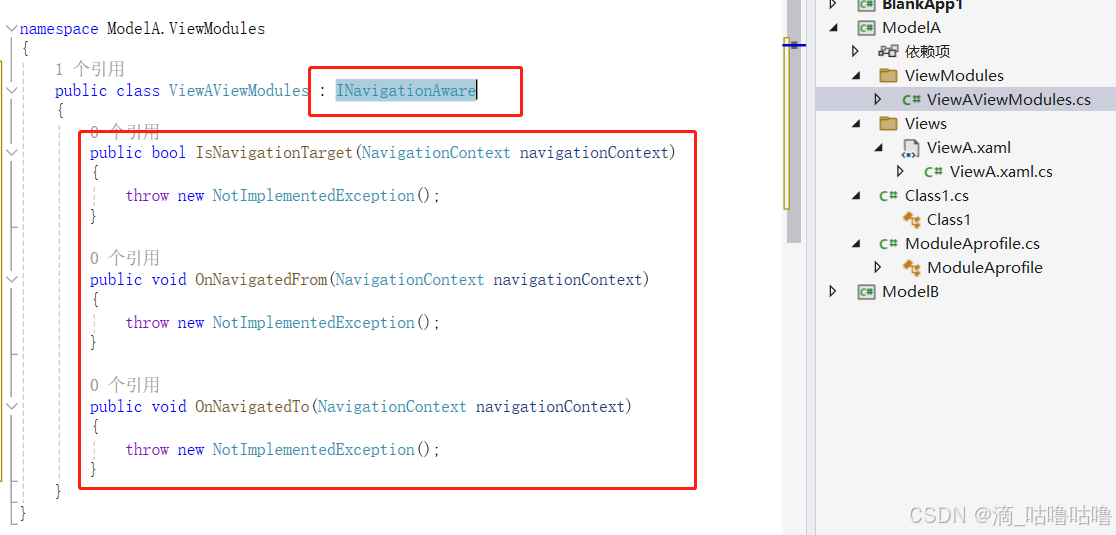
//添加数据有关的基类BindableBase
public class ViewAViewModules : BindableBase,INavigationAware
{
    private string title;
    public string Title{	//要注意这里不能使用默认的private  要改为public 否则回报错
        get { return title; }
        set { title = value; RaisePropertyChanged(); }
    }
        public bool IsNavigationTarget(NavigationContext navigationContext)
        {
            //每次重新导航的时候,是否重用原来的实例
            return false;		//这里使用true的话下次从ModelB切换到ModelA不会进行覆盖。
            //throw new NotImplementedException();
        }

        public void OnNavigatedFrom(NavigationContext navigationContext)
        {
            //throw new NotImplementedException();
            //拦截导航请求
        }
    public void OnNavigatedTo(NavigationContext navigationContext)
    {
        //throw new NotImplementedException();
        if(navigationContext.Parameters.ContainsKey("Title")) {
            //用来接收viewmodule传递的参数,传递什么类型就用什么类型接收
            Title = navigationContext.Parameters.GetValue<string>("Title");
        }
    }
}
使用OnNavigatedFrom进行导航拦截,在进行切换时会调用此函数
方式:之前ViewAViewModules继承自INavigationAware,可以改为IConfirmNavigationRequest,实现其接口ConfirmNavigationRequest,此接口主要用于验证是否允许切换
public void ConfirmNavigationRequest(NavigationContext navigationContext, Action<bool> continuationCallback)
{
    //验证是否允许切换
    //throw new NotImplementedException();
    bool result = true;
    if(MessageBox.Show("确认导航?","提示",MessageBoxButton.YesNo)==MessageBoxResult.No)
    {
        //如果是no 那么
        result = false;
    }
    continuationCallback(result);   //通过这个委托把这个结果(是否拦截导航)传进去
}
类似的导航功能还有:返回上一步:导航日志(此处省略)
18.prism对话服务(5)
也就是弹窗的功能。
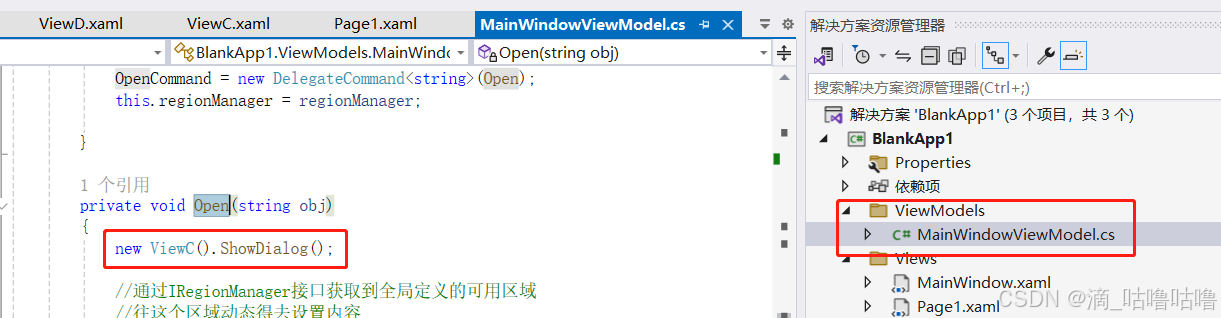
在祝程序的MainWindow.xaml中,添加两个按钮进行弹窗触发。在主程序中添加窗口ViewAA.cs(以下图片上的ViewC都为ViewAA),在open函数中new此类,点击时则会有窗口出现。
但是特定的页面依赖于特定的实现,耦合度太高,这个问题如何去解决?-------依赖注入的方式(同上band).
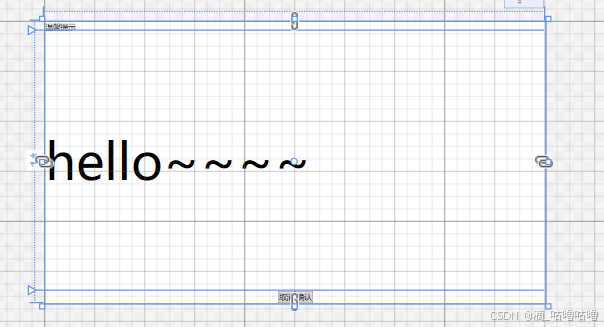
将之前在主项目文件中创建的窗口ViewC.cs删掉,在ModuleA中新建一个用户控件ViewAA.cs,自定义控件的分布,提示和其他按钮。
<Grid>
    <Grid.RowDefinitions>
        <RowDefinition Height="auto" />
        <RowDefinition/>
        <RowDefinition Height="auto" />
    </Grid.RowDefinitions>

    <TextBlock Text="温馨提示" />
    <TextBlock Grid.Row="1" Text="hello~~~~" FontSize="80"  VerticalAlignment="Center"/>
    <StackPanel Orientation="Horizontal" Grid.Row="2"><!--水平排列-->
        <Button Content="取消" />
        <Button Content="确认" />
    </StackPanel>
</Grid>
然后注入依赖:之前注入导航是:RegisterForNavigation 现在注入对话框是:RegisterDialog
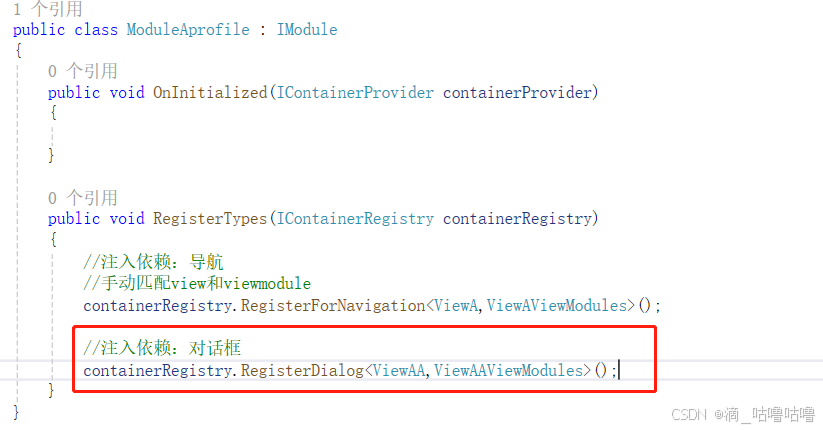
加入ViewAA对应的ViewAAViewModules:继承自IDialogAware,然后点击实现对应接口。
public class ViewAAViewModules : IDialogAware
{
    //对话框
    //public string Title => throw new NotImplementedException();//修改,不抛异常
    public string Title {  get; set; }

    public event Action<IDialogResult> RequestClose;

    public bool CanCloseDialog()
    {
        //允许被关闭
        return true;
        //throw new NotImplementedException();
    }

    public void OnDialogClosed()
    {
        //关闭窗口
        DialogParameters keys = new DialogParameters();
        keys.Add("Value", "viewAA:Dialog");
        RequestClose?.Invoke(new DialogResult(ButtonResult.OK, keys));
        //throw new NotImplementedException();
    }

    public void OnDialogOpened(IDialogParameters parameters)
    {
        //接收弹窗中的参数
        //throw new NotImplementedException();
    }
}
然后在ModuleAprofile.cs注册依赖的地方,将viewAA和viewAAviewmodules进行绑定
对话框传递参数:主项目中MainWindowViewModel.cs中写入需要传递的参数。
//对话框
private readonly IDialogService dialogService;
public MainWindowViewModel(IDialogService dialogService)
{
//regionManager主要用于管理模块
OpenCommand = new DelegateCommand<string>(Open);
this.dialogService = dialogService;
}
private void Open(string obj)
{
DialogParameters keys = new DialogParameters();
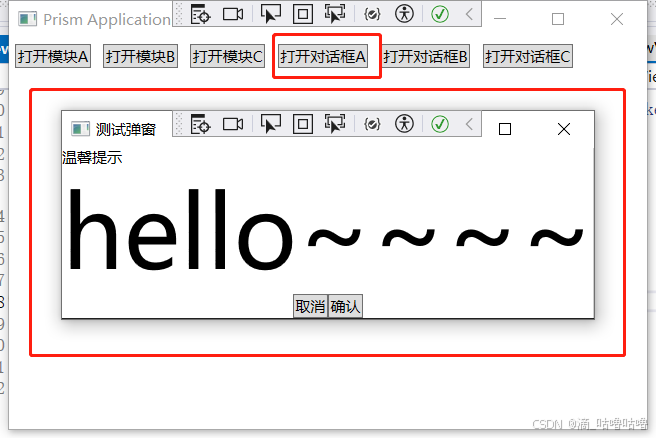
keys.Add("Title", "测试弹窗"); //传递参数
dialogService.ShowDialog(obj,keys,callback =>
{
//回调方法
});
}
ViewAAViewModules中接收参数的函数OnDialogOpened修改:
public void OnDialogOpened(IDialogParameters parameters)
{
    //接收弹窗中的参数
    //throw new NotImplementedException();
    Title=parameters.GetValue<string>("Title");
}
点击【打开对话框A】,则显示“测试弹窗”-弹窗
现在把【确认/取消按钮加入对应的功能】:
ViewAAViewModules.cs写构造函数
public DelegateCommand CancelCommand { get; set; } //取消
public DelegateCommand SaveCommand { get; set; } //保存
public ViewAAViewModules() {
CancelCommand = new DelegateCommand(Cancel);
SaveCommand = new DelegateCommand(Save);
}
private void Save()
{
//新生成方法-保存
OnDialogClosed();
}
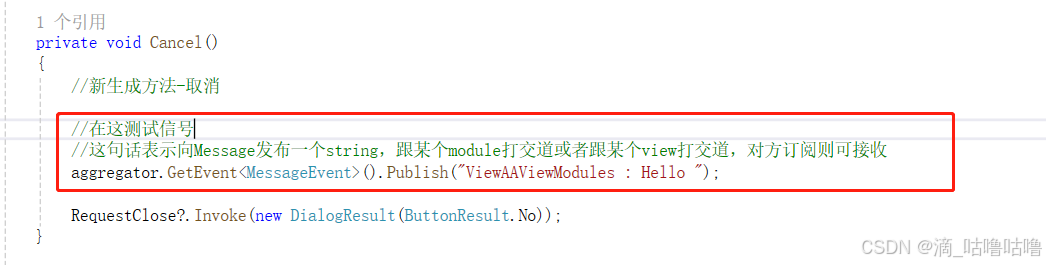
private void Cancel()
{
//新生成方法-取消
RequestClose?.Invoke(new DialogResult(ButtonResult.No));
}
ViewAA给按钮中绑定command
 <Button Content="取消"  Command="{Binding CancelCommand}"/>
 <Button Content="确认"  Command="{Binding SaveCommand}" />
在之前MainWindowViewModel的回调函数中进行判断
 private void Open(string obj)
 {
     DialogParameters keys = new DialogParameters();
     keys.Add("Title", "测试弹窗");
     dialogService.ShowDialog(obj,keys,callback =>
     {
         //回调方法,点击之后获取点击的结果
         if (callback.Result == ButtonResult.OK) {
             //如果点击了ok那么获取传递的值
             string result = callback.Parameters.GetValue<string>("Value");
         }
     });
 }
实现点击确定按钮(OK)进行数据传递,点击取消按钮(NO)不做操作
好处:实现业务代码的简化,耦合性降低
19.prism发布订阅(6)
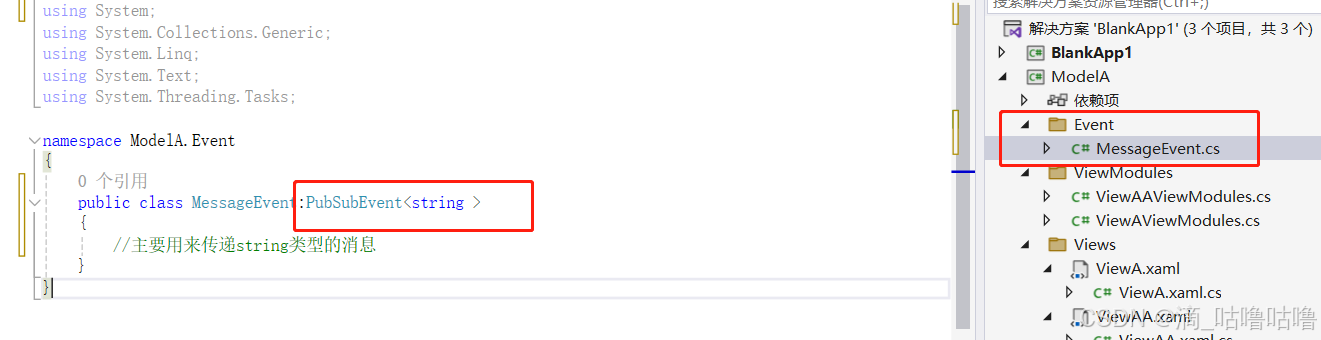
创建Event文件夹,创建一个新的类:MessageEvent.cs文件,消息模型。
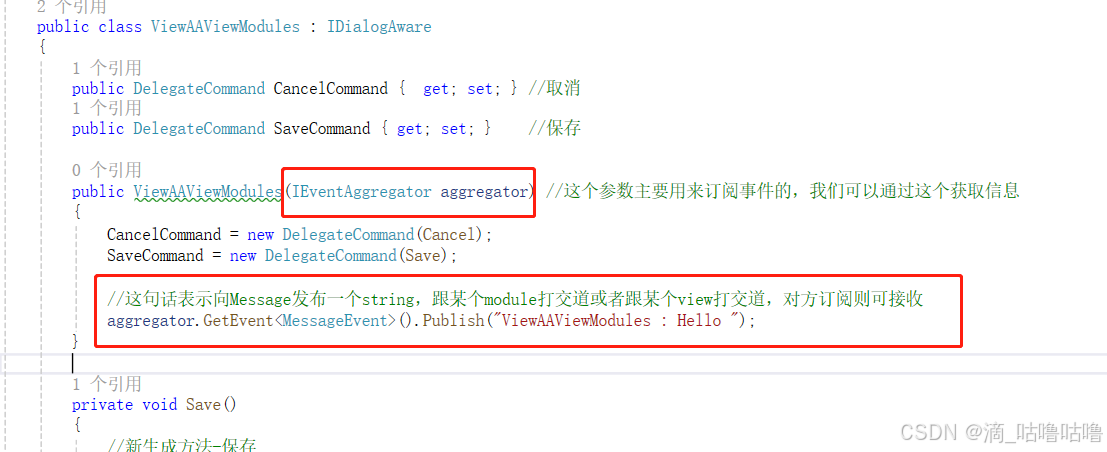
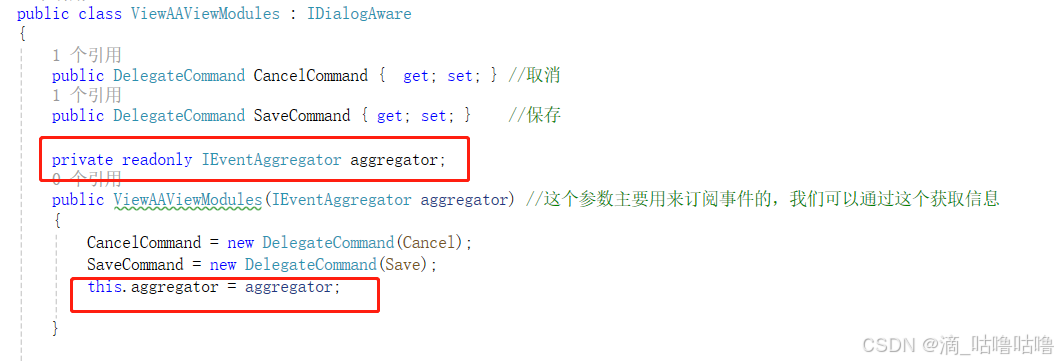
使用:ViewAAViewModules.cs构造函数注入
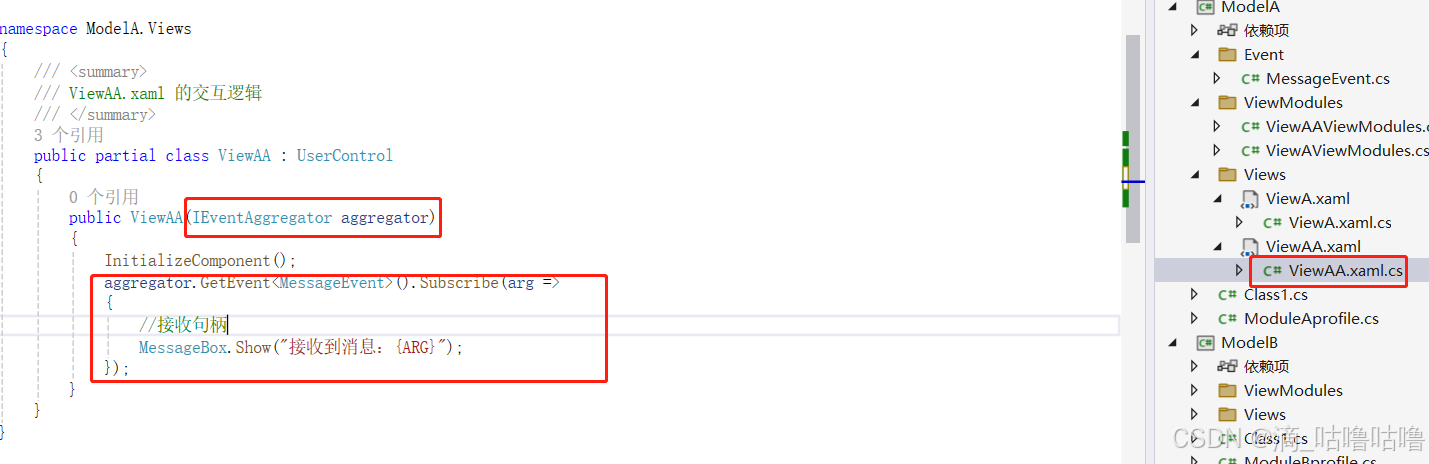
例如,在ViewAA.xaml中,进行订阅:
进行测试:
修改ViewAAViewModules.cs
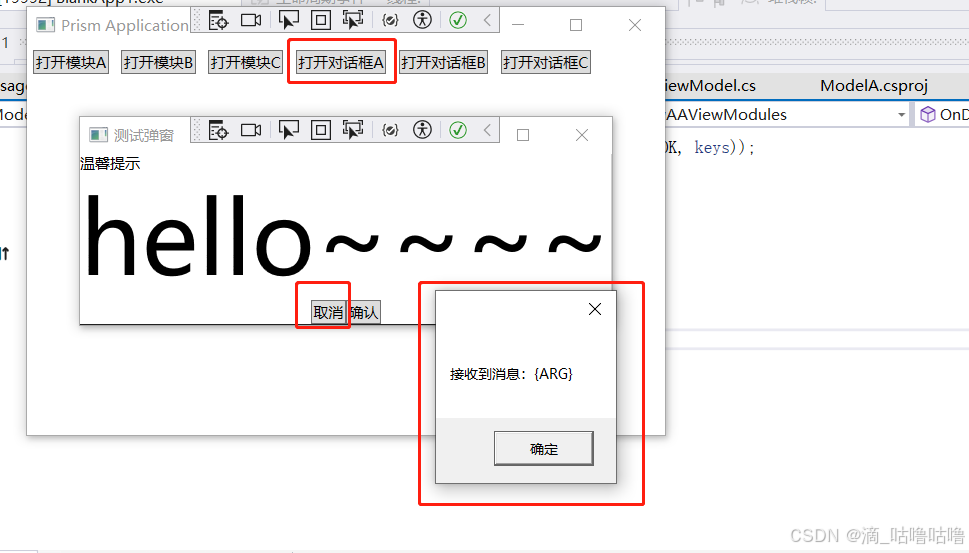
测试:ViewAAViewModules.cs点击取消按钮发布信号
实现效果:点击打开对话框A–》弹出测试弹窗 --》点击测试弹窗取消–》
弹出接收消息弹窗
取消订阅功能实现:点击取消,接收到消息之后取消该消息的订阅,则第二次点击取消按钮不会再弹窗。ViewAA.xaml.cs文件
扩展:也可以写复杂类型的对象:

namespace ModelA.Event
{
    public class MessageEvent:PubSubEvent<string >
    {
        //主要用来传递string类型的消息
    }

    public class TestEvent : PubSubEvent<Test>
    {

    }

    public class Test
    {
        public string Id {  get; set; }
        public string Name { get; set; }
    }
}
本站资源均来自互联网,仅供研究学习,禁止违法使用和商用,产生法律纠纷本站概不负责!如果侵犯了您的权益请与我们联系!
转载请注明出处: 免费源码网-免费的源码资源网站 » WPF项目实战视频《二》(主要为prism框架)

发表评论 取消回复