您的第一个 C++ MoveIt 项目
本教程将指导你编写第一个使用 MoveIt 的 C++ 应用程序。
警告:由于需要额外的参数才能实现完整的 Move Group 功能,MoveIt 中的大多数功能将无法正常工作。要进行完整设置,请继续学习 Move Group C++ 接口教程。
先决条件
如果您还没有这样做,请确保您已完成入门中的步骤。
本教程假设您了解 ROS 2 的基础知识。为了为此做好准备,请完成官方 ROS 2 教程,直到“编写一个简单的发布者和订阅者(C++)”。
步骤
1 创建一个包
打开终端并设置你的 ROS 2 安装,以便 ros2 命令可以工作。
导航到你在“入门”教程中创建的 ws_moveit 目录。
进入 src 目录,因为我们将源代码放在那里。
使用 ROS 2 命令行工具创建一个新包:
ros2 pkg create \
--build-type ament_cmake \
 --dependencies moveit_ros_planning_interface rclcpp \
 --node-name hello_moveit hello_moveit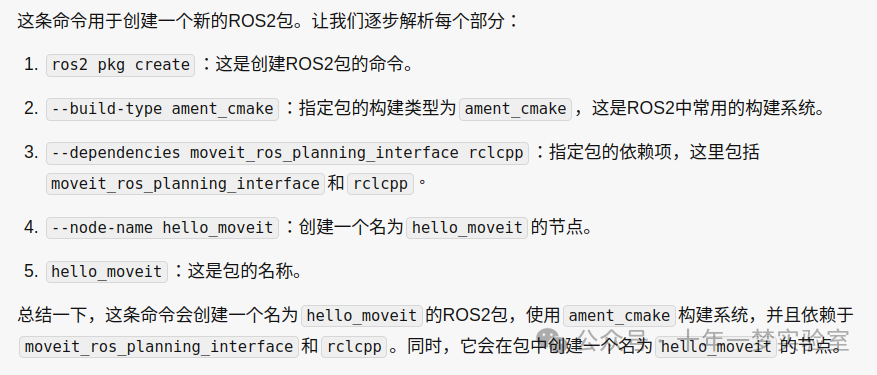
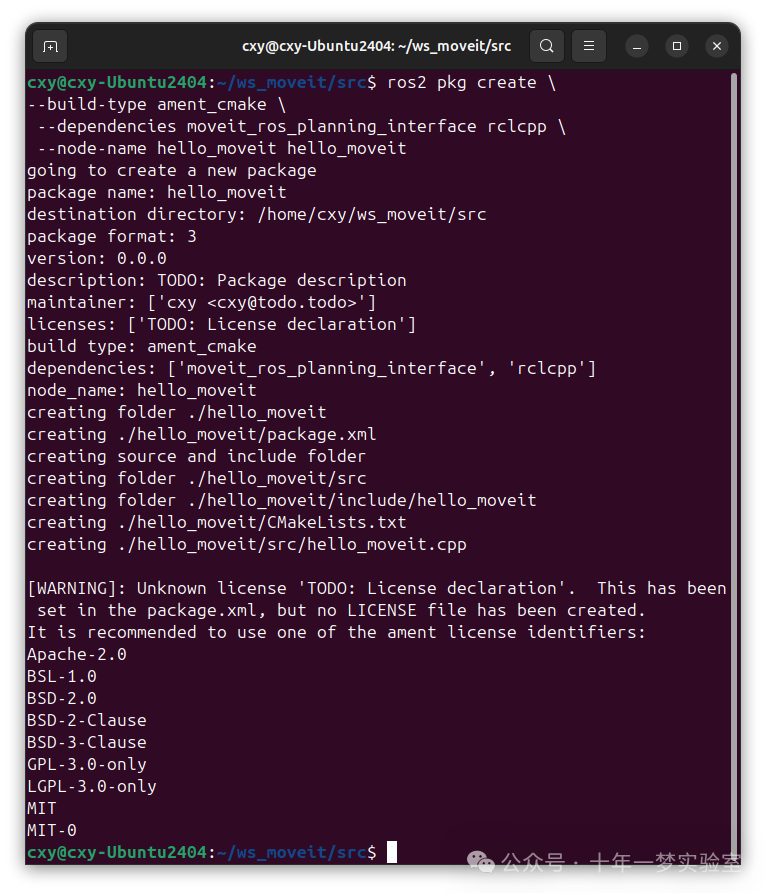
此输出将显示它在新目录中创建了一些文件。
请注意,我们添加了 moveit_ros_planning_interface 和 rclcpp 作为依赖项。这将在 package.xml 和 CMakeLists.txt 文件中创建必要的更改,以便我们可以依赖这两个包。
在您喜欢的编辑器中打开为您在 ws_moveit/src/hello_moveit/src/hello_moveit.cpp 创建的新源文件。
2 创建一个 ROS 节点和执行器
这第一段代码有点样板,但你应该已经习惯在 ROS 2 教程中看到这个。
#include <memory>


#include <rclcpp/rclcpp.hpp>
#include <moveit/move_group_interface/move_group_interface.h>


int main(int argc, char * argv[])
{
  // 初始化 ROS 并创建节点
  rclcpp::init(argc, argv);
  auto const node = std::make_shared<rclcpp::Node>(
    "hello_moveit",
    rclcpp::NodeOptions().automatically_declare_parameters_from_overrides(true)
  );


  // 创建 ROS 日志记录器
  auto const logger = rclcpp::get_logger("hello_moveit");


  // 下一步代码在这里


  // 关闭 ROS
  rclcpp::shutdown();
  return 0;
}
2.1 构建和运行
我们将在继续之前构建并运行程序以确保一切正常。
将目录更改回工作区目录 ws_moveit 并运行此命令:
colcon build --mixin debugcxy@cxy-Ubuntu2404:~/ws_moveit$ colcon build --packages-select hello_moveit --mixin debug
Starting >>> hello_moveit
[Processing: hello_moveit]
Finished <<< hello_moveit [41.3s]
Summary: 1 package finished [46.0s]成功后,打开一个新的终端,然后在该新的终端中 source 工作区环境脚本,以便我们可以运行我们的程序。
cd ~/ws_moveit
source install/setup.bash
运行你的程序并查看输出。
ros2 run hello_moveit hello_moveit程序应运行并退出而不会出错。
2.2 检查代码
顶部包含的头文件只是一些标准的 C++头文件,以及我们稍后将使用的 ROS 和 MoveIt 的头文件。
之后,我们有正常的调用来初始化 rclcpp,然后我们创建我们的节点。
auto const node = std::make_shared<rclcpp::Node>(
  "hello_moveit",
  rclcpp::NodeOptions().automatically_declare_parameters_from_overrides(true)
);
第一个参数是 ROS 将用于命名唯一节点的字符串。第二个参数是 MoveIt 所需的,因为我们使用 ROS 参数。
接下来,我们创建一个名为“hello_moveit”的日志记录器,以保持我们的日志输出有序且可配置。
// Create a ROS logger
auto const logger = rclcpp::get_logger("hello_moveit");
最后,我们有关闭 ROS 的代码。
// Shutdown ROS
rclcpp::shutdown();
return 0;
3 使用 MoveGroupInterface 进行规划和执行
在注释“Next step goes here”处,添加以下代码:
// 创建 MoveIt MoveGroup 接口
using moveit::planning_interface::MoveGroupInterface;
auto move_group_interface = MoveGroupInterface(node, "manipulator");


// 设置目标姿态
auto const target_pose = []{
  geometry_msgs::msg::Pose msg;
  msg.orientation.w = 1.0;
  msg.position.x = 0.28;
  msg.position.y = -0.2;
  msg.position.z = 0.5;
  return msg;
}();
move_group_interface.setPoseTarget(target_pose);


// 创建到目标姿态的规划
auto const [success, plan] = [&move_group_interface]{
  moveit::planning_interface::MoveGroupInterface::Plan msg;
  auto const ok = static_cast<bool>(move_group_interface.plan(msg));
  return std::make_pair(ok, msg);
}();


// 执行规划
if(success) {
  move_group_interface.execute(plan);
} else {
  RCLCPP_ERROR(logger, "Planning failed!");
}
3.1 构建和运行
就像以前一样,我们需要先构建代码,然后才能运行它。
在工作区目录 ws_moveit 中运行此命令:
colcon build --mixin debugcxy@cxy-Ubuntu2404:~/ws_moveit$ colcon build --packages-select hello_moveit --mixin debug
Starting >>> hello_moveit
Finished <<< hello_moveit [9.98s]
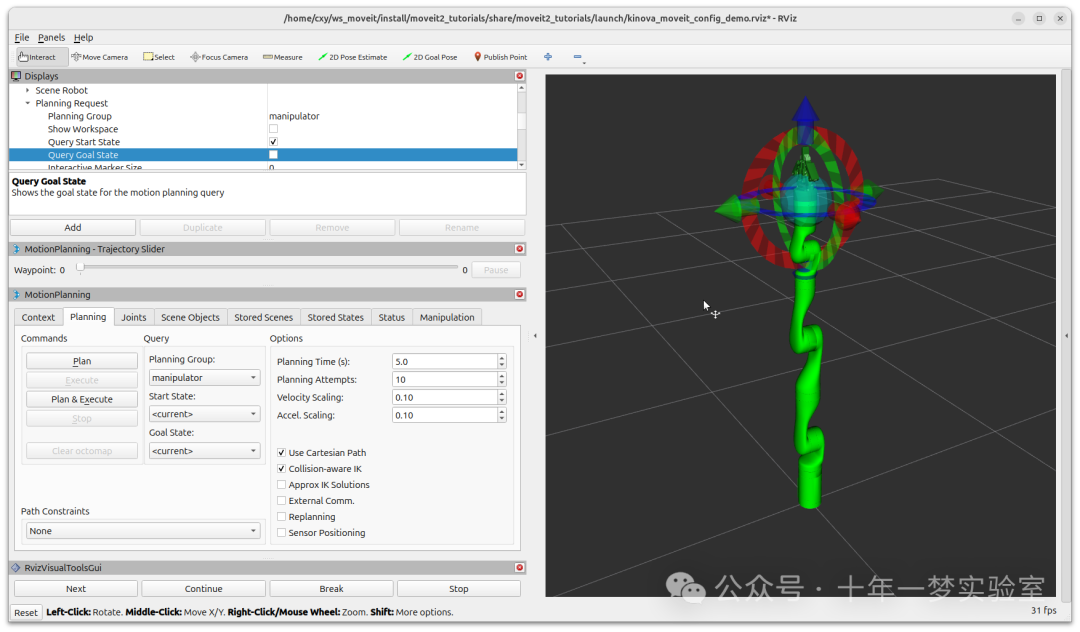
Summary: 1 package finished [10.3s]成功后,我们需要重用上一个教程中的 demo 启动文件来启动 RViz 和 MoveGroup 节点。在一个单独的终端中,设置工作区,然后执行:
ros2 launch moveit2_tutorials demo.launch.py然后在 Displays 窗口下的 MotionPlanning/Planning Request 中,取消选中 Query Goal State 框。
在第三个终端中,配置工作区并运行您的程序。
ros2 run hello_moveit hello_moveit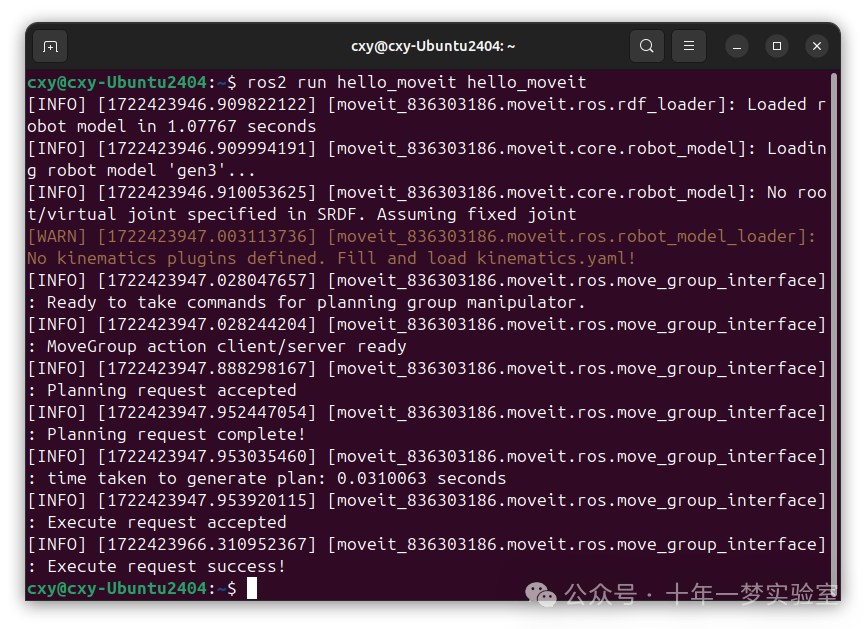
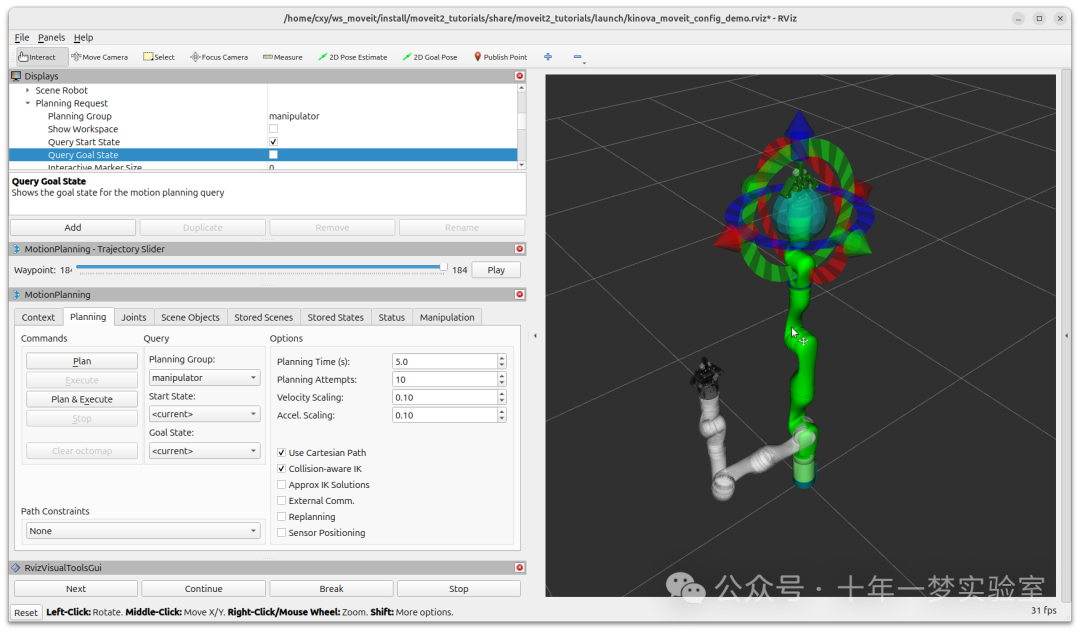
这应该会导致 RViz 中的机器人移动并最终处于这个姿势:请注意,如果你在未先启动 demo 启动文件的情况下运行节点 hello_moveit,它将等待 10 秒钟,然后打印此错误并退出。
[ERROR] [1644181704.350825487] [hello_moveit]: Could not find parameter robot_description and did not receive robot_description via std_msgs::msg::String subscription within 10.000000 seconds.3.2 检查代码
我们首先要做的是创建 MoveGroupInterface 。这个对象将用于与 move_group 交互,这使我们能够规划和执行轨迹。请注意,这是我们在此程序中创建的唯一可变对象。另一个需要注意的是我们在这里创建的 MoveGroupInterface 对象的第二个参数: "manipulator" 。这是在机器人描述中定义的我们将使用此 MoveGroupInterface 操作的关节组。
using moveit::planning_interface::MoveGroupInterface;
auto move_group_interface = MoveGroupInterface(node, "manipulator");然后,我们设置目标位姿并规划。请注意,仅设置目标姿势(通过 setPoseTarget )。起始姿势隐含为关节状态发布器发布的位置,可以使用 MoveGroupInterface::setStartState* 系列函数进行更改(但在本教程中未进行更改)。
关于下一部分代码的另一件事是使用 lambda 构造消息类型 target_pose 和规划。这是你会在现代 C++ 代码库中找到的一种模式,允许以更声明的方式编写代码。有关此模式的更多信息,请参阅本教程末尾的几个链接。
// 设置目标姿态
auto const target_pose = []{
  geometry_msgs::msg::Pose msg;
  msg.orientation.w = 1.0;
  msg.position.x = 0.28;
  msg.position.y = -0.2;
  msg.position.z = 0.5;
  return msg;
}();
move_group_interface.setPoseTarget(target_pose);


// 创建到目标位姿的规划
auto const [success, plan] = [&move_group_interface]{
  moveit::planning_interface::MoveGroupInterface::Plan msg;
  auto const ok = static_cast<bool>(move_group_interface.plan(msg));
  return std::make_pair(ok, msg);
}();
最后,如果规划成功,我们执行规划,否则记录错误:
// 执行规划
if(success) {
  move_group_interface.execute(plan);
} else {
  RCLCPP_ERROR(logger, "Planning failed!");
}
总结
您创建了一个 ROS 2 包,并使用 MoveIt 编写了您的第一个程序。
你学习了如何使用 MoveGroupInterface 进行规划和执行移动。
以下是本教程末尾的完整 hello_moveit.cpp 源代码副本。https://github.com/ros-planning/moveit2_tutorials/blob/main/doc/tutorials/your_first_project/kinova_hello_moveit.cpp
进一步阅读
我们使用 lambda 来初始化对象为常量。这被称为 IIFE 技术。阅读更多关于此模式的信息,请参阅 C++ Stories。https://www.cppstories.com/2016/11/iife-for-complex-initialization/
我们还将所有可能的内容声明为 const。阅读更多关于 const 的有用性,请参阅这里。https://www.cppstories.com/2016/12/please-declare-your-variables-as-const/
Next Step
在下一个教程《在 RViz 中可视化》中https://moveit.picknik.ai/main/doc/tutorials/visualizing_in_rviz/visualizing_in_rviz.html ,您将扩展您在此处构建的程序,以创建visual markers视觉标记,使理解 MoveIt 的工作变得更容易。
附录:完整代码
#include <memory> // 引入内存管理库


#include <rclcpp/rclcpp.hpp> // 引入ROS2核心库
#include <moveit/move_group_interface/move_group_interface.h> // 引入MoveIt!库


int main(int argc, char * argv[])
{
  // 初始化ROS并创建节点
  rclcpp::init(argc, argv);
  auto const node = std::make_shared<rclcpp::Node>(
    "hello_moveit", // 节点名称
    rclcpp::NodeOptions().automatically_declare_parameters_from_overrides(true) // 自动声明参数
  );


  // 创建一个ROS日志记录器
  auto const logger = rclcpp::get_logger("hello_moveit");


  // 创建MoveIt!的MoveGroup接口
  using moveit::planning_interface::MoveGroupInterface;
  auto move_group_interface = MoveGroupInterface(node, "manipulator"); // 使用“manipulator”组


  // 设置目标位姿
  auto const target_pose = []{
    geometry_msgs::msg::Pose msg;
    msg.orientation.w = 1.0; // 设置四元数的w分量
    msg.position.x = 0.28; // 设置x坐标
    msg.position.y = -0.2; // 设置y坐标
    msg.position.z = 0.5; // 设置z坐标
    return msg;
  }();
  move_group_interface.setPoseTarget(target_pose); // 设置目标位姿


  // 创建到目标位姿的规划
  auto const [success, plan] = [&move_group_interface]{
    moveit::planning_interface::MoveGroupInterface::Plan msg;
    auto const ok = static_cast<bool>(move_group_interface.plan(msg)); // 规划路径
    return std::make_pair(ok, msg); // 返回规划结果和规划信息
  }();


  // 执行规划
  if(success) {
    move_group_interface.execute(plan); // 执行规划
  } else {
    RCLCPP_ERROR(logger, "Planning failed!"); // 规划失败,记录错误
  }


  // 关闭ROS
  rclcpp::shutdown();
  return 0;
}
本站资源均来自互联网,仅供研究学习,禁止违法使用和商用,产生法律纠纷本站概不负责!如果侵犯了您的权益请与我们联系!
转载请注明出处: 免费源码网-免费的源码资源网站 » 【MoveIt 2】您的第一个 C++ MoveIt 项目

发表评论 取消回复