学习视频(强推):【MyBatis视频零基础入门到进阶,MyBatis全套视频教程源码级深入详解】 https://www.bilibili.com/video/BV1JP4y1Z73S/?p=134&share_source=copy_web&vd_source=4d877b7310d01a59f27364f1080e3382
MyBatis中文参考网:https://mybatis.net.cn/index.html
一、MyBatis概述
1.1 框架
- 在文献中看到的framework被翻译为框架
- Java常用框架:
- SSM三大框架:Spring + SpringMVC + MyBatis
- SpringBoot
- SpringCloud
- 等。。
- 框架其实就是对通用代码的封装,提前写好了一堆接口和类,我们可以在做项目的时候直接引入这些接口和类(引入框架),基于这些现有的接口和类进行开发,可以大大提高开发效率。
- 框架一般都以jar包的形式存在。(jar包中有class文件以及各种配置文件等。)
1.2 三层架构
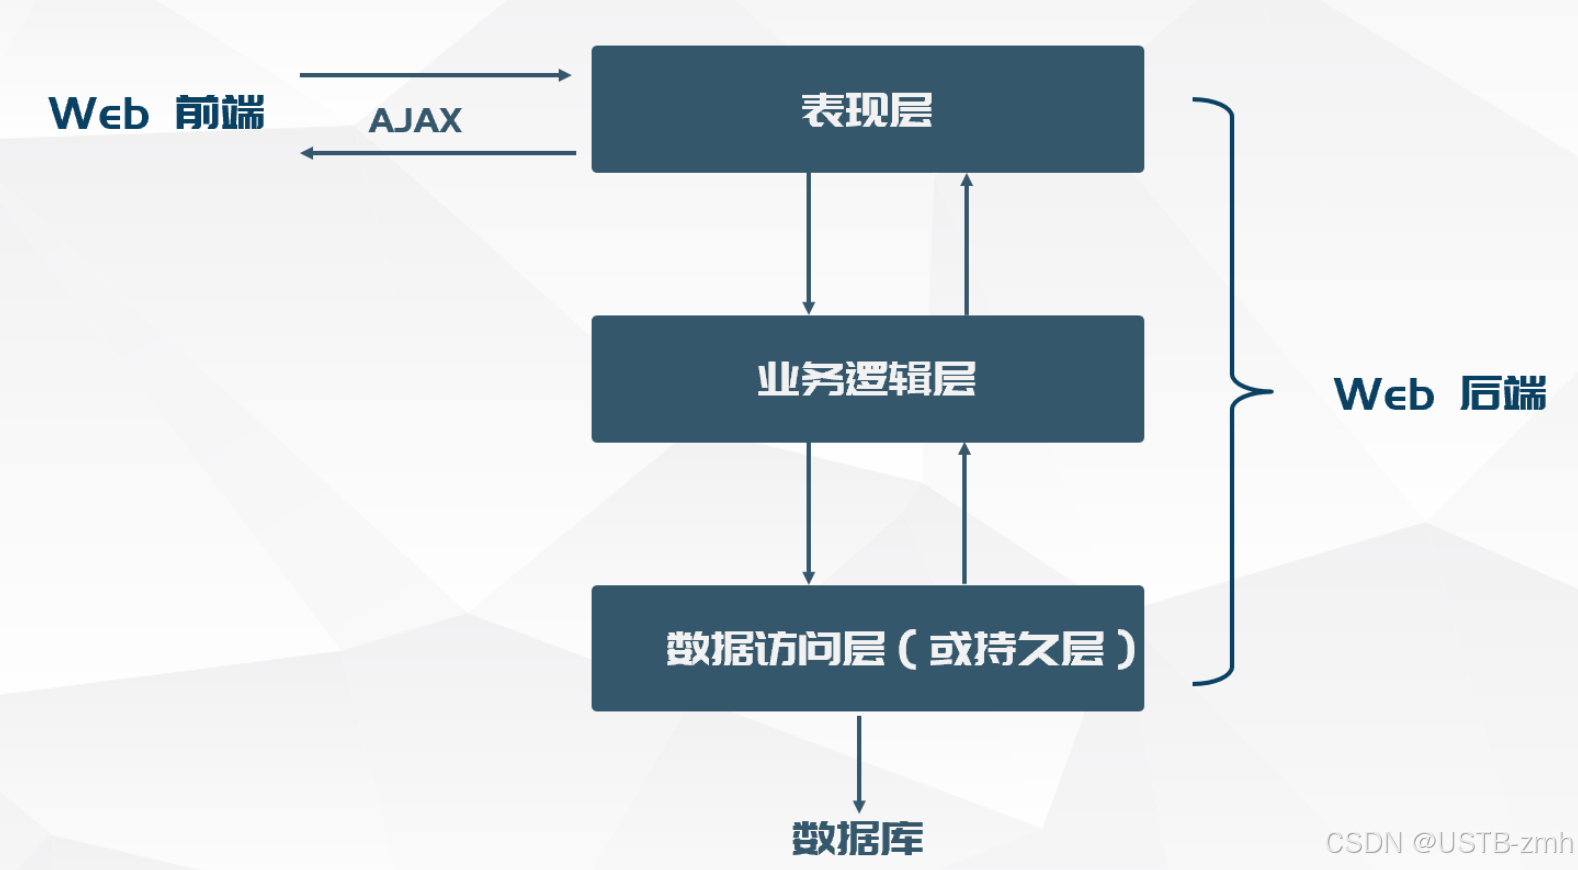
- 表现层(UI):直接跟前端打交互(一是接收前端ajax请求,二是返回json数据给前端)
- 业务逻辑层(BLL):一是处理表现层转发过来的前端请求(也就是具体业务),二是将从持久层获取的数据返回到表现层。
- 数据访问层(DAL):直接操作数据库完成CRUD,并将获得的数据返回到上一层(也就是业务逻辑层)。
- Java持久层框架:
- MyBatis
- Hibernate(实现了JPA规范)
- jOOQ
- Guzz
- Spring Data(实现了JPA规范)
- ActiveJDBC
- …
1.3 JDBC不足
示例1
// ......
// sql语句写死在java程序中
String sql = "insert into t_user(id,idCard,username,password,birth,gender,email,city,street,zipcode,phone,grade) values(?,?,?,?,?,?,?,?,?,?,?,?)";
PreparedStatement ps = conn.prepareStatement(sql);
// 繁琐的赋值:思考一下,这种有规律的代码能不能通过反射机制来做自动化。
ps.setString(1, "1");
ps.setString(2, "123456789");
ps.setString(3, "zhangsan");
ps.setString(4, "123456");
ps.setString(5, "1980-10-11");
ps.setString(6, "男");
ps.setString(7, "zhangsan@126.com");
ps.setString(8, "北京");
ps.setString(9, "大兴区凉水河二街");
ps.setString(10, "1000000");
ps.setString(11, "16398574152");
ps.setString(12, "A");
// 执行SQL
int count = ps.executeUpdate();
// ......
示例2
// ......
// sql语句写死在java程序中
String sql = "select id,idCard,username,password,birth,gender,email,city,street,zipcode,phone,grade from t_user";
PreparedStatement ps = conn.prepareStatement(sql);
ResultSet rs = ps.executeQuery();
List<User> userList = new ArrayList<>();
// 思考以下循环中的所有代码是否可以使用反射进行自动化封装。
while(rs.next()){
    // 获取数据
    String id = rs.getString("id");
    String idCard = rs.getString("idCard");
    String username = rs.getString("username");
    String password = rs.getString("password");
    String birth = rs.getString("birth");
    String gender = rs.getString("gender");
    String email = rs.getString("email");
    String city = rs.getString("city");
    String street = rs.getString("street");
    String zipcode = rs.getString("zipcode");
    String phone = rs.getString("phone");
    String grade = rs.getString("grade");
    // 创建对象
    User user = new User();
    // 给对象属性赋值
    user.setId(id);
    user.setIdCard(idCard);
    user.setUsername(username);
    user.setPassword(password);
    user.setBirth(birth);
    user.setGender(gender);
    user.setEmail(email);
    user.setCity(city);
    user.setStreet(street);
    user.setZipcode(zipcode);
    user.setPhone(phone);
    user.setGrade(grade);
    // 添加到集合
    userList.add(user);
}
// ......
JDBC不足:
- SQL语句写死在Java程序中,不灵活。改SQL的话就要改Java代码。违背开闭原则OCP。(比如业务扩展了,sql语句中需要更多的参数,因此需要修改java代码)
- 给?传值是繁琐的。能不能自动化???
- 将结果集封装成Java对象是繁琐的。能不能自动化???
1.4 了解MyBatis
- MyBatis本质上就是对JDBC的封装,通过MyBatis完成CRUD。
- MyBatis中文使用手册:https://mybatis.net.cn/getting-started.html
- MyBatis在三层架构中负责持久层的,属于持久层框架(dao层)。
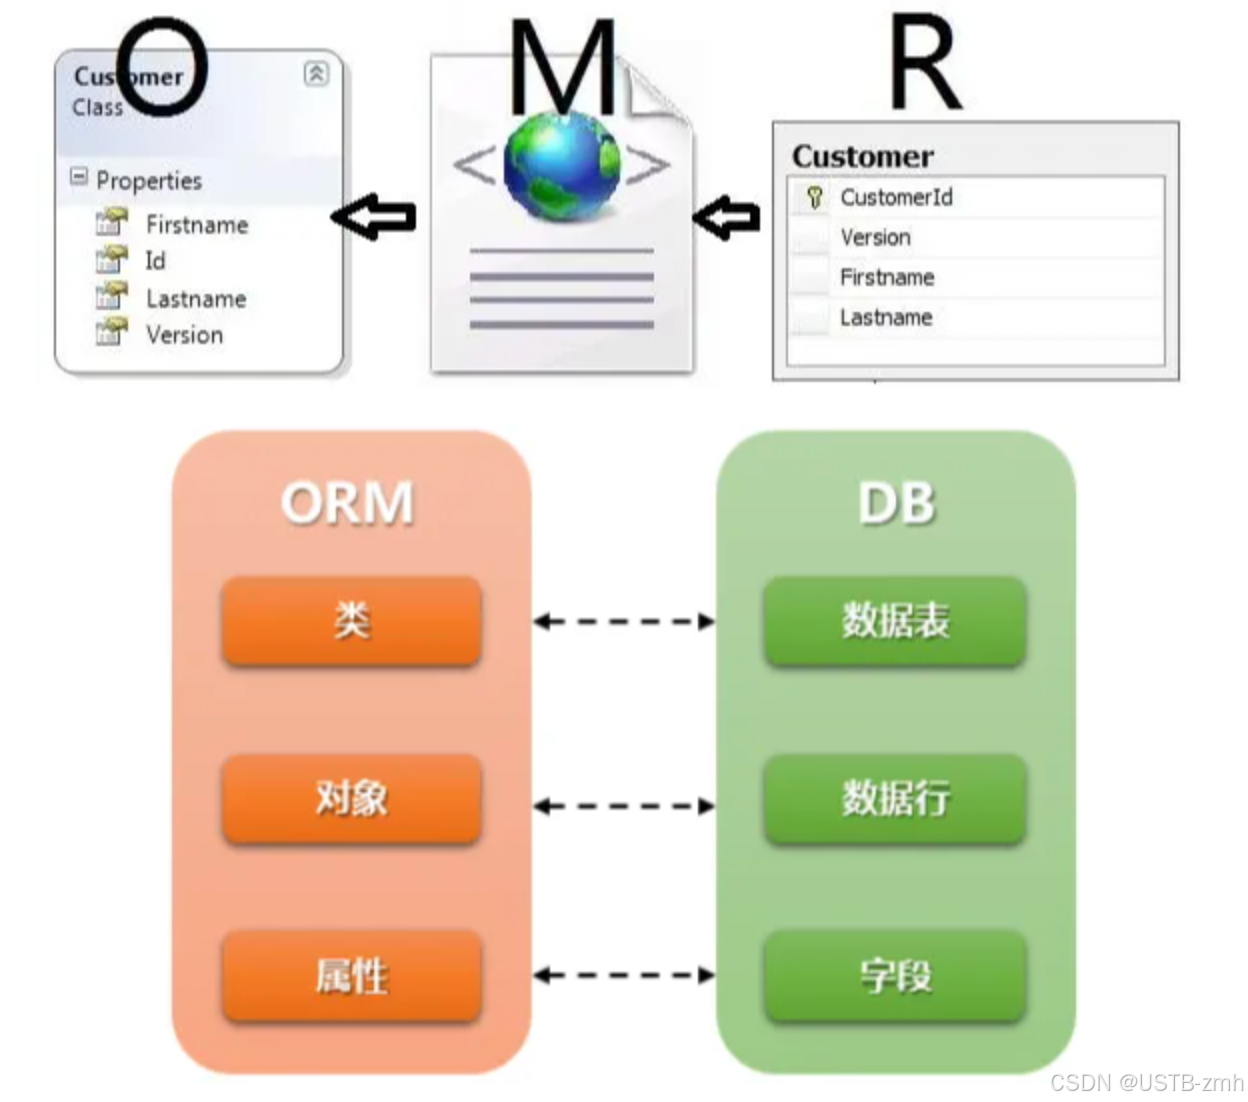
- ORM:对象关系映射
- O(Object):Java虚拟机中的Java对象
- R(Relational):关系型数据库
- M(Mapping):将Java虚拟机中的Java对象映射到数据库表中一行记录,或是将数据库表中一行记录映射成Java虚拟机中的一个Java对象。
- ORM图示
- MyBatis属于半自动化ORM框架(因为MyBatis框架中SQL语句是需要程序员自己编写的)。
- Hibernate属于全自动化的ORM框架(使用Hibernate框架时,不需要程序员手动编写SQL语句,SQL语句可以自动生成)。
- MyBatis框架特点:
- 支持定制化 SQL、存储过程、基本映射以及高级映射
- 避免了几乎所有的 JDBC 代码中手动设置参数以及获取结果集
- 支持XML开发,也支持注解式开发。【为了保证sql语句的灵活,所以mybatis大部分是采用XML方式开发。】
- 将接口和 Java 的 POJOs(Plain Ordinary Java Object,简单普通的Java对象)映射成数据库中的记录
- 体积小好学:两个jar包,两个XML配置文件。
- 完全做到sql解耦合。
- 提供了基本映射标签。
- 提供了高级映射标签。
- 提供了XML标签,支持动态SQL的编写。
- …
二、MyBatis入门程序
2.1 MyBatis入门程序开发步骤
写代码前准备:
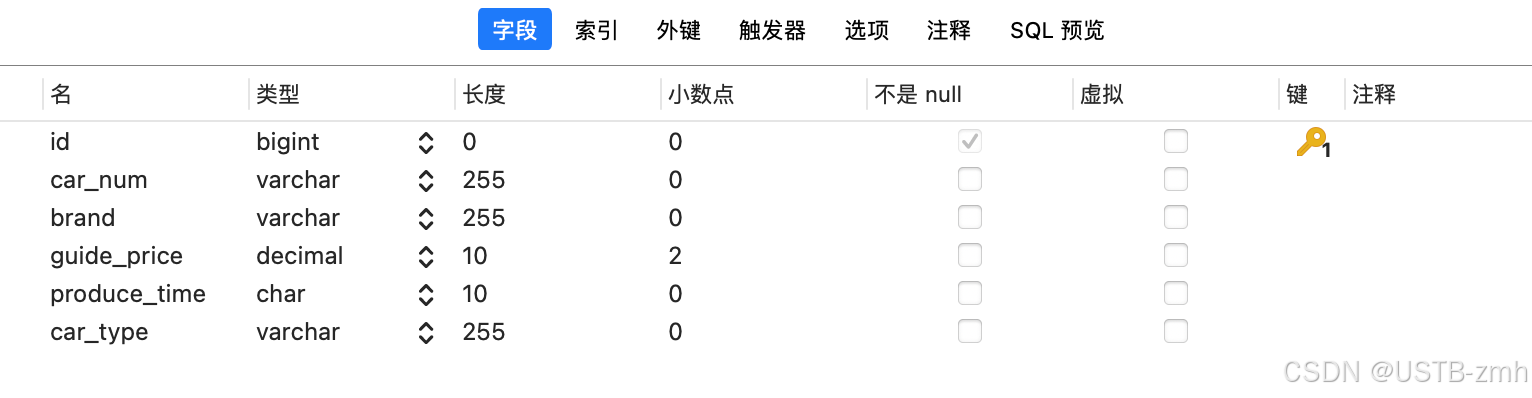
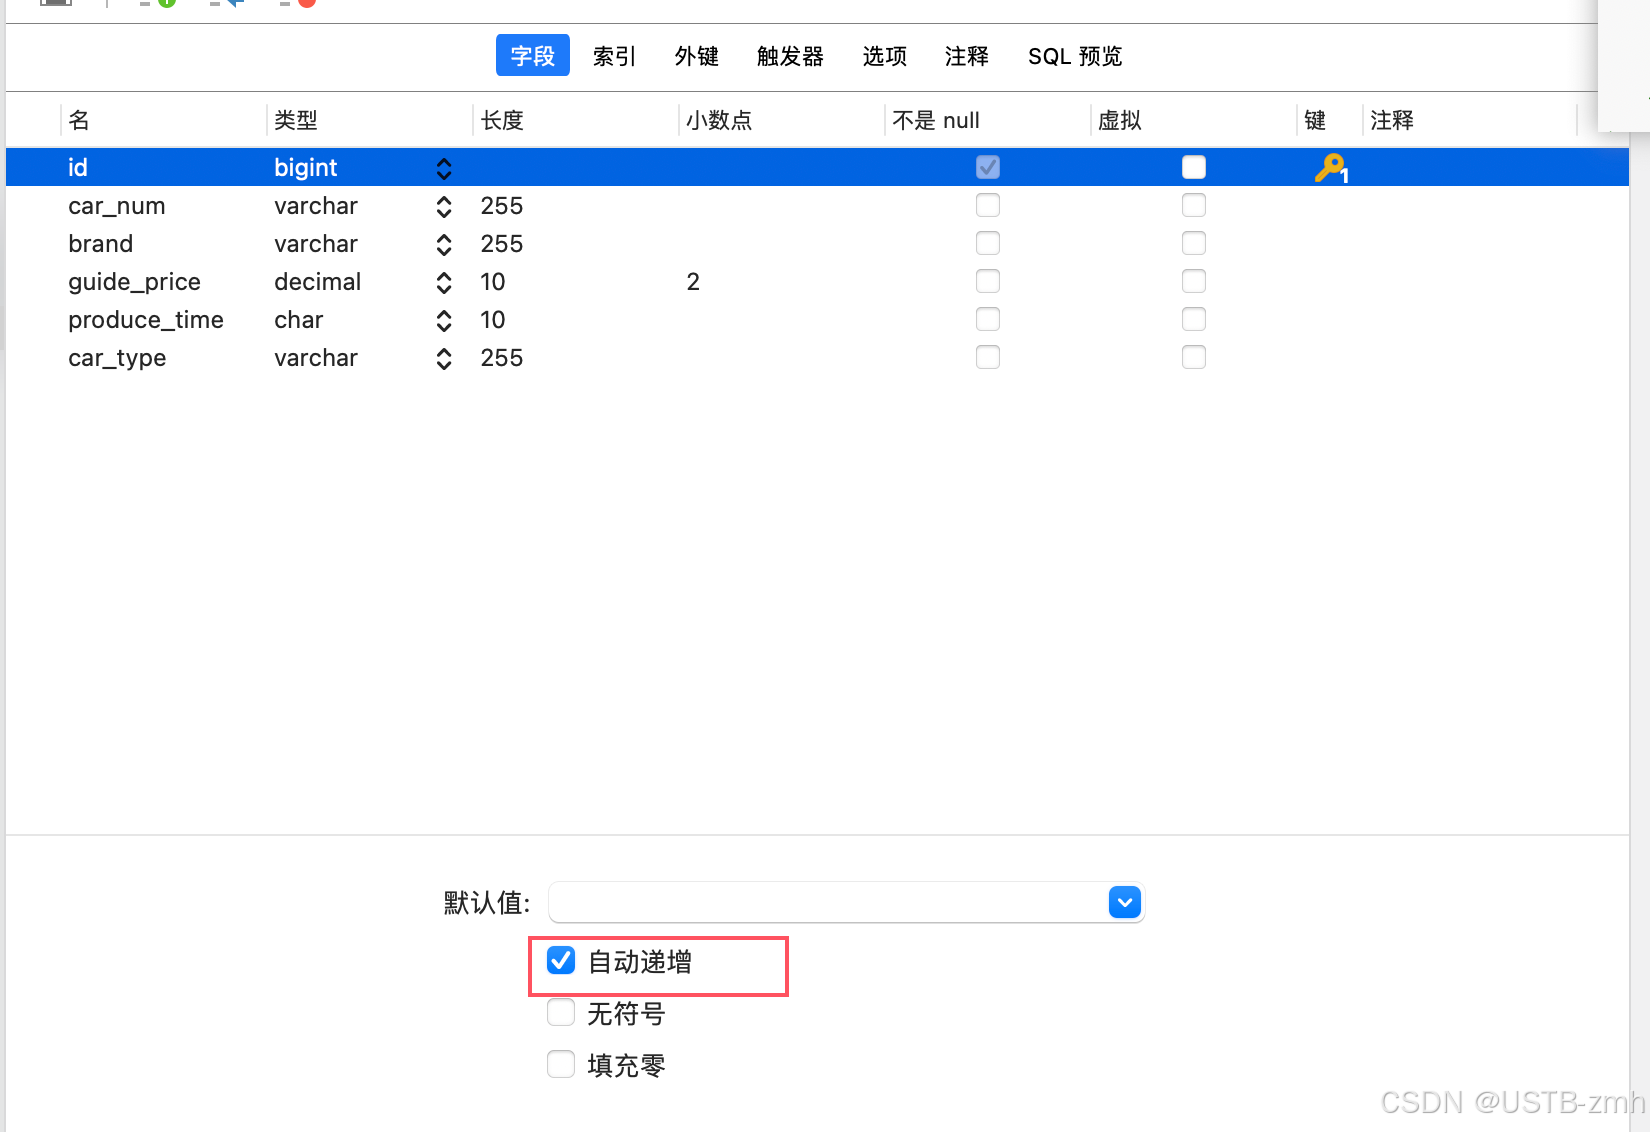
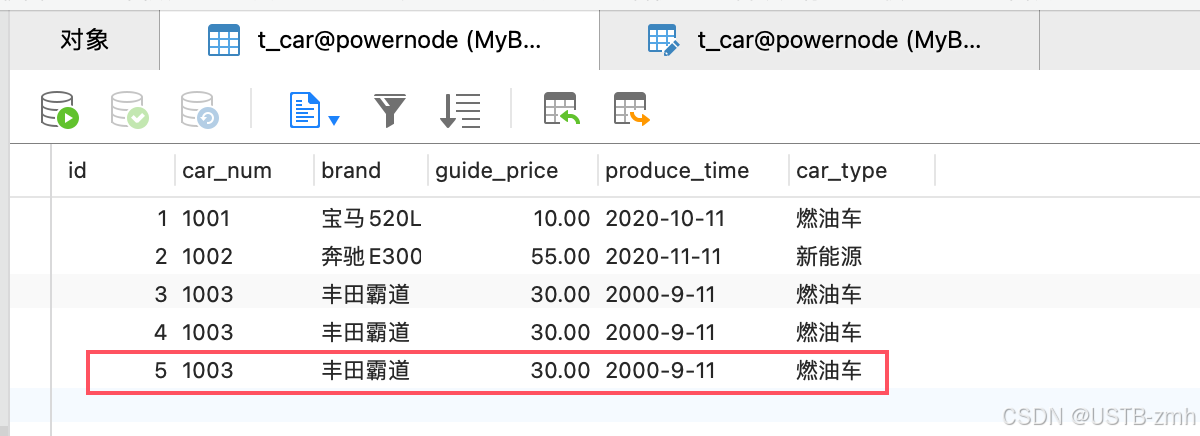
- 准备数据库表:汽车表t_car,字段包括:
- id:主键(自增)【bigint】
- car_num:汽车编号【varchar】
- brand:品牌【varchar】
- guide_price:厂家指导价【decimal类型,专门为财务数据准备的类型】
- produce_time:生产时间【char,年月日即可,10个长度,‘2022-10-11’】
- car_type:汽车类型(燃油车、电车、氢能源)【varchar】
- 使用navicat for mysql工具建表
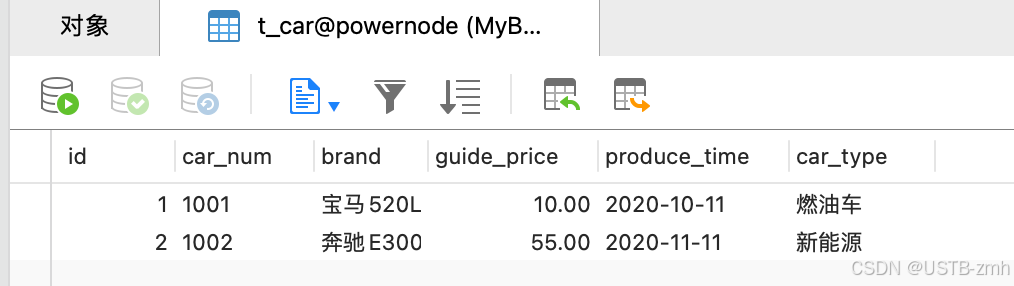
- 使用navicat for mysql工具向t_car表中插入两条数据,如下:
- 创建Project:建议创建Empty Project,设置Java版本以及编译版本等。
- 步骤1:打包方式:jar(不需要war,因为mybatis封装的是jdbc。)
<groupId>com.powernode</groupId>
    <artifactId>mybatis-001</artifactId>
    <version>1.0-SNAPSHOT</version>
    <packaging>jar</packaging>
- 步骤2:引入依赖(mybatis依赖 + mysql驱动依赖)
<!--mybatis核心依赖-->
<dependency>
  <groupId>org.mybatis</groupId>
  <artifactId>mybatis</artifactId>
  <version>3.5.16</version>
</dependency>
<!--mysql驱动依赖-->
<dependency>
  <groupId>mysql</groupId>
  <artifactId>mysql-connector-java</artifactId>
  <version>8.0.31</version>
</dependency>
- 步骤3:在resources根目录下新建mybatis-config.xml配置文件(可以参考mybatis手册拷贝)
<?xml version="1.0" encoding="UTF-8" ?>
<!DOCTYPE configuration
  PUBLIC "-//mybatis.org//DTD Config 3.0//EN"
  "http://mybatis.org/dtd/mybatis-3-config.dtd">
<configuration>
  <environments default="development">
    <environment id="development">
      <transactionManager type="JDBC"/>
      <dataSource type="POOLED">
        <property name="driver" value="${driver}"/>
        <property name="url" value="${url}"/>
        <property name="username" value="${username}"/>
        <property name="password" value="${password}"/>
      </dataSource>
    </environment>
  </environments>
  <mappers>
 	    <!--执行XxxMapper.xml文件的路径-->
        <!--resource属性默认自动会从类的根路径下开始查找资源-->
    <mapper resource="org/mybatis/example/BlogMapper.xml"/>
  </mappers>
</configuration>
注意1:mybatis核心配置文件的文件名不一定是mybatis-config.xml,可以是其它名字。
注意2:mybatis核心配置文件存放的位置也可以随意。这里选择放在resources根下,相当于放到了类的根路径下。
- 步骤4:在resources根目录下新建CarMapper.xml配置文件(可以参考mybatis手册拷贝)
<?xml version="1.0" encoding="UTF-8" ?>
<!DOCTYPE mapper
PUBLIC "-//mybatis.org//DTD Mapper 3.0//EN"
"http://mybatis.org/dtd/mybatis-3-mapper.dtd">
<mapper namespace="org.mybatis.example.BlogMapper">
<!--insert语句,id是这条SQL语句的唯一标识。这个id就代表了这条SQL语句。-->
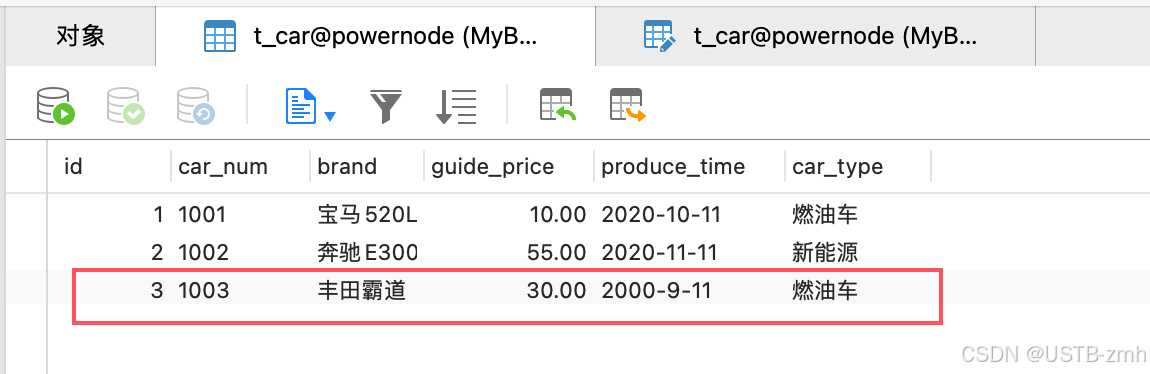
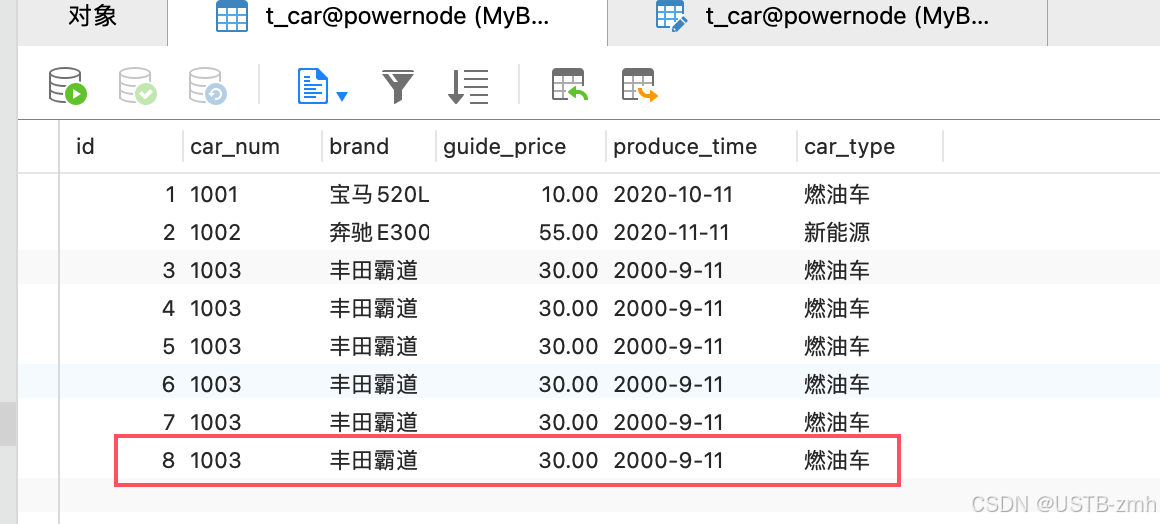
<insert id="insertCar">
insert into t_car(id, car_num, brand, guide_price, produce_time, car_type)
values(null,1003,'丰田霸道',30.0,'2000-9-11','燃油车')
</insert>
</mapper>
注意1:sql语句最后结尾可以不写“;”
注意2:CarMapper.xml文件的名字不是固定的。可以使用其它名字。
注意3:CarMapper.xml文件的位置也是随意的。这里选择放在resources根下,相当于放到了类的根路径下。
注意4:将CarMapper.xml文件路径配置到mybatis-config.xml:
<mapper resource="CarMapper.xml"/>
- 步骤5:编写MyBatisIntroductionTest代码
在MyBatis当中,负责执行SQL语句的对象叫SqlSession,它是专门用来执行SQL语句的,是一个Java程序和数据库之间的一次会话。要想获取SqlSession对象,需要先获取SqlSessionFactory对象,通过SqlSessionFactory工厂来生产SqlSession对象。获取SqlSessionFactory对象需要首先获取SqlSessionFactoryBuilder对象,通过SqlSessionFactoryBuilder对象的build方法,来获取一个SqlSessionFactory对象。
SqlSessionFactoryBuilder --> SqlSessionFactory --> SqlSession
package com.powernode.mybatis.test;
import org.apache.ibatis.session.SqlSession;
import org.apache.ibatis.session.SqlSessionFactory;
import org.apache.ibatis.session.SqlSessionFactoryBuilder;
import java.io.InputStream;
public class MyBatisTest {
public static void main(String[] args) {
// 1. 创建SqlSessionFactoryBuilder对象
SqlSessionFactoryBuilder sqlSessionFactoryBuilder = new SqlSessionFactoryBuilder();
// 2. 创建SqlSessionFactory对象
//getResourceAsStream默认就是从类的根路径(resource)下开始查找资源
InputStream is = Thread.currentThread().getContextClassLoader().getResourceAsStream("mybatis-config.xml");
SqlSessionFactory sqlSessionFactory = sqlSessionFactoryBuilder.build(is);
// 3. 创建SqlSession对象
SqlSession sqlSession = sqlSessionFactory.openSession();
// 4. 执行sql
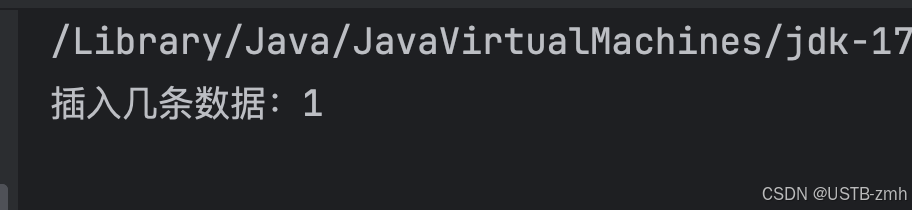
int count = sqlSession.insert("insertCar"); // 这个"insertCar"必须是sql的id
System.out.println("插入几条数据:" + count);
// 5. 提交(mybatis默认采用的事务管理器是JDBC,默认是不提交的,需要手动提交。)
sqlSession.commit();
// 6. 关闭资源(只关闭是不会提交的)
sqlSession.close();
}
}
运行结果:
注意1:如果你报错id不能是空,请设置表的id为自动增长。
注意2:默认采用的事务管理器是:JDBC。JDBC事务默认是不提交的,需要手动提交。
2.2 关于MyBatis核心配置文件的名字和路径详解
核心配置文件的名字是随意的,因为以下的代码:
优点:采用这种方式,从类路径当中加载资源,项目的移植性很强。项目从windows移植到linux,代码不需要进行修改,因为这个资源文件一直都在类路径当中。
// 文件名是出现在程序中的,文件名如果修改了,对应这里的java程序也改一下就行了。
InputStream is = Thread.currentThread().getContextClassLoader().getResourceAsStream("mybatis-config.xml");
这只是一个输入流,可以自己new。
InputStream is = new FileInputStream("D:/mybatis-config.xml");
缺点:可移植性太差,程序不够健壮,可能会移植到其他的操作系统当中,导致以上路径无效,还需要修改java代码中的路径,违背OCP原则。
在mybatis中提供了一个类:Resource【org.apache.ibatis.io.Resources】,该类可以从类路径当中获取资源,我们通常使用它来获取输入流InputStream,代码如下
// 这种方式只能从类路径当中获取资源,也就是说mybatis-config.xml文件需要在类路径下。
InputStream is = Resources.getResourceAsStream("mybatis-config.xml");
底层的代码就是第一个方法。
2.3 MyBatis第一个比较完整的代码写法
package com.powernode.mybatis.test;

import org.apache.ibatis.io.Resources;
import org.apache.ibatis.session.SqlSession;
import org.apache.ibatis.session.SqlSessionFactory;
import org.apache.ibatis.session.SqlSessionFactoryBuilder;

import java.io.IOException;

public class MyBatisCompleteTest {
    public static void main(String[] args) {
        SqlSession sqlSession = null;
        try {
            SqlSessionFactoryBuilder sqlSessionFactoryBuilder = new SqlSessionFactoryBuilder();
            SqlSessionFactory build = sqlSessionFactoryBuilder.build(Resources.getResourceAsReader("mybatis-config.xml"));
            //开启会话(底层会开启事务)
            sqlSession = build.openSession();
            //执行SQL语句,处理相关业务
            int insert = sqlSession.insert("insertCar");
            System.out.println(insert);
            //执行到这里,没有发生任何异常,提交事务,终止事务。
            sqlSession.commit();
        } catch (Exception e) {
            //最好回滚事务
            if(sqlSession != null){
                sqlSession.rollback();
            }
            e.printStackTrace();
        }finally {
            sqlSession.close();
        }
    }
}
2.4 引入JUnit
- JUnit是专门做单元测试的组件。
- 在实际开发中,单元测试一般是由我们Java程序员来完成的。
- 我们要对我们自己写的每一个业务方法负责任,要保证每个业务方法在进行测试的时候都能通过。
- 测试的过程中涉及到两个概念:
- 期望值
- 实际值
- 期望值和实际值相同表示测试通过,期望值和实际值不同则单元测试执行时会报错。
- 这里引入JUnit是为了代替main方法。
- 使用JUnit步骤:
- 第一步:引入依赖
<!-- junit依赖 -->
<dependency>
    <groupId>junit</groupId>
    <artifactId>junit</artifactId>
    <version>4.13.2</version>
    <scope>test</scope>
</dependency>
-
第二步:编写单元测试类【测试用例】,测试用例中每一个测试方法上使用@Test注解进行标注。
- 测试用例的名字以及每个测试方法的定义都是有规范的:
- 测试用例的名字:XxxTest
- 测试方法声明格式:public void test业务方法名(){}
package com.powernode.junit.service;
import org.junit.Test;
//名字规范:测试的类名 + Test
public class MathServiceTest {
    //测试方法的规范:public void testXxxx()
    @Test
    public void testSum(){
    }

    @Test
    public void testSub(){
    }
}
-
第三步:可以在类上执行,也可以在方法上执行
- 在类上执行时,该类中所有的测试方法都会执行。
- 在方法上执行时,只执行当前的测试方法。
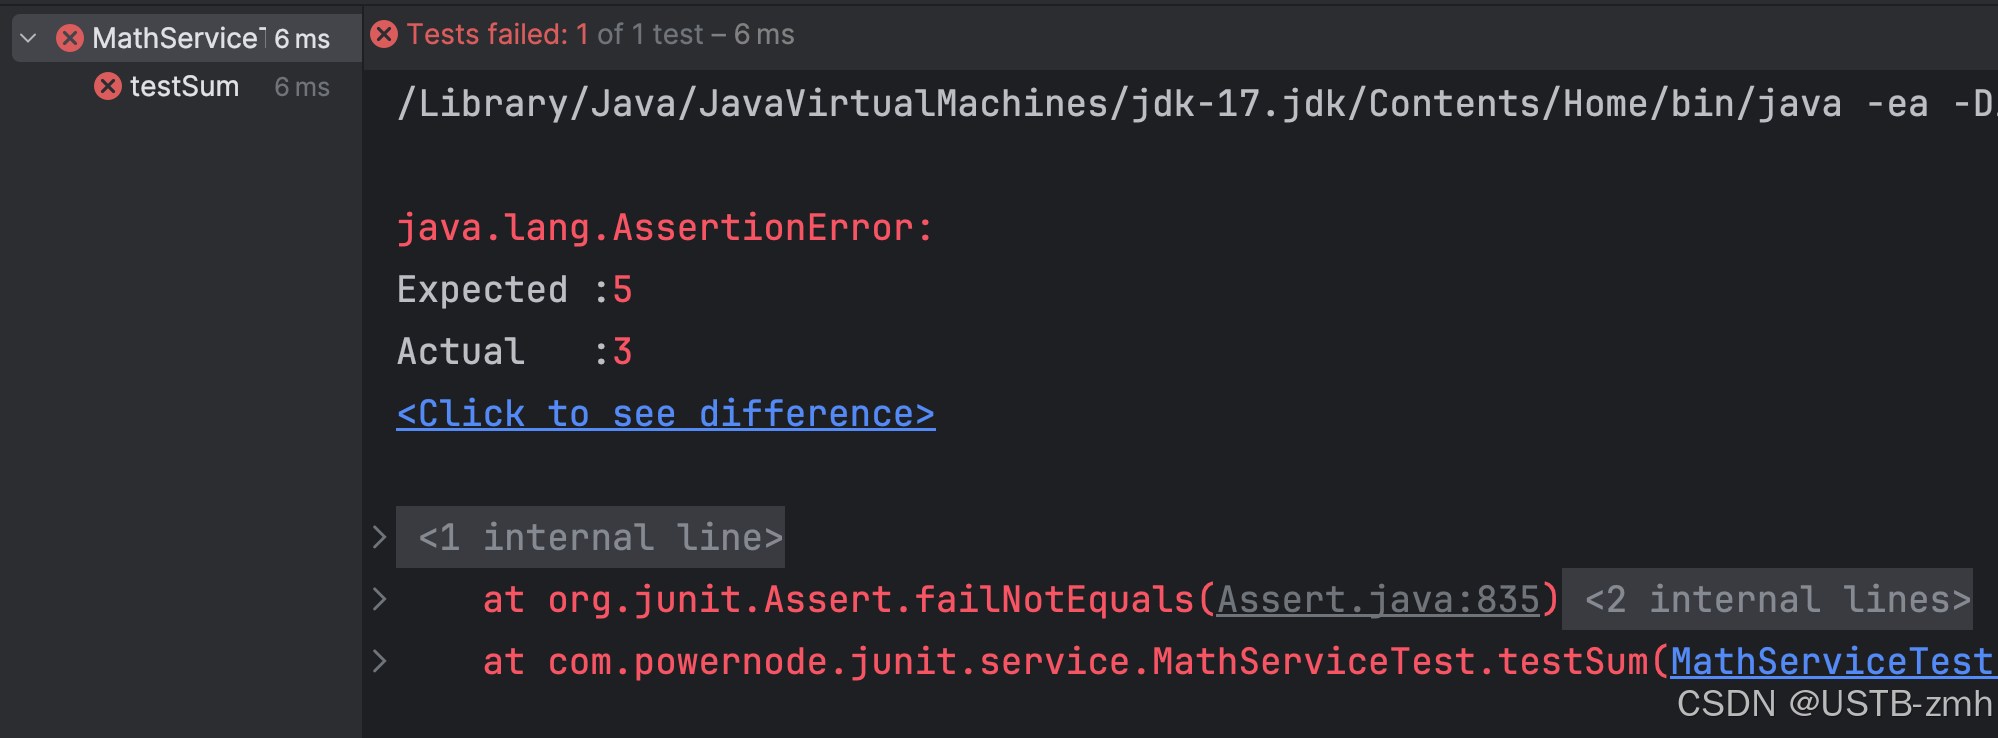
    @Test
    public void testSum(){
        //单元测试有两个重要概念:
        //实际值:被测试的业务方法的真正执行结果。
        //期望值:执行了这个业务方法之后,你的期望执行结果是多少?
        MathService mathService = new MathService();
        //获取实际值
        int actual = mathService.sum(1,2); //求和
        //期望值
        int expected = 5;
        // 加断言进行测试
        Assert.assertEquals(expected, actual);
    }
执行结果:
- 在MyBatis中引入Junit
package com.powernode.mybatis.test;
import org.apache.ibatis.io.Resources;
import org.apache.ibatis.session.SqlSession;
import org.apache.ibatis.session.SqlSessionFactory;
import org.apache.ibatis.session.SqlSessionFactoryBuilder;
import org.junit.Test;
public class CarMapperTest {
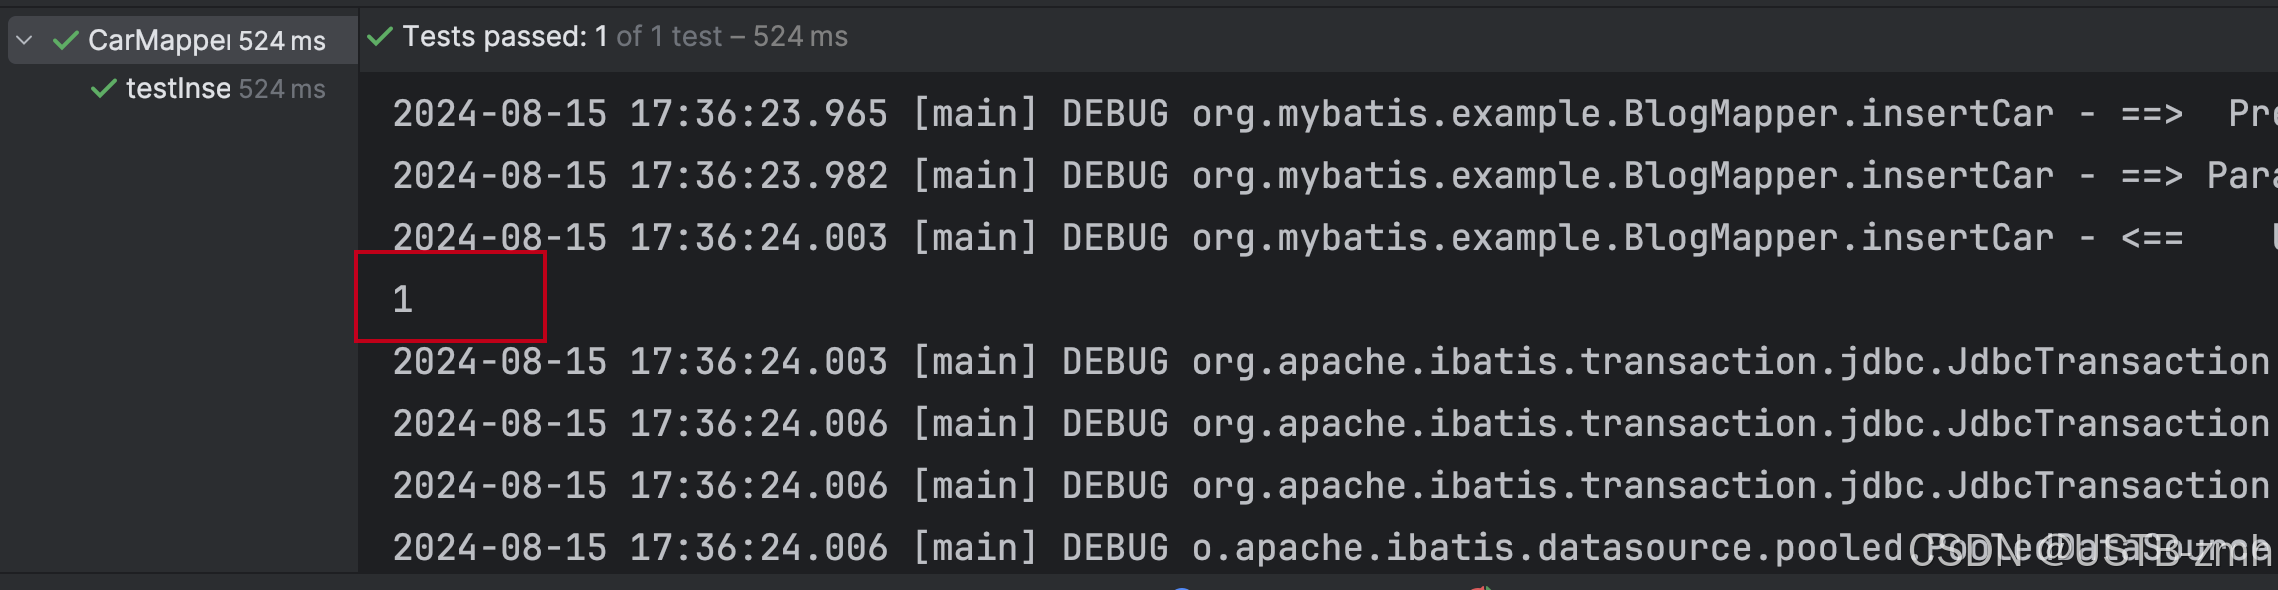
@Test
public void testInsertCar(){
//编写mybatis程序
SqlSession sqlSession = null;
try {
SqlSessionFactoryBuilder sqlSessionFactoryBuilder = new SqlSessionFactoryBuilder();
SqlSessionFactory build = sqlSessionFactoryBuilder.build(Resources.getResourceAsReader("mybatis-config.xml"));
//开启会话(底层会开启事务)
sqlSession = build.openSession();
//执行SQL语句,处理相关业务
int insert = sqlSession.insert("insertCar");
System.out.println(insert);
//执行到这里,没有发生任何异常,提交事务,终止事务。
sqlSession.commit();
} catch (Exception e) {
//最好回滚事务
if(sqlSession != null){
sqlSession.rollback();
}
e.printStackTrace();
}finally {
sqlSession.close();
}
}
}
运行结果(插入成功):

2.5 引入日志框架logback
- 引入日志框架的目的是为了看清楚mybatis执行的具体sql。
- 启用标准日志组件,只需要在mybatis-config.xml文件中添加以下配置:【可参考mybatis手册】
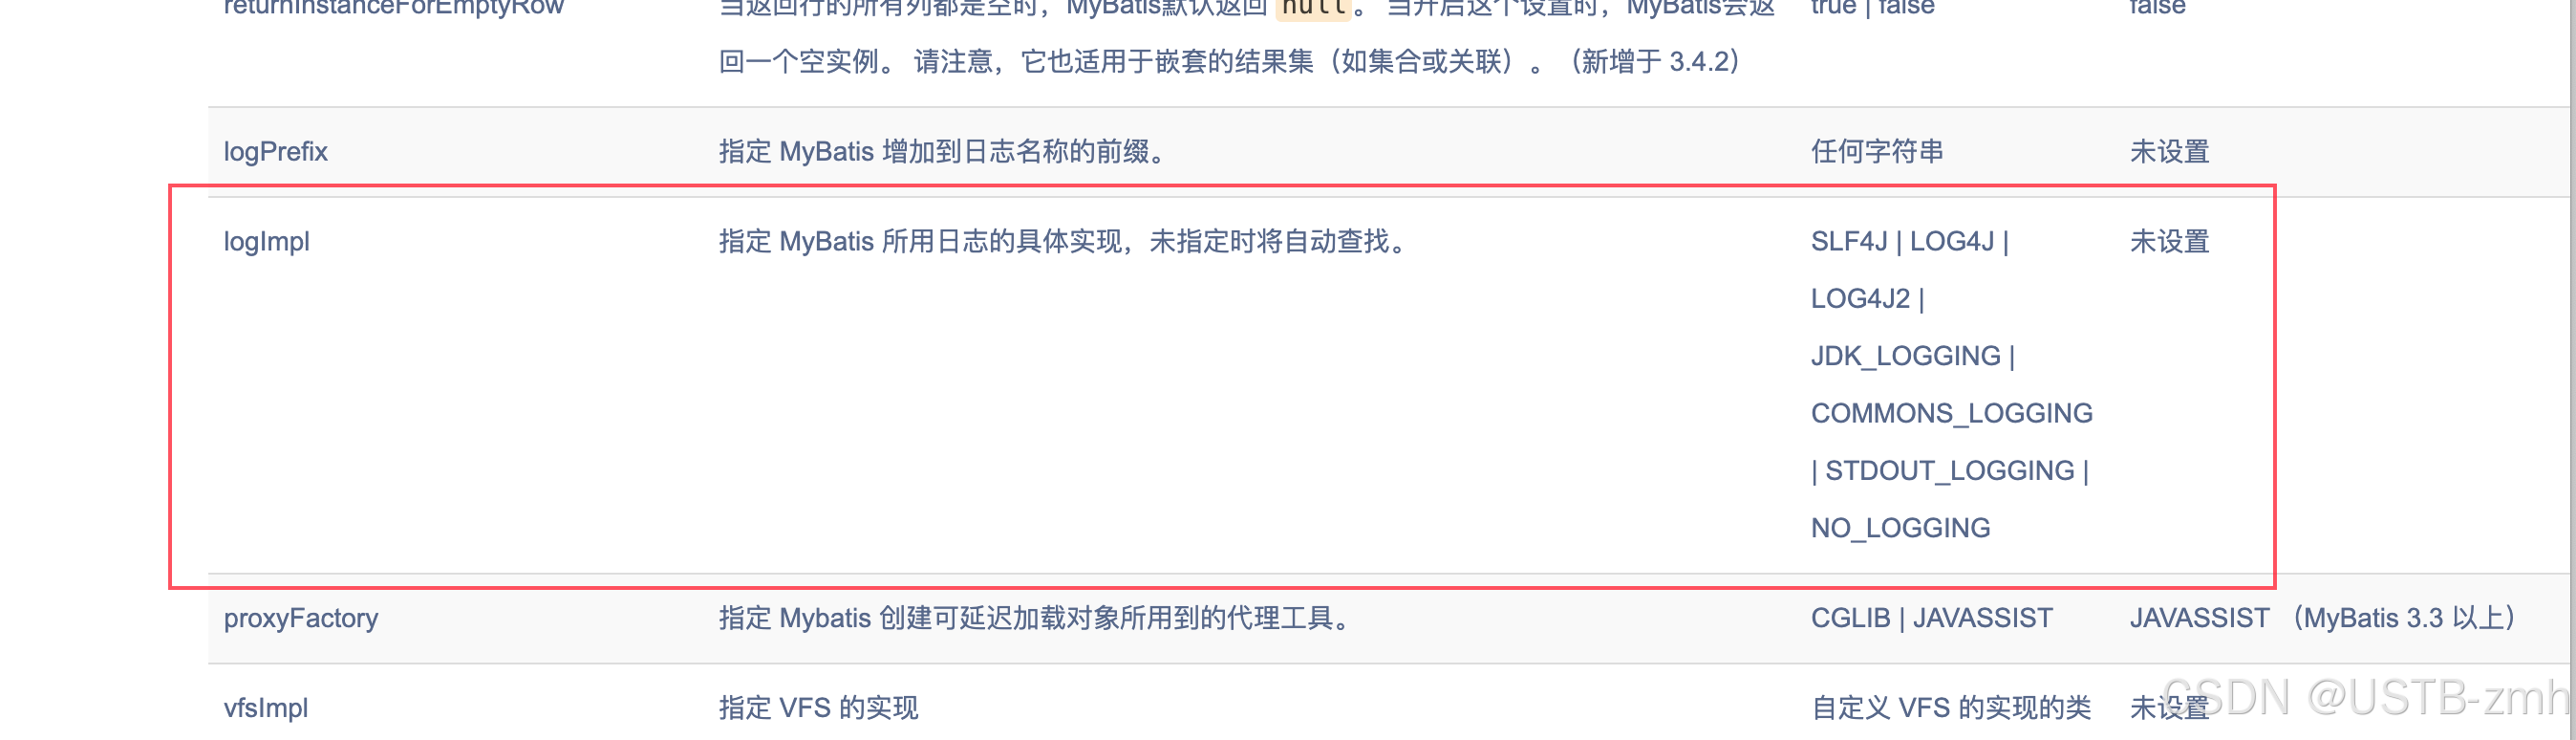
<settings>
<!--标准日志,MyBaits底层已经实现了这个日志,只需要开启即可-->
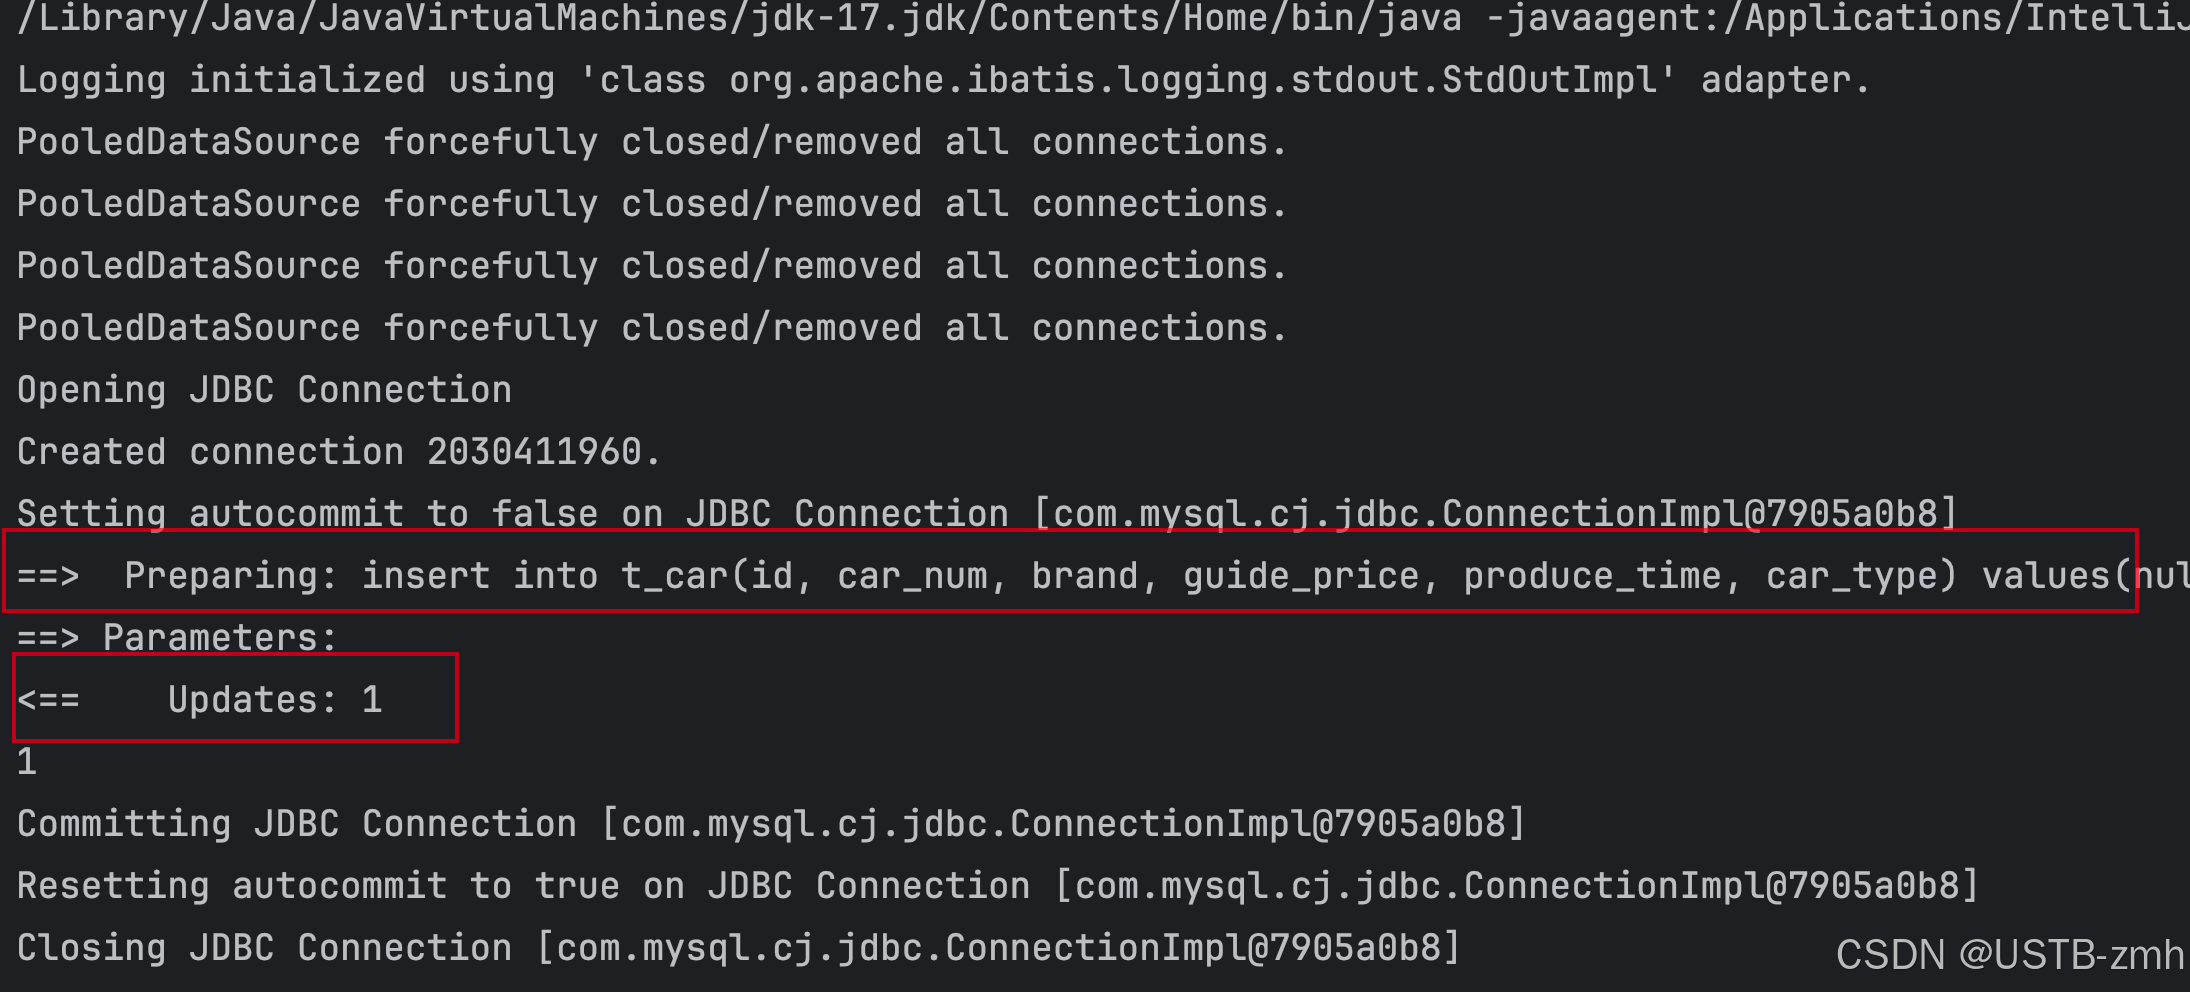
<setting name="logImpl" value="STDOUT_LOGGING" />
</settings>
执行结果就会一些日志信息:
标准日志也可以用,但是配置不够灵活,可以集成其他的日志组件,例如:log4j,logback等。
- logback是目前日志框架中性能较好的,较流行的,所以我们选它。
- 引入logback的步骤:
- 第一步:引入logback相关依赖
<dependency>
  <groupId>ch.qos.logback</groupId>
  <artifactId>logback-classic</artifactId>
  <version>1.2.11</version>
  <scope>test</scope>
</dependency>
- 第二步:引入logback相关配置文件(文件名叫做logback.xml或logback-test.xml,放到类路径当中
<?xml version="1.0" encoding="UTF-8"?>

<configuration debug="false">
    <!-- 控制台输出 -->
    <appender name="STDOUT" class="ch.qos.logback.core.ConsoleAppender">
        <encoder class="ch.qos.logback.classic.encoder.PatternLayoutEncoder">
            <!--格式化输出:%d表示日期,%thread表示线程名,%-5level:级别从左显示5个字符宽度%msg:日志消息,%n是换行符-->
            <pattern>%d{yyyy-MM-dd HH:mm:ss.SSS} [%thread] %-5level %logger{50} - %msg%n</pattern>
        </encoder>
    </appender>
    <!-- 按照每天生成日志文件 -->
    <appender name="FILE" class="ch.qos.logback.core.rolling.RollingFileAppender">
        <rollingPolicy class="ch.qos.logback.core.rolling.TimeBasedRollingPolicy">
            <!--日志文件输出的文件名-->
            <FileNamePattern>${LOG_HOME}/TestWeb.log.%d{yyyy-MM-dd}.log</FileNamePattern>
            <!--日志文件保留天数-->
            <MaxHistory>30</MaxHistory>
        </rollingPolicy>
        <encoder class="ch.qos.logback.classic.encoder.PatternLayoutEncoder">
            <!--格式化输出:%d表示日期,%thread表示线程名,%-5level:级别从左显示5个字符宽度%msg:日志消息,%n是换行符-->
            <pattern>%d{yyyy-MM-dd HH:mm:ss.SSS} [%thread] %-5level %logger{50} - %msg%n</pattern>
        </encoder>
        <!--日志文件最大的大小-->
        <triggeringPolicy class="ch.qos.logback.core.rolling.SizeBasedTriggeringPolicy">
            <MaxFileSize>100MB</MaxFileSize>
        </triggeringPolicy>
    </appender>

    <!--mybatis log configure-->
    <logger name="com.apache.ibatis" level="TRACE"/>
    <logger name="java.sql.Connection" level="DEBUG"/>
    <logger name="java.sql.Statement" level="DEBUG"/>
    <logger name="java.sql.PreparedStatement" level="DEBUG"/>

    <!-- 日志输出级别,logback日志级别包括五个:TRACE < DEBUG < INFO < WARN < ERROR -->
    <root level="DEBUG">
        <appender-ref ref="STDOUT"/>
        <appender-ref ref="FILE"/>
    </root>

</configuration>
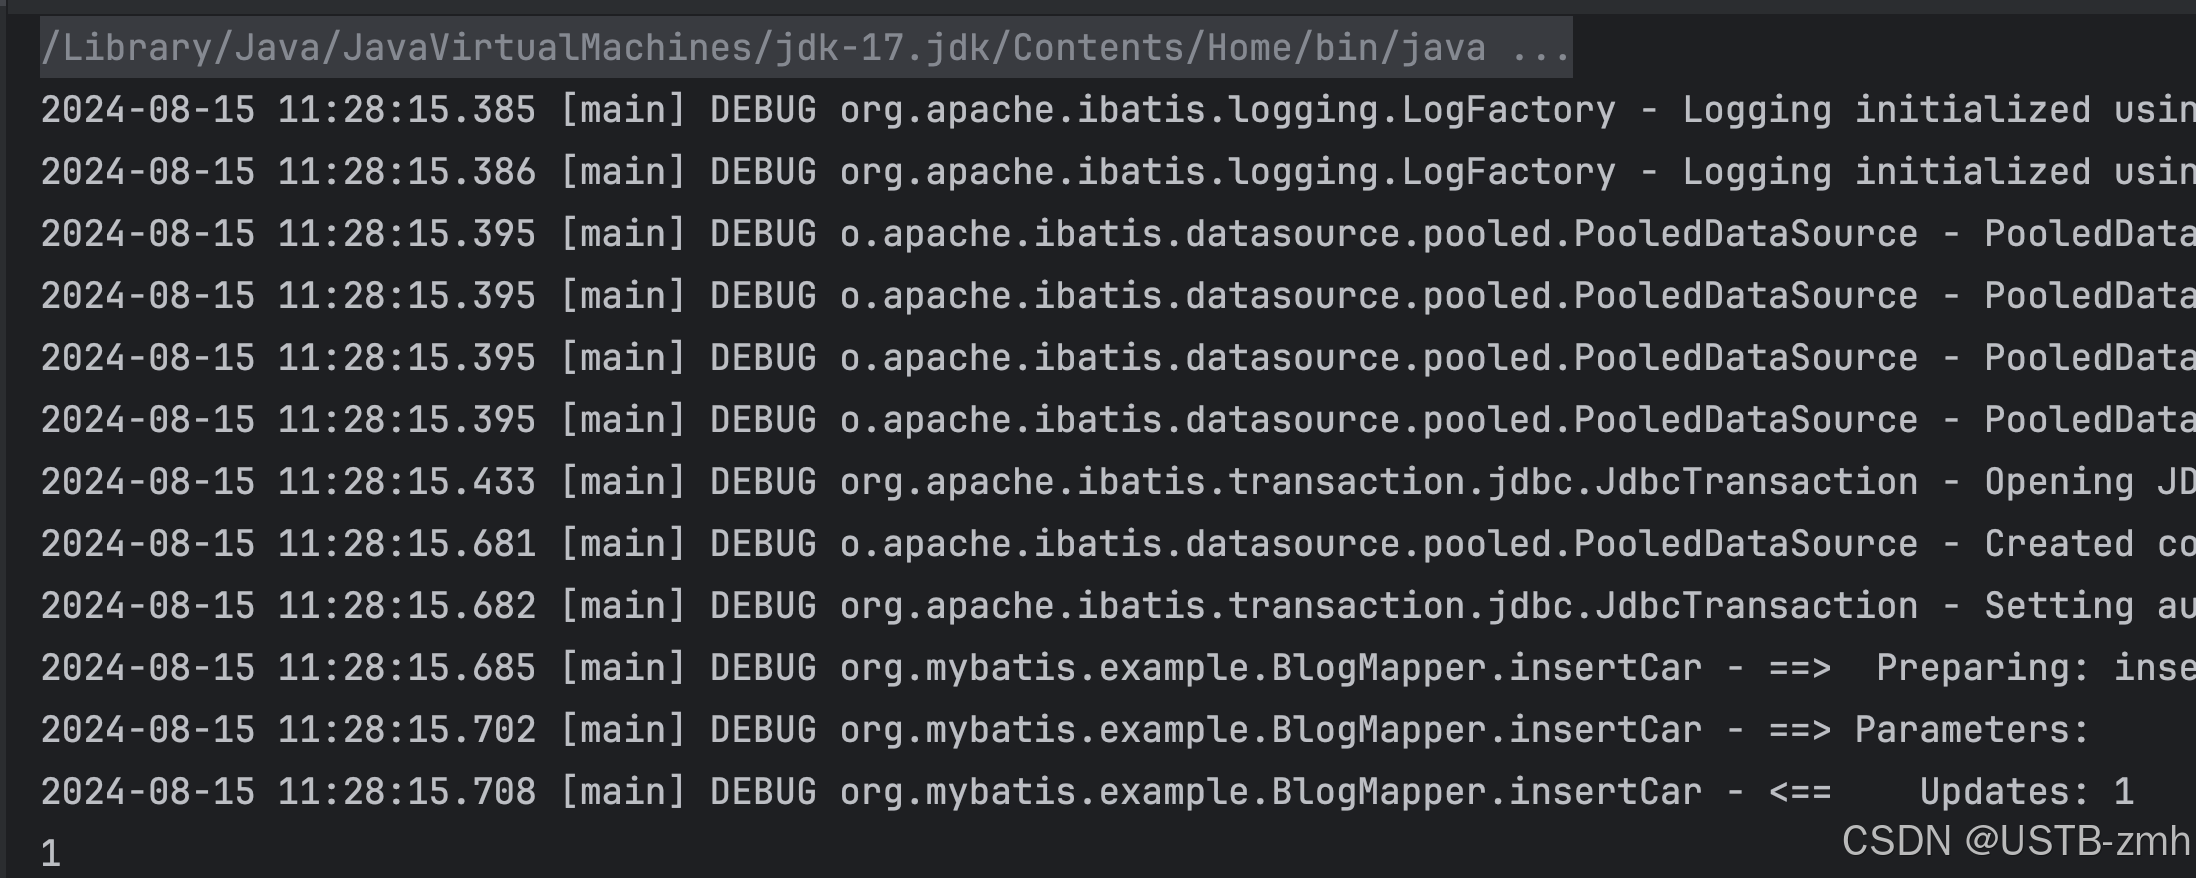
运行结果:
可不进行配置。
    <settings>
        <setting name="logImpl" value="SLF4J" />
    </settings>
2.6 MyBatis工具类SqlSessionUtil的封装
每一次获取SqlSession对象代码太繁琐,封装一个工具类
package com.powernode.mybatis.utils;
import org.apache.ibatis.io.Resources;
import org.apache.ibatis.session.SqlSession;
import org.apache.ibatis.session.SqlSessionFactory;
import org.apache.ibatis.session.SqlSessionFactoryBuilder;
import java.io.IOException;
import static org.apache.ibatis.io.Resources.getResourceAsReader;
public class SqlSessionUtil {

    // 工具类的构造方法一般都是私有化的
    // 工具类所有的方法都是静态的,直接采用类名即可调用,不需要new对象。
    // 为了防止new对象,构造方法私有化
    private SqlSessionUtil(){}

    private static SqlSessionFactory sqlSessionFactory;

    // 类加载时执行
    // SqlSessionFactory对象:一个SqlSessionFactory对应一个environment,一个environment通常是一个数据库。
    // SqlSessionUtil工具类在进行第一次加载的时候,解析mybatis-config.xml文件,创建SqlSessionFactory对象
    static {
        try {
            sqlSessionFactory = new SqlSessionFactoryBuilder().build(getResourceAsReader("mybatis-config.xml"));
        } catch (IOException e) {
            throw new RuntimeException(e);
        }

    }


    // 获取会话对象
    public static SqlSession openSession(){
        return sqlSessionFactory.openSession();
    }
}
测试工具类
@Test
    public void testInsertCarByUtil(){
        SqlSession sqlSession = SqlSessionUtil.openSession();
        int count = sqlSession.insert("insertCar");
        System.out.println(count);
        sqlSession.commit();
        sqlSession.close();
    }
运行结果:
三、使用MyBatis完成CRUD
3.1 insert(Create)
分析以下SQL映射文件中SQL语句存在的问题
<?xml version="1.0" encoding="UTF-8" ?>
<!DOCTYPE mapper
        PUBLIC "-//mybatis.org//DTD Mapper 3.0//EN"
        "http://mybatis.org/dtd/mybatis-3-mapper.dtd">

<!--namespace先随便写-->
<mapper namespace="car">
    <insert id="insertCar">
        insert into t_car(car_num,brand,guide_price,produce_time,car_type) values('103', '奔驰E300L', 50.3, '2022-01-01', '燃油车')
    </insert>
</mapper>
存在的问题是:SQL语句中的值不应该写死,值应该是用户提供的。之前的JDBC代码是这样写的:
// JDBC中使用 ? 作为占位符。那么MyBatis中会使用什么作为占位符呢?
String sql = "insert into t_car(car_num,brand,guide_price,produce_time,car_type) values(?,?,?,?,?)";
// ......
// 给 ? 传值。那么MyBatis中应该怎么传值呢?
ps.setString(1,"103");
ps.setString(2,"奔驰E300L");
ps.setDouble(3,50.3);
ps.setString(4,"2022-01-01");
ps.setString(5,"燃油车");
在MyBatis中可以这样做:
在Java程序中,将数据放到Map集合中
在sql语句中使用 #{map集合的key} 来完成传值,#{} 等同于JDBC中的 ? ,#{}就是占位符
Java程序这样写:
 @Test
    public void testInsertCar(){
        SqlSession sqlSession = SqlSessionUtil.openSession();

        //前端传过来数据,使用Map集合进行数据的封装
        Map<String, Object> map = new HashMap<>();
        map.put("k1", "1111");
        map.put("k2","比亚迪汉");
        map.put("k3", 10.0);
        map.put("k4", "2020-11-11");
        map.put("k5", "电车");


        //执行sql语句
        // insert方法的参数
        // 第一个参数:sqlId,从CarMapper.xml文件中复制
        // 第二个参数:封装数据的对象
        int count = sqlSession.insert("insertCar", map);
        System.out.println(count);

        sqlSession.commit();
        sqlSession.close();
    }
sql语句#{} 的里面必须填写map集合的key,不能随便写。
<?xml version="1.0" encoding="UTF-8" ?>
<!DOCTYPE mapper
        PUBLIC "-//mybatis.org//DTD Mapper 3.0//EN"
        "http://mybatis.org/dtd/mybatis-3-mapper.dtd">
<mapper namespace="org.mybatis.example.BlogMapper">

    <!--insert语句,id是这条SQL语句的唯一标识。这个id就代表了这条SQL语句。-->
    <insert id="insertCar">
        insert into t_car(id, car_num, brand, guide_price, produce_time, car_type)
        values(null, #{k1}, #{k2}, #{k3}, #{k4}, #{k5})
    </insert>
</mapper>
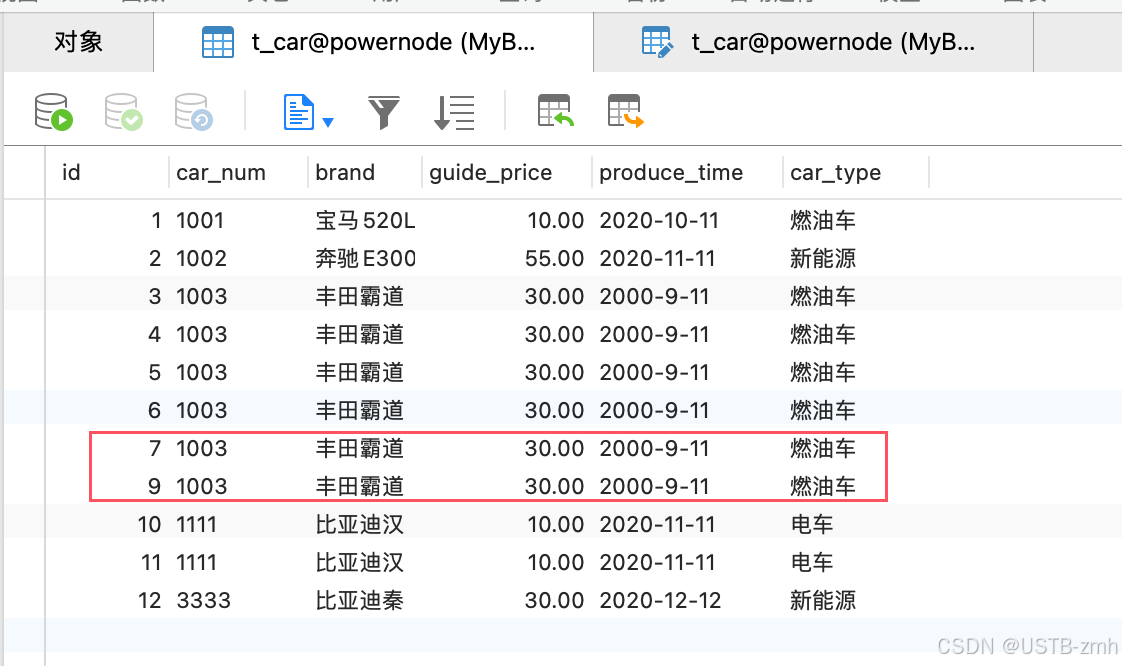
运行结果:
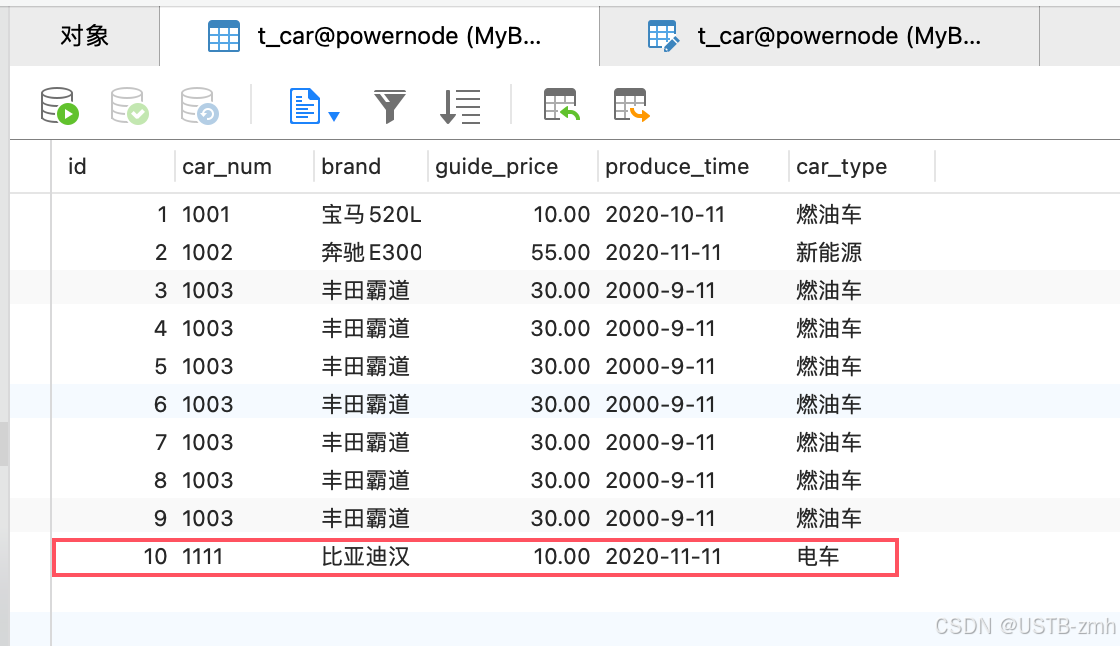
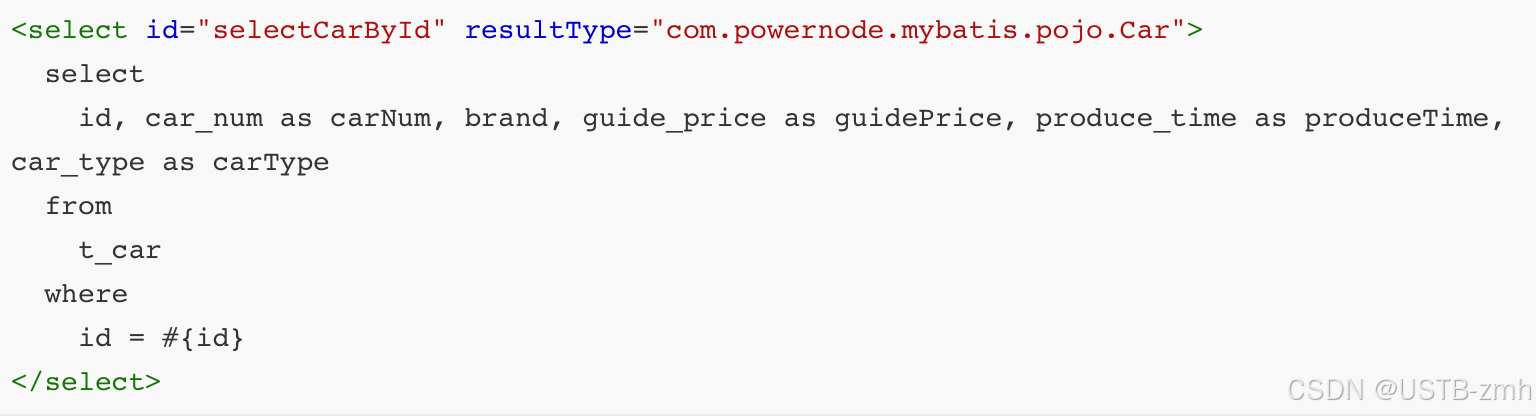
在以上sql语句中,可以看到#{k1} #{k2} #{k3} #{k4} #{k5}的可读性太差,为了增强可读性,我们可以将Java程序key改为表的列名。
修改之后的运行结果:
使用Map集合可以传参,那使用pojo(简单普通的java对象)可以完成传参吗?测试一下:
第一步:定义一个pojo类Car,提供相关属性。
有参构造,无参构造,get,set,toString自己补。


// 封装汽车相关信息的pojo类,普通的java类
public class Car {
    // 数据库表当中的字段应该和pojo类的属性一一对应
    // 建议使用包装类,这样可以防止null的问题
    private Long id;
    private String car_num;
    private String brand;
    private Double guide_price;
    private String produce_time;
    private String car_type;
}
第二步:Java程序
@Test
    public void testInsertCarByPOJO(){
        SqlSession sqlSession = SqlSessionUtil.openSession();
        //封装数据
        Car car = new Car(null, "3333", "比亚迪秦", 30.0, "2020-12-12", "新能源");
        //执行SQL
        int count = sqlSession.insert("insertCar", car);
        System.out.println(count);
        sqlSession.commit();
        sqlSession.close();

    }
第三步:SQL语句
注意:#{}里面写的是POJO的属性名
<?xml version="1.0" encoding="UTF-8" ?>
<!DOCTYPE mapper
        PUBLIC "-//mybatis.org//DTD Mapper 3.0//EN"
        "http://mybatis.org/dtd/mybatis-3-mapper.dtd">
<mapper namespace="org.mybatis.example.BlogMapper">

    <!--insert语句,id是这条SQL语句的唯一标识。这个id就代表了这条SQL语句。-->
    <insert id="insertCar">
            insert into t_car(id, car_num, brand, guide_price, produce_time, car_type)
            values (null, #{car_num}, #{brand}, #{guide_price}, #{produce_time}, #{car_type})
    </insert>
</mapper>
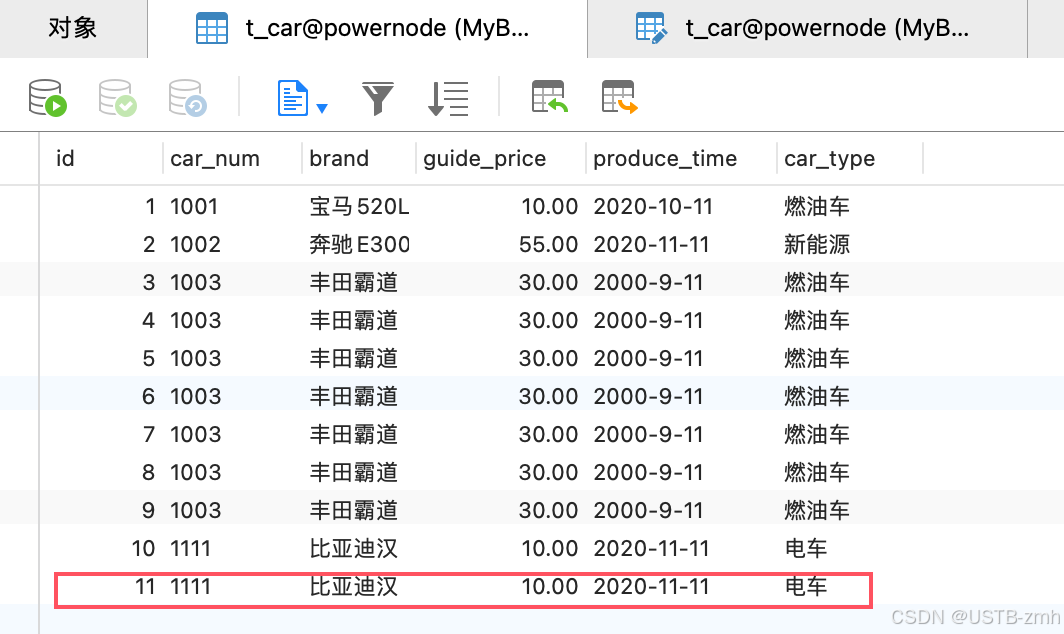
运行结果:
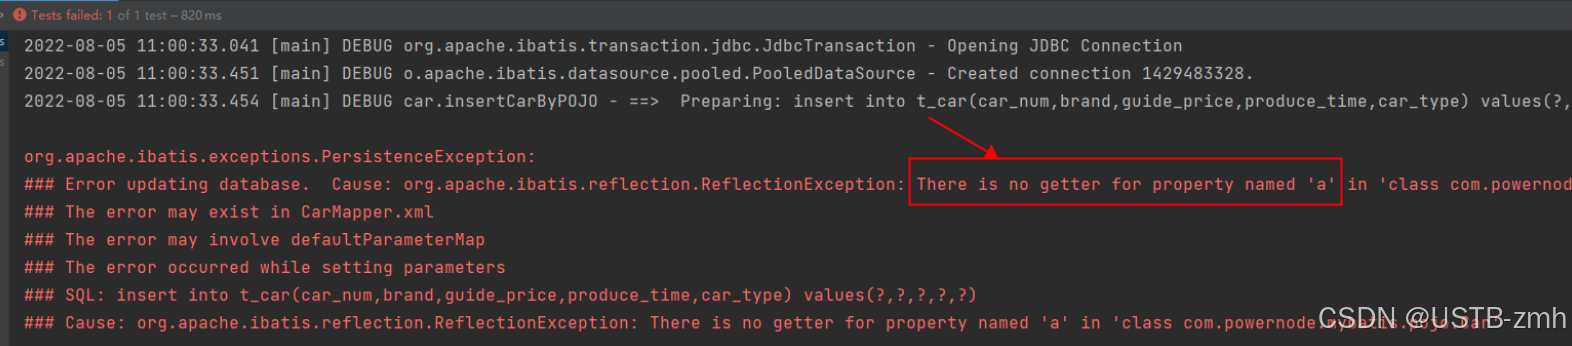
#{} 里写的是POJO的属性名,如果写成其他的会有问题吗?

 <insert id="insertCar">
            insert into t_car(id, car_num, brand, guide_price, produce_time, car_type)
            values (null, #{a}, #{brand}, #{guide_price}, #{produce_time}, #{car_type})
    </insert>
</mapper>
运行程序,出现了以下异常:
错误信息中描述:在Car类中没有找到a属性的getter方法。
修改POJO类Car的代码,只将getCarNum()方法名修改为getA(),其他代码不变,如下:
运行代码依旧成功。
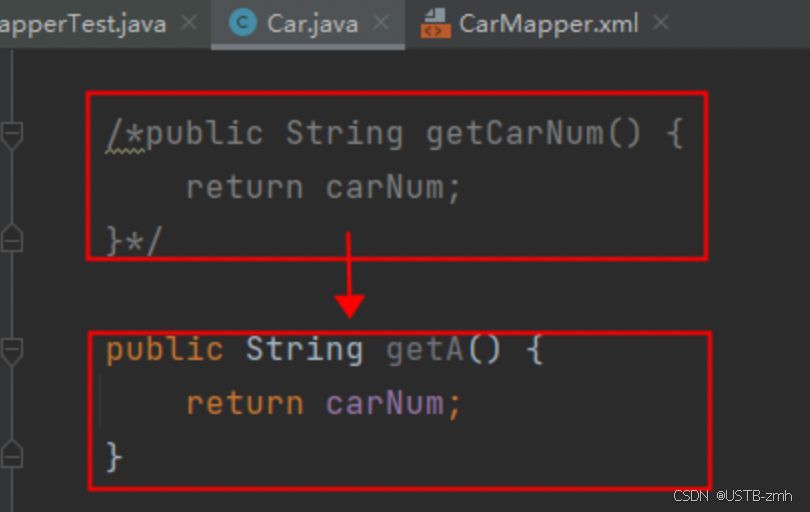
经过测试得出结论:
如果采用map集合传参,#{} 里写的是map集合的key,如果key不存在不会报错,数据库表中会插入NULL。
**如果采用POJO传参,#{} 里写的是get方法的方法名去掉get之后将剩下的单词首字母变小写(例如:getAge对应的是#{age},getUserName对应的是#{userName}),如果这样的get方法不存在会报错。**其实底层通过sql属性的名字#{属性名},去找到POJO的get方法得到POJO类的属性名,同时要求POJO类的属性名和表的字段名保持一致,因此得到的也是表的字段名,这种情况称为反射。
3.2 delete(Delete)
需求:根据car_num进行删除。
SQL语句这样写:
注意:当占位符只有一个的时候,${} 里面的内容可以随便写(不建议),会自动识别。
<delete id="deleteById">
        delete from t_car where id = #{car_num}
</delete>
Java程序这样写:
 @Test
    public void testDeleteById(){
        SqlSession sqlSession = SqlSessionUtil.openSession();
        // 执行sql语句
        int count = sqlSession.delete("deleteById", 8);
        System.out.println(count);
        sqlSession.commit();
        sqlSession.close();
    }
执行结果:
3.3 update(Update)
通过id修改各个字段的名
sql语句
<update id="updateById">
        update t_car set car_num = #{car_num}, brand = #{brand}, guide_price = #{guide_price}, produce_time = #{produce_time}, car_type = #{car_type} where id = #{id}
    </update>
java语句
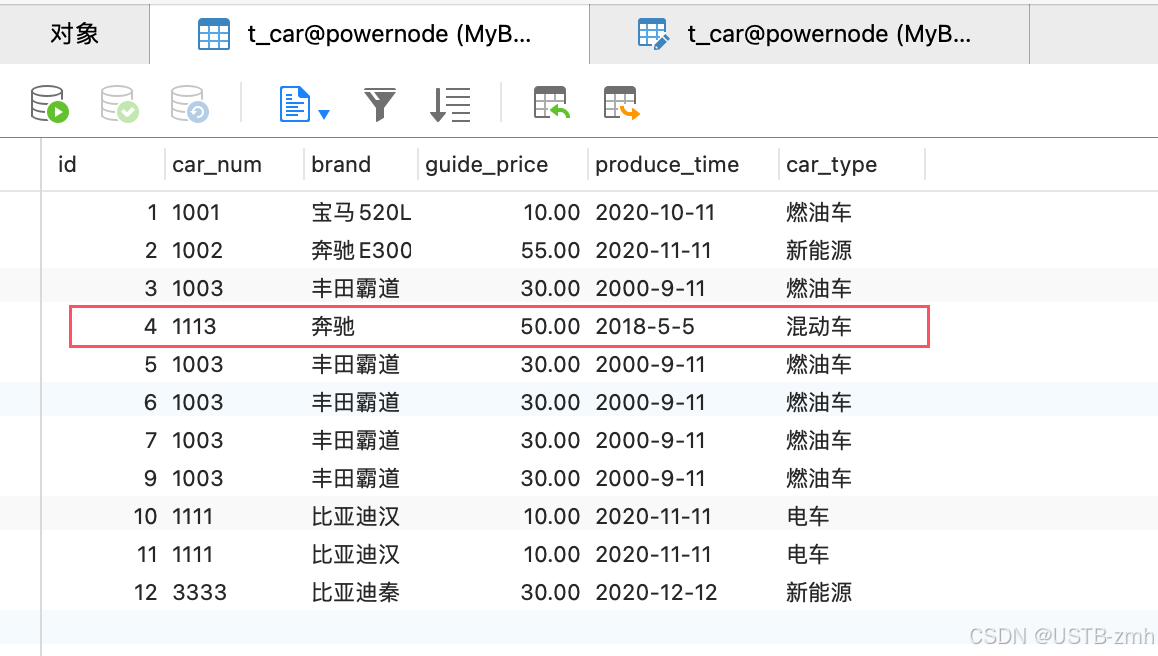
@Test
    public void testUpdateById(){
        SqlSession sqlSession = SqlSessionUtil.openSession();
        //准备数据
        Car car = new Car(4L, "1113", "奔驰", 50.0, "2018-5-5", "混动车");
        //执行sql语句
        int count = sqlSession.update("updateById", car);
        System.out.println(count);
        sqlSession.commit();
        sqlSession.close();
    }
运行结果:
当然使用map传数据也是可以的。
3.4 select(Retrieve)
3.4.1 查询一条数据
java程序:
@Test
    public void testSelectById(){
        SqlSession sqlSession = SqlSessionUtil.openSession();
        // 执行SQL语句,根据id查,只有一条数据返回
        Object car = sqlSession.selectOne("selectById", 5);
        System.out.println(car);
        sqlSession.close();
    }
sql语句:
    <select id="selectById" resultType="com.powernode.mybatis.pojo.Car">
        select * from t_car where id = #{id}
    </select>
必须要resultType来指定返回的数据需要封装成什么对象。
运行结果:
注意:Car类的属性名要与表的字段名保持一致,要不然会使得赋值失败。导致为null,或者在查询SQL起别名。


3.4.2 查询多条数据
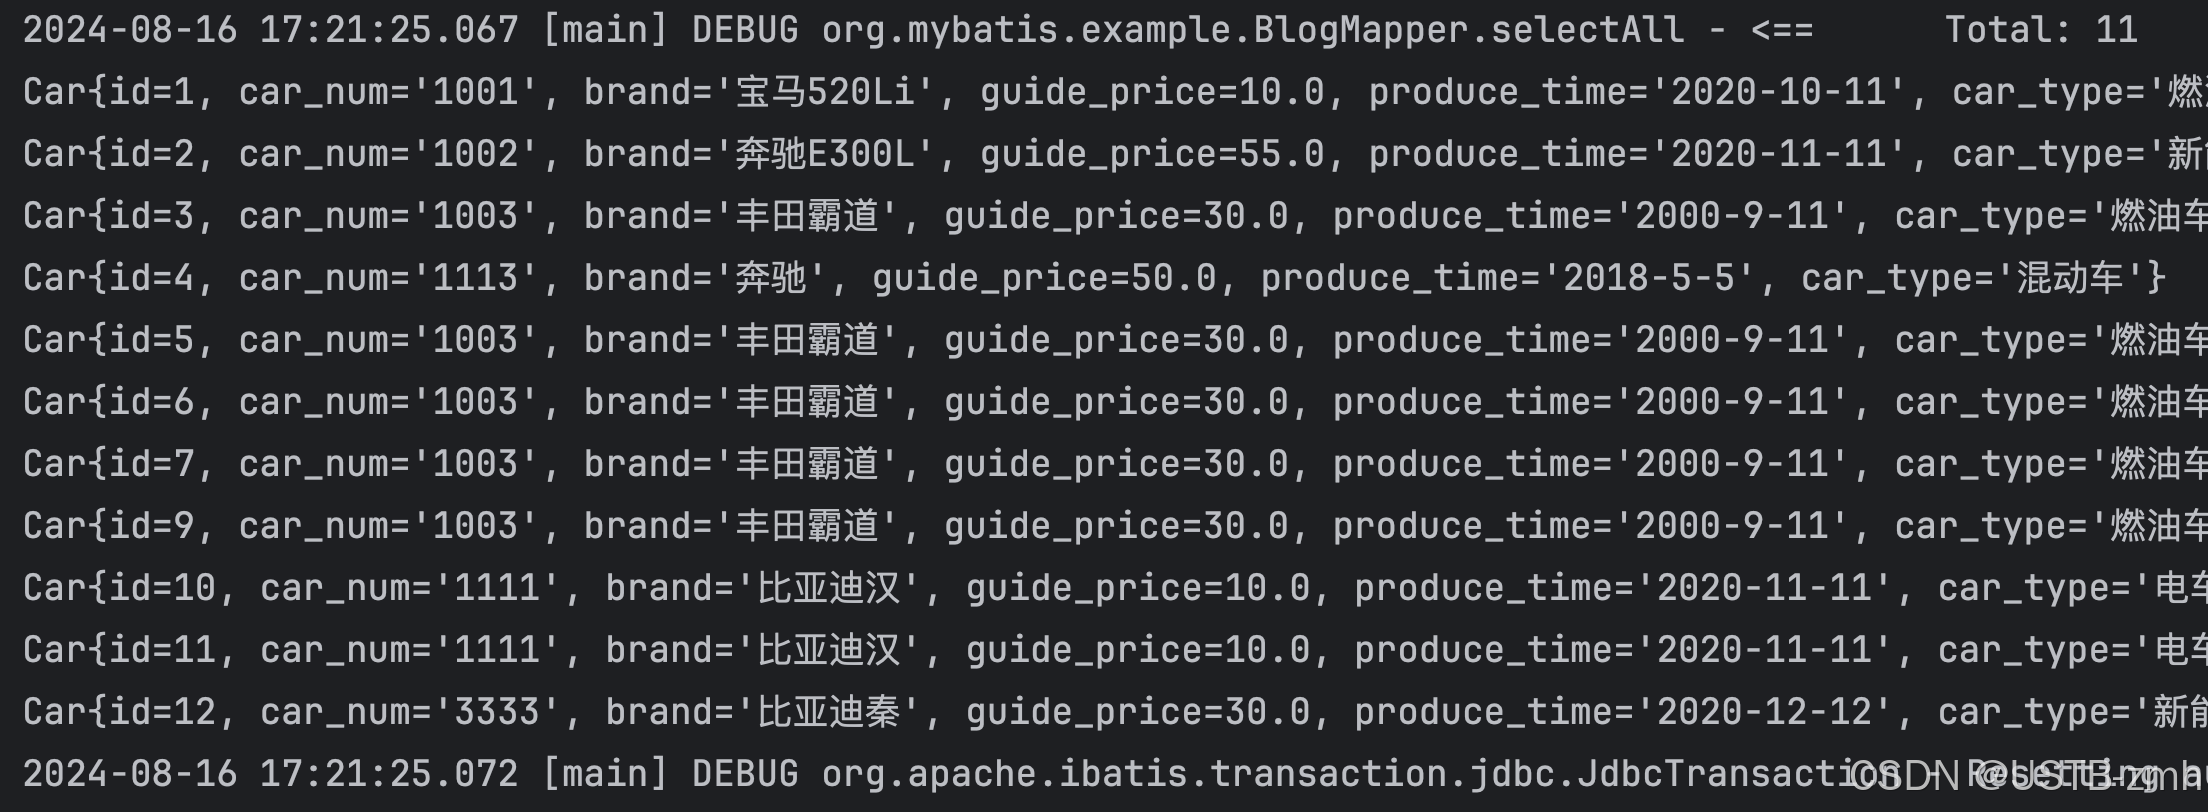
SQL语句:
    <select id="selectAll" resultType="com.powernode.mybatis.pojo.Car">
        select * from t_car
    </select>
java语句:
@Test
    public void testSelectAll(){
        SqlSession sqlSession = SqlSessionUtil.openSession();
        List<Object> selectAll = sqlSession.selectList("selectAll");
        selectAll.forEach(car -> System.out.println(car));
        sqlSession.close();
    }
运行结果:
3.5 关于SQL Mapper的namespace
在SQL Mapper配置文件中标签的namespace属性可以翻译为命名空间,这个命名空间主要是为了防止sql的Id冲突的。
四、MyBatis核心配置文件详解
<?xml version="1.0" encoding="UTF-8" ?>
<!DOCTYPE configuration
        PUBLIC "-//mybatis.org//DTD Config 3.0//EN"
        "http://mybatis.org/dtd/mybatis-3-config.dtd">
<configuration>

    <environments default="development">
        <environment id="development">
            <transactionManager type="JDBC"/>
            <dataSource type="POOLED">
                <property name="driver" value="com.mysql.cj.jdbc.Driver"/>
                <property name="url" value="jdbc:mysql://localhost:3306/powernode"/>
                <property name="username" value="root"/>
                <property name="password" value="123456"/>
            </dataSource>
        </environment>
    </environments>
    <mappers>
        <!--执行XxxMapper.xml文件的路径-->
        <!--resource属性默认自动会从类的根路径下开始查找资源-->
        <mapper resource="CarMapper.xml"/>
    </mappers>
</configuration>
- configuration:根标签,表示配置信息。
- environments:环境(多个),以“s”结尾表示复数,也就是说mybatis的环境可以配置多个数据源。
- default属性:表示默认使用的是哪个环境,default后面填写的是environment的id。default的值只需要和environment的id值一致即可。
- environment:具体的环境配置(主要包括:事务管理器的配置 + 数据源的配置)
- id:给当前环境一个唯一标识,该标识用在environments的default后面,用来指定默认环境的选择。
- transactionManager:配置事务管理器
- type属性:指定事务管理器具体使用什么方式,可选值包括两个
- JDBC:使用JDBC原生的事务管理机制。底层原理:事务开启conn.setAutoCommit(false); …处理业务…事务提交conn.commit();
- MANAGED:交给其它容器来管理事务,比如WebLogic、JBOSS等。如果没有管理事务的容器,则没有事务。没有事务的含义:只要执行一条DML语句,则提交一次。
- type属性:指定事务管理器具体使用什么方式,可选值包括两个
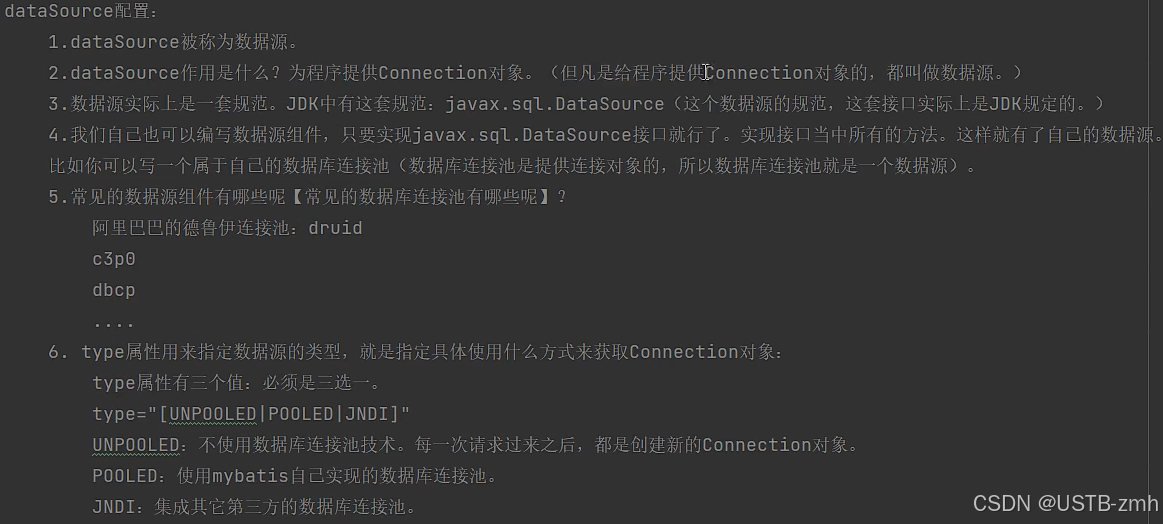
- dataSource:指定数据源
- type属性:用来指定具体使用的数据库连接池的策略,可选值包括三个
- UNPOOLED:采用传统的获取连接的方式,虽然也实现Javax.sql.DataSource接口,但是并没有使用池的思想。
- property可以是:
- driver 这是 JDBC 驱动的 Java 类全限定名。
- url 这是数据库的 JDBC URL 地址。
- username 登录数据库的用户名。
- password 登录数据库的密码。
- defaultTransactionIsolationLevel 默认的连接事务隔离级别。
- defaultNetworkTimeout 等待数据库操作完成的默认网络超时时间(单位:毫秒)
- property可以是:
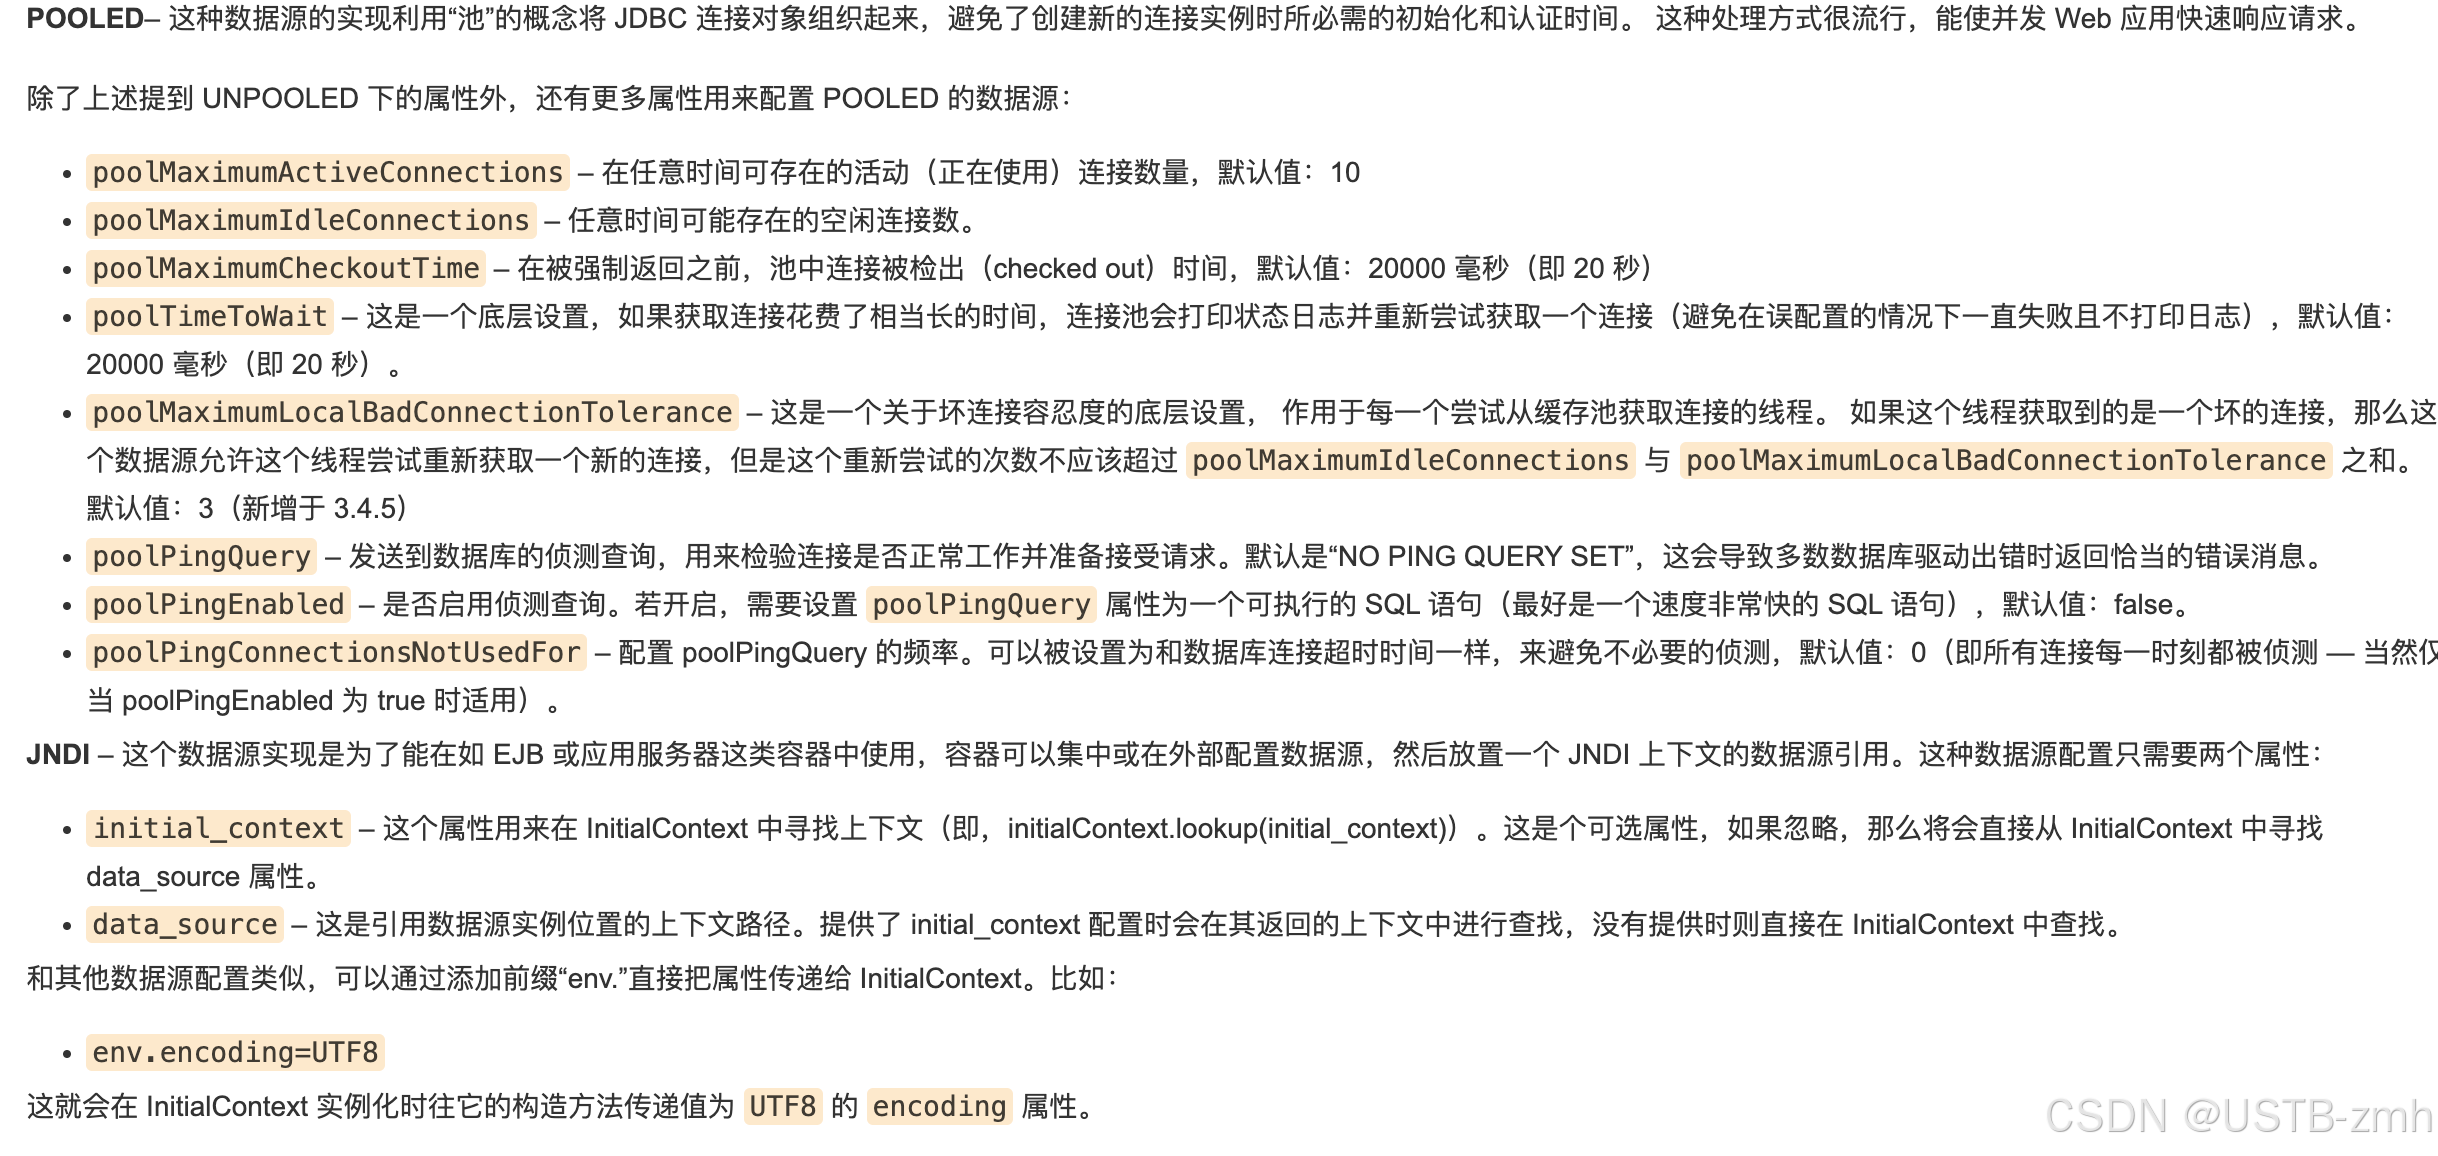
- POOLED:采用传统的javax.sql.DataSource规范中的连接池,mybatis中有针对规范的实现。
- property可以是(除了包含UNPOOLED中之外):
- poolMaximumActiveConnections 在任意时间可存在的活动(正在使用)连接数量,默认值:10
- poolMaximumIdleConnections 任意时间可能存在的空闲连接数。
- 其它…
- property可以是(除了包含UNPOOLED中之外):
- JNDI:采用服务器提供的JNDI技术实现,来获取DataSource对象,不同的服务器所能拿到DataSource是不一样。如果不是web或者maven的war工程,JNDI是不能使用的。
- property可以是(最多只包含以下两个属性):
- initial_context 这个属性用来在 InitialContext 中寻找上下文(即,initialContext.lookup(initial_context))这是个可选属性,如果忽略,那么将会直接从 InitialContext 中寻找 data_source 属性。
- data_source 这是引用数据源实例位置的上下文路径。提供了 initial_context 配置时会在其返回的上下文中进行查找,没有提供时则直接在 InitialContext 中查找。
- property可以是(最多只包含以下两个属性):
- UNPOOLED:采用传统的获取连接的方式,虽然也实现Javax.sql.DataSource接口,但是并没有使用池的思想。
- type属性:用来指定具体使用的数据库连接池的策略,可选值包括三个
- mappers:在mappers标签中可以配置多个sql映射文件的路径。
- mapper:配置某个sql映射文件的路径
- resource属性:使用相对于类路径的资源引用方式
- url属性:使用完全限定资源定位符(URL)方式
4.1 environment
创建一个新的数据库用于测试我这里为testmybatis:
mybatis-config.xml:
<?xml version="1.0" encoding="UTF-8" ?>
<!DOCTYPE configuration
        PUBLIC "-//mybatis.org//DTD Config 3.0//EN"
        "http://mybatis.org/dtd/mybatis-3-config.dtd">
<configuration>

    <!--一般一个数据库就会对应一个SqlSessionFactory对象。-->
    <!--一个环境environment会对应一个SqlSessionFactory。-->
    <environments default="development">

        <environment id="development">
            <transactionManager type="JDBC"/>
            <dataSource type="POOLED">
                <property name="driver" value="com.mysql.cj.jdbc.Driver"/>
                <property name="url" value="jdbc:mysql://localhost:3306/powernode"/>
                <property name="username" value="root"/>
                <property name="password" value="zmh0527!"/>
            </dataSource>
        </environment>

        <!--这是另一个数据库-->
        <environment id="testDB">
            <transactionManager type="JDBC"/>
            <dataSource type="POOLED">
                <property name="driver" value="com.mysql.cj.jdbc.Driver"/>
                <property name="url" value="jdbc:mysql://localhost:3306/testmybatis"/>
                <property name="username" value="root"/>
                <property name="password" value="zmh0527!"/>
            </dataSource>
        </environment>

    </environments>
    <mappers>
        <!--执行XxxMapper.xml文件的路径-->
        <!--resource属性默认自动会从类的根路径下开始查找资源-->
        <mapper resource="CarMapper.xml"/>
        <mapper resource="TestDB.xml"/>
    </mappers>
</configuration>
TestDB.xml
<?xml version="1.0" encoding="UTF-8" ?>
<!DOCTYPE mapper
        PUBLIC "-//mybatis.org//DTD Mapper 3.0//EN"
        "http://mybatis.org/dtd/mybatis-3-mapper.dtd">
<mapper namespace="bbbbb">
    <!--insert语句,id是这条SQL语句的唯一标识。这个id就代表了这条SQL语句。-->
    <insert id="insertCar">
        insert into t_car values (null, '8888', '沃尔沃', 33.3, '2000-11-11', '燃油车')
    </insert>
</mapper>
java代码:
@Test
public void testEnvironment() throws Exception {
//获取SqlSessionFactory对象(采取默认方式)
SqlSessionFactoryBuilder sqlSessionFactoryBuilder = new SqlSessionFactoryBuilder();
//这种方式就是获取的默认环境
SqlSessionFactory build = sqlSessionFactoryBuilder.build(Resources.getResourceAsStream("mybatis-config.xml"));
SqlSession sqlSession = build.openSession();
//执行sql语句
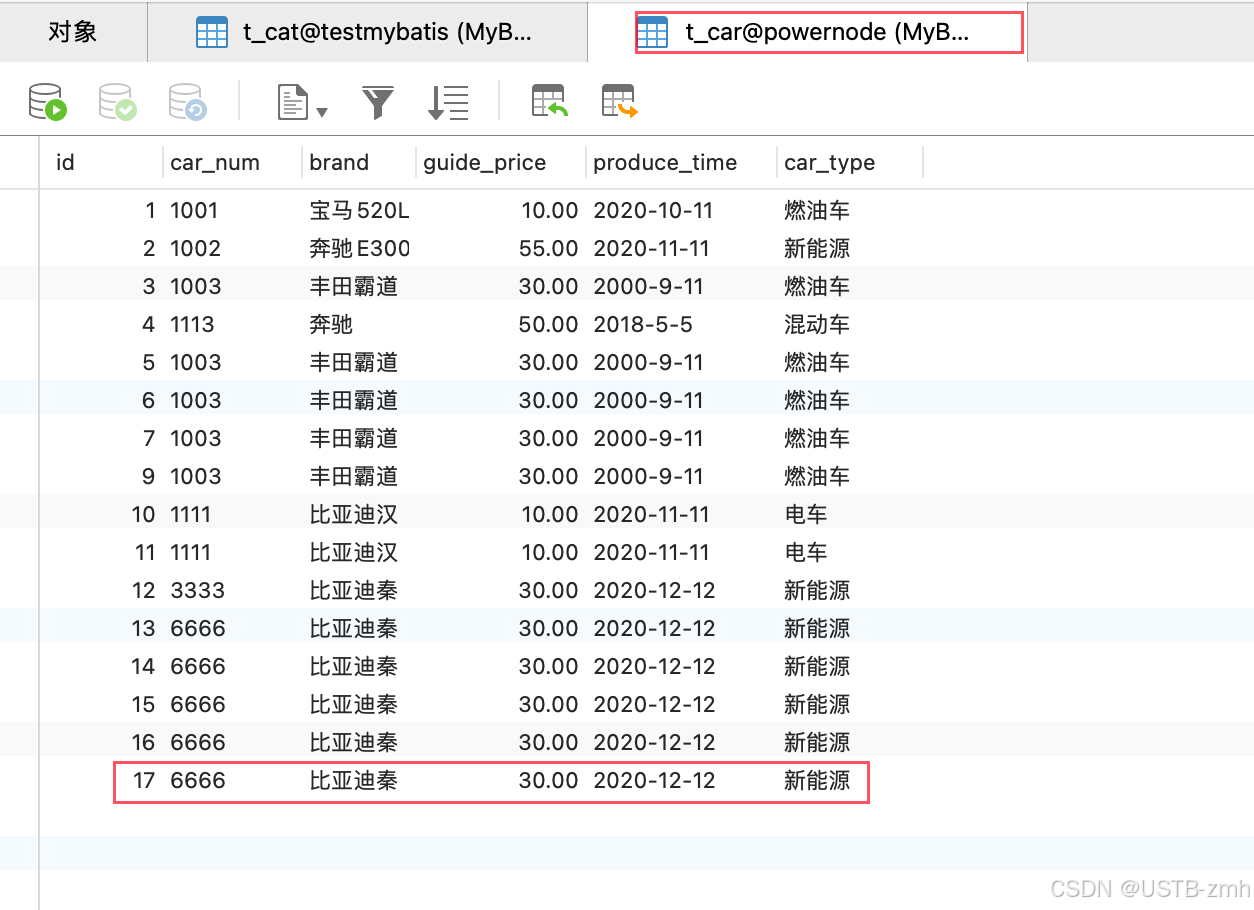
Car car = new Car(null, "6666", "比亚迪秦", 30.0, "2020-12-12", "新能源");
sqlSession.insert("aaaaa.insertCar", car);
sqlSession.commit();
sqlSession.close();
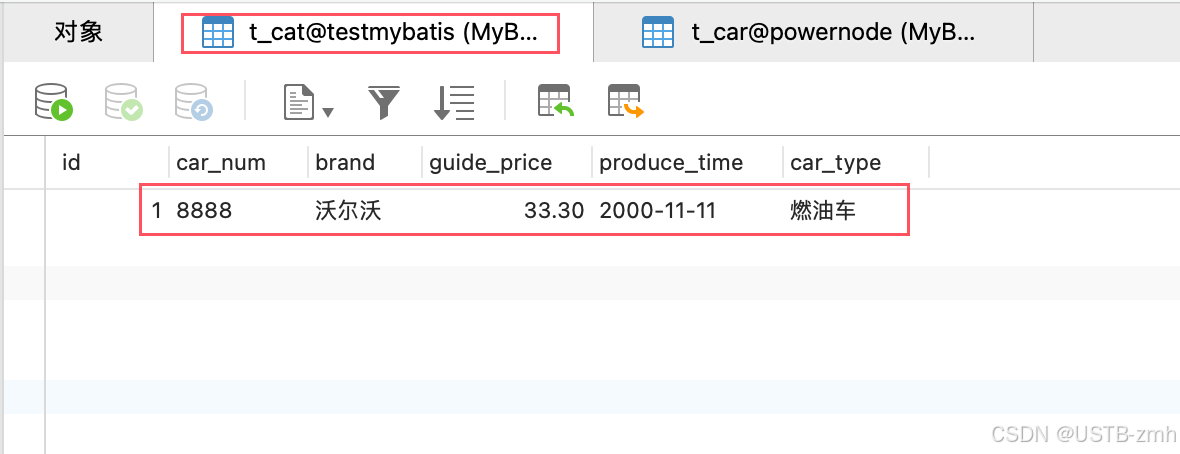
//这种方式通过环境id来使用指定的环境
SqlSessionFactory build1 = sqlSessionFactoryBuilder.build(Resources.getResourceAsStream("mybatis-config.xml"), "testDB");
SqlSession sqlSession1 = build1.openSession();
sqlSession1.insert("bbbbb.insertCar");
sqlSession1.commit();
sqlSession1.close();
}
运行结果:
4.2 transactionManager
当事务管理器是:JDBC
- 采用JDBC的原生事务机制:
- 开启事务:conn.setAutoCommit(false);
- 处理业务…
- 提交事务:conn.commit();
当事务管理器是:MANAGED
- 交给容器去管理事务,但目前使用的是本地程序,没有容器的支持,当mybatis找不到容器的支持时:没有事务。也就是说只要执行一条DML语句,则提交一次。
官网:MANAGED – 这个配置几乎没做什么。它从不提交或回滚一个连接,而是让容器来管理事务的整个生命周期(比如 JEE 应用服务器的上下文)。 默认情况下它会关闭连接。然而一些容器并不希望连接被关闭,因此需要将 closeConnection 属性设置为 false 来阻止默认的关闭行为。
4.3 dataSource

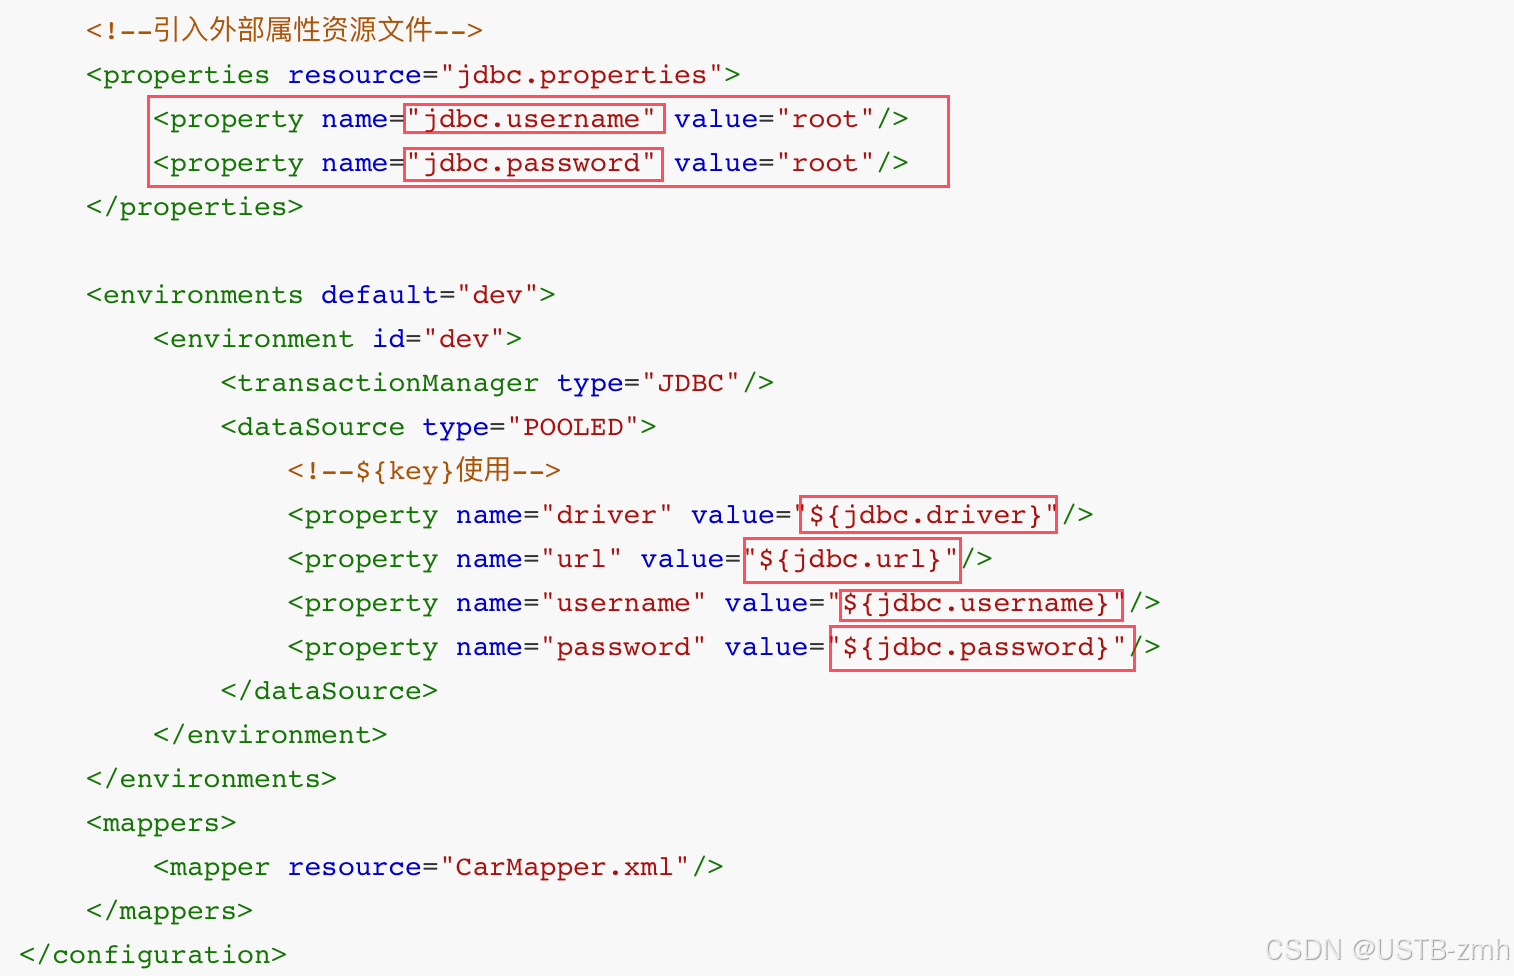
4.4 properties
mybatis提供了更加灵活的配置,连接数据库的信息可以单独写到一个属性资源文件中,假设在类的根路径下创建jdbc.properties文件,配置如下:
jdbc.driver=com.mysql.cj.jdbc.Driver
jdbc.url=jdbc:mysql://localhost:3306/powernode
properties两个属性:
resource:这个属性从类的根路径下开始加载。【常用的。】
url:从指定的url加载,假设文件放在d:/jdbc.properties,这个url可以写成:file:///d:/jdbc.properties。注意是三个斜杠哦。
注意:如果不知道mybatis-config.xml文件中标签的编写顺序的话,可以有两种方式知道它的顺序:
- 第一种方式:查看dtd约束文件。
- 第二种方式:通过idea的报错提示信息。【一般采用这种方式】
4.5 mapper
mapper标签用来指定SQL映射文件的路径,包含多种指定方式,这里先主要看其中两种:
第一种:resource,从类的根路径下开始加载【比url常用】
<mappers>
  <mapper resource="CarMapper.xml"/>
</mappers>
如果是这样写的话,必须保证类的根下有CarMapper.xml文件。
如果类的根路径下有一个包叫做test,CarMapper.xml如果放在test包下的话,这个配置应该是这样写:
<mappers>
  <mapper resource="test/CarMapper.xml"/>
</mappers>
第二种:url,从指定的url位置加载,不建议,因为移植的话,文件位置会变,需要修改代码!
假设CarMapper.xml文件放在d盘的根下,这个配置就需要这样写:
<mappers>
  <mapper url="file:///d:/CarMapper.xml"/>
</mappers>
五、在WEB中应用MyBatis(使用MVC架构模式)
实现功能:
- 银行账户转账
使用技术:
- HTML + Servlet + MyBatis
WEB应用的名称:
- bank
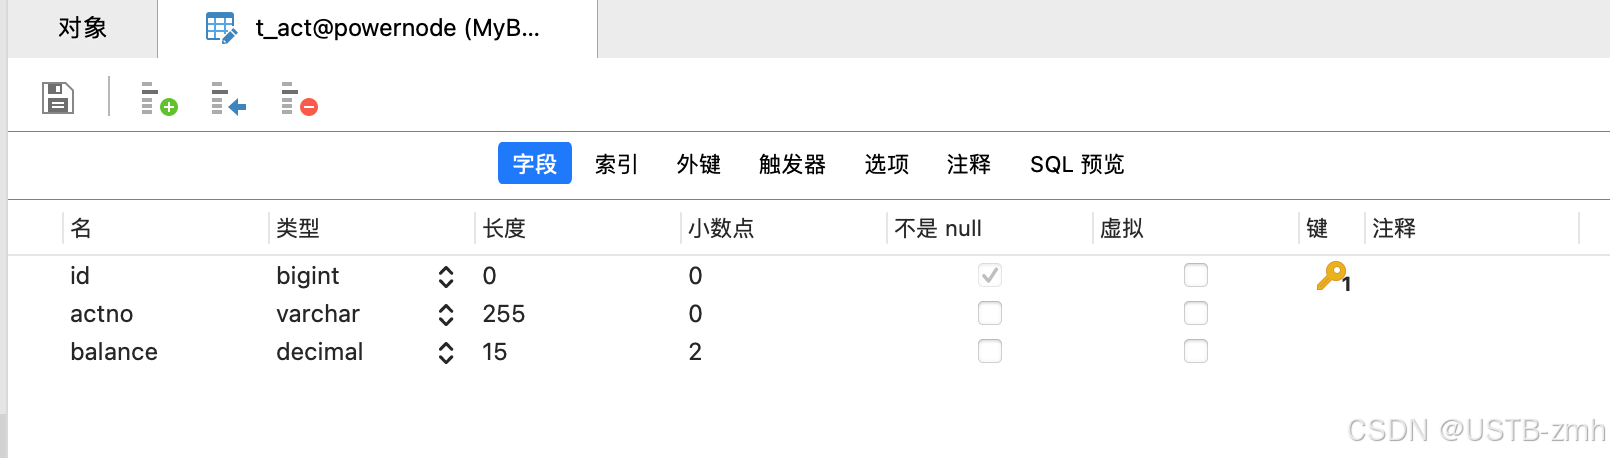
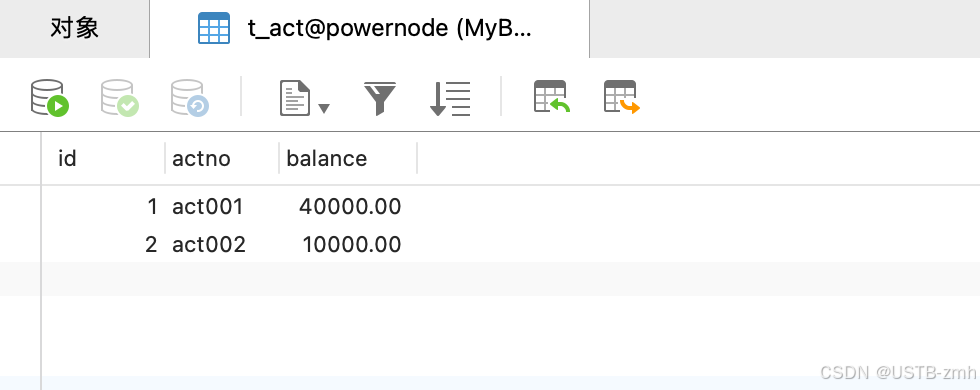
5.1 数据库表的设计和准备数据

5.2 实现步骤
5.2.1 第一步:环境搭建
创建一个maven web工程。
web.xml文件的版本较低,可以从tomcat10的样例文件中复制,然后修改
<?xml version="1.0" encoding="UTF-8"?>
<web-app xmlns="https://jakarta.ee/xml/ns/jakartaee"
         xmlns:xsi="http://www.w3.org/2001/XMLSchema-instance"
         xsi:schemaLocation="https://jakarta.ee/xml/ns/jakartaee
                      https://jakarta.ee/xml/ns/jakartaee/web-app_5_0.xsd"
         version="5.0"
         metadata-complete="true">

</web-app>
- 删除index.jsp文件,因为我们这个项目不使用JSP。只使用html。
- 确定pom.xml文件中的打包方式是war包。
- 引入相关依赖
- 编译器版本修改为17
- 引入的依赖包括:mybatis,mysql驱动,junit,logback,servlet。
<!--mybatis依赖-->
        <dependency>
            <groupId>org.mybatis</groupId>
            <artifactId>mybatis</artifactId>
            <version>3.5.10</version>
        </dependency>
        <!--mysql驱动依赖-->
        <dependency>
            <groupId>mysql</groupId>
            <artifactId>mysql-connector-java</artifactId>
            <version>8.0.30</version>
        </dependency>
        <!--junit依赖-->
        <dependency>
            <groupId>junit</groupId>
            <artifactId>junit</artifactId>
            <version>4.13.2</version>
            <scope>test</scope>
        </dependency>
        <!--logback依赖-->
        <dependency>
            <groupId>ch.qos.logback</groupId>
            <artifactId>logback-classic</artifactId>
            <version>1.2.11</version>
        </dependency>
        <!--servlet依赖-->
        <dependency>
            <groupId>jakarta.servlet</groupId>
            <artifactId>jakarta.servlet-api</artifactId>
            <version>5.0.0</version>
            <scope>provided</scope>
        </dependency>
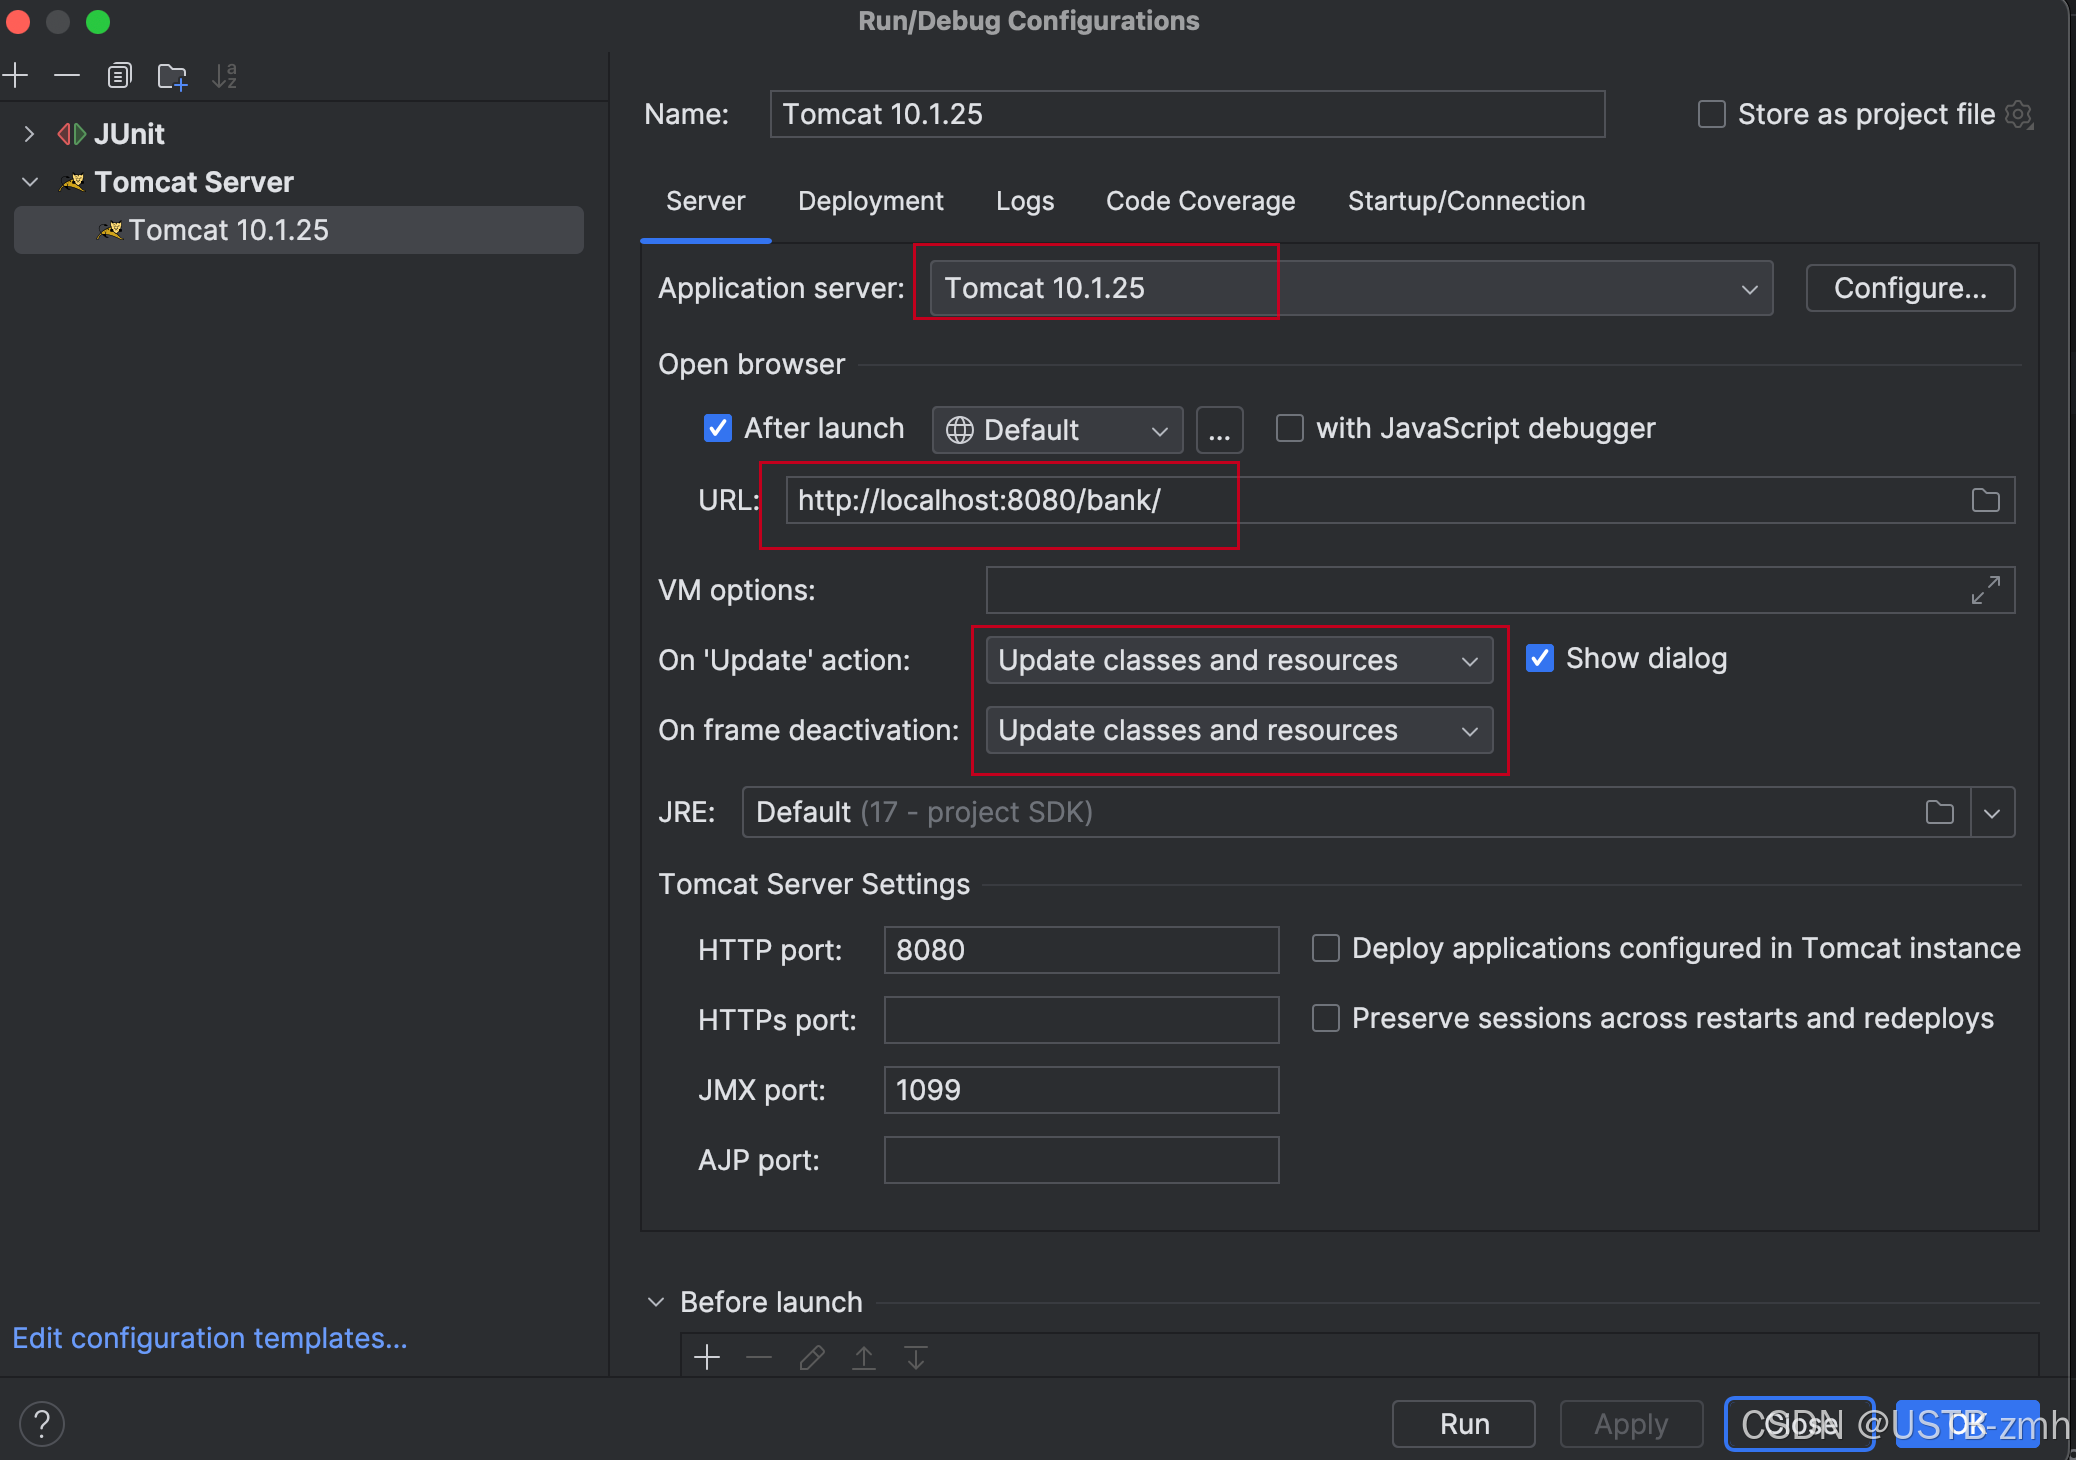
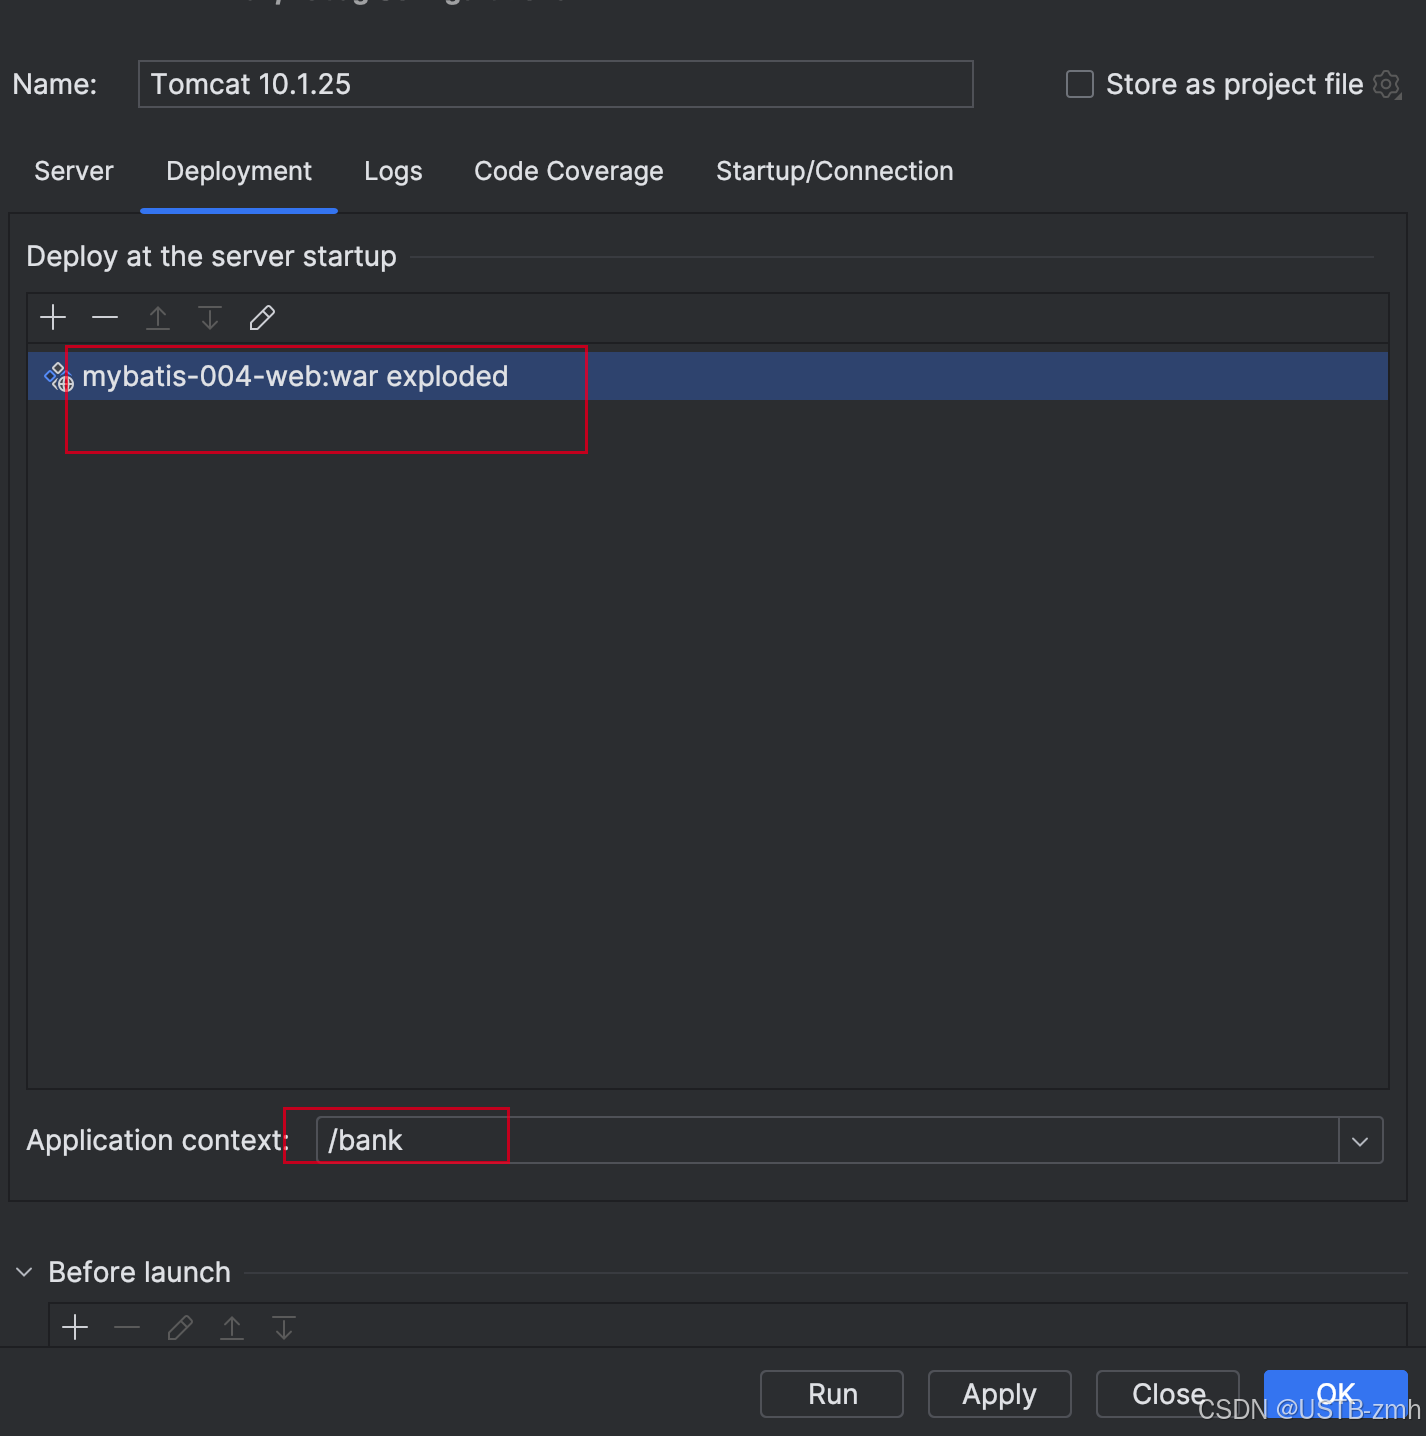
配置Tomcat
引入相关配置文件,放到resources目录下(全部放到类的根路径下)
- mybatis-config.xml
- AccountMapper.xml
- logback.xml
- jdbc.properties
jdbc.driver=com.mysql.cj.jdbc.Driver
jdbc.url=jdbc:mysql://localhost:3306/powernode
jdbc.username=root
jdbc.password=root
<?xml version="1.0" encoding="UTF-8" ?>
<!DOCTYPE configuration
        PUBLIC "-//mybatis.org//DTD Config 3.0//EN"
        "http://mybatis.org/dtd/mybatis-3-config.dtd">
<configuration>

    <properties resource="jdbc.properties"/>

    <environments default="dev">
        <environment id="dev">
            <transactionManager type="JDBC"/>
            <dataSource type="POOLED">
                <property name="driver" value="${jdbc.driver}"/>
                <property name="url" value="${jdbc.url}"/>
                <property name="username" value="${jdbc.username}"/>
                <property name="password" value="${jdbc.password}"/>
            </dataSource>
        </environment>
    </environments>
    <mappers>
        <mapper resource="AccountMapper.xml"/>
    </mappers>
</configuration>
<?xml version="1.0" encoding="UTF-8" ?>
<!DOCTYPE mapper
        PUBLIC "-//mybatis.org//DTD Mapper 3.0//EN"
        "http://mybatis.org/dtd/mybatis-3-mapper.dtd">

<mapper namespace="account">

</mapper>
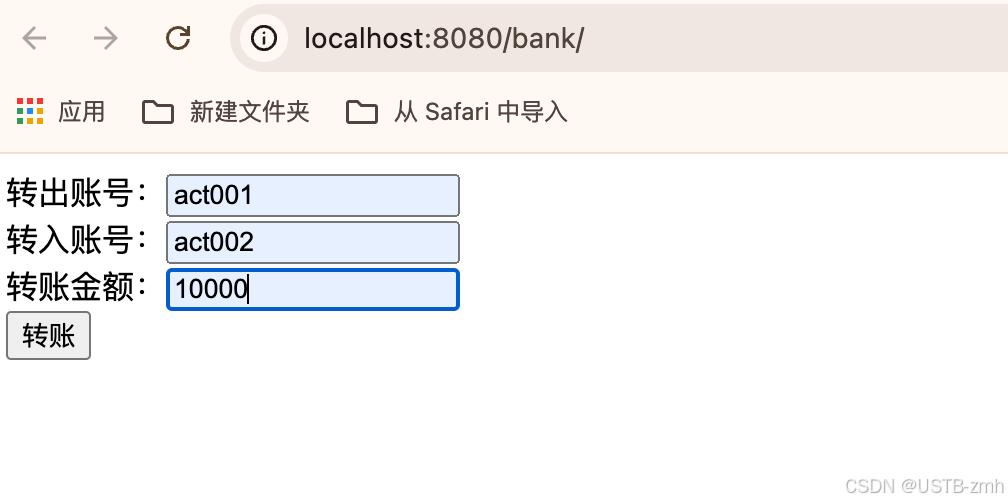
5.2.2 第二步:前端页面index.html
<!DOCTYPE html>
<html lang="en">
<head>
    <meta charset="UTF-8">
    <title>银行账户转账</title>
</head>
<body>
<form action="/bank/transfer" method="post">
  转出账号:<input type="text" name="fromAction"><br>
  转入账号:<input type="text" name="toActno"><br>
  转账金额:<input type="text" name="money"><br>
  <input type="submit" value="转账">

</form>
</body>
</html>
5.2.3 第三步:创建pojo包、service包、dao包、web包、utils包
- com.powernode.bank.pojo
- com.powernode.bank.service
- com.powernode.bank.service.impl
- com.powernode.bank.dao
- com.powernode.bank.dao.impl
- com.powernode.bank.web.controller
- com.powernode.bank.exception
- com.powernode.bank.utils:将之前编写的SqlSessionUtil工具类拷贝到该包下。
5.2.4 第四步:定义pojo类:Account
无参构造、有参构造、tostrig()、get set方法以省略。
public class Account {
    private Long id;
    private String actno;
    private Double balance;
}
5.2.5 第五步:编写AccountDao接口,以及AccountDaoImpl实现类
分析dao中至少要提供几个方法,才能完成转账:
- 转账前需要查询余额是否充足:selectByActno
- 转账时要更新账户:update
//负责数据库 t_act表的crud
//DAO对象中的任何一个方法和业务不挂钩,没有任何业务逻辑在里面
//DAO中的方法就是做CRUD的,所以方法名大部分为:insertXXX deleteXXX updateXXX selectXXX
public interface AccountDao {
    //根据账户查询账户信息
    Account selectByActno(String actno);

    //更新账户信息
    int updateByActno(Account act);
}
public class AccountDaoImpl implements AccountDao {
    @Override
    public Account selectByActno(String actno) {
        SqlSession sqlSession = SqlSessionUtil.openSession();
        Account account = (Account) sqlSession.selectOne("account.selectByActno", actno);
        return account;
    }

    @Override
    public int updateByActno(Account act) {
        SqlSession sqlSession = SqlSessionUtil.openSession();
        int update = sqlSession.update("account.updateByActno", act);
        return update;
    }
}
5.2.6 第六步:AccountDaoImpl中编写了mybatis代码,需要编写SQL映射文件了
<?xml version="1.0" encoding="UTF-8" ?>
<!DOCTYPE mapper
        PUBLIC "-//mybatis.org//DTD Mapper 3.0//EN"
        "http://mybatis.org/dtd/mybatis-3-mapper.dtd">
<mapper namespace="account">
    <select id="selectByActno" resultType="com.powernode.bank.pojo.Account">
        select * from t_act where actno = #{actno}
    </select>

    <update id="updateByActno">
        update t_act set balance = #{balance} where actno = #{actno}
    </update>

</mapper>
5.2.7 第七步:编写AccountService接口以及AccountServiceImpl
测试的异常
public class MoneyNotEnoughException extends Exception{
    public MoneyNotEnoughException(){}
    public MoneyNotEnoughException(String msg){
        super(msg);
    }
}
public class TransferException extends Exception{
    public TransferException(){}
    public TransferException(String msg){
        super(msg);
    }
}
public interface AccountService {
    //账户转账业务(起名要 见名知意)
    void transfer(String fromActno, String toActno, double money) throws MoneyNotEnoughException, TransferException;
}
public class AccountServiceImpl implements AccountService {

    private AccountDao accountDao = new AccountDaoImpl();

    @Override
    public void transfer(String fromActno, String toActno, double money) throws MoneyNotEnoughException, TransferException {
        //添加事务控制代码
        SqlSession sqlSession = SqlSessionUtil.openSession();

        // 1、判断转出账户的余额是否充足(select)
        // 2、如果转出账户余额不充足,提示用户
        Account fromAct = accountDao.selectByActno(fromActno);
        if(fromAct.getBalance() < money){
            throw new MoneyNotEnoughException("对不起,余额不足!");
        }
        // 3、如果充足,更新转出账户余额(update)
        //先更新内存中java对象account的余额
        Account toAct = accountDao.selectByActno(toActno);
        fromAct.setBalance(fromAct.getBalance() - money);
        toAct.setBalance(toAct.getBalance() + money);
        int count = accountDao.updateByActno(fromAct);

        //模拟异常
        String s = null;
        s.toString();


        // 4、更新转入账户余额(update)
        count += accountDao.updateByActno(toAct);
        if(count != 2){
            throw new TransferException("转账异常!!!");
        }

        //提交事务
        sqlSession.commit();
        //关闭事务
        SqlSessionUtil.close(sqlSession);
    }
}
5.2.8 第八步:编写AccountController
@WebServlet("/transfer")
public class AccountServlet extends HttpServlet {

    //为了让这个对象在其他方法中也可以用,声明为实例变量
    private AccountService accountService = new AccountServiceImpl();

    @Override
    protected void doPost(HttpServletRequest request, HttpServletResponse response)
            throws ServletException, IOException {
    //获取表单数据
        String fromActno = request.getParameter("fromActno");
        String toActno = request.getParameter("toActno");
        double money = Double.parseDouble(request.getParameter("money"));
    //调用service的转账方法完成转账(调业务层)
        try {
            //调用service的转账方法完成转账(调业务层)
            accountService.transfer(fromActno,toActno,money);
            //程序到这表示转账成功了
            //调用view展示结果
            response.sendRedirect(request.getContextPath() + "/success.html");
        } catch (MoneyNotEnoughException e) {
            response.sendRedirect(request.getContextPath() + "/error1.html");
        } catch (TransferException e) {
            response.sendRedirect(request.getContextPath() + "/error2.html");
        } catch (Exception e){
            response.sendRedirect(request.getContextPath() + "/error2.html");
        }
    }
}
5.2.9 第九步:重新编写工具类
public class SqlSessionUtil {

    // 工具类的构造方法一般都是私有化的
    // 工具类所有的方法都是静态的,直接采用类名即可调用,不需要new对象。
    // 为了防止new对象,构造方法私有化
    private SqlSessionUtil(){}

    private static SqlSessionFactory sqlSessionFactory;

    // 类加载时执行
    // SqlSessionFactory对象:一个SqlSessionFactory对应一个environment,一个environment通常是一个数据库。
    // SqlSessionUtil工具类在进行第一次加载的时候,解析mybatis-config.xml文件,创建SqlSessionFactory对象
    static {
        try {
            sqlSessionFactory = new SqlSessionFactoryBuilder().build(getResourceAsReader("mybatis-config.xml"));
        } catch (IOException e) {
            throw new RuntimeException(e);
        }

    }

    //全局的,服务器级别的,一个服务器当中定义一个即可。
    //为什么把sqlSession对象放到ThreadLocal当中呢?为了保证一个线程对应一个SqlSession
    private static ThreadLocal<SqlSession> local = new ThreadLocal<>();


    // 获取会话对象
    public static SqlSession openSession(){
        SqlSession sqlSession = local.get();
        if(sqlSession == null){
            sqlSession = sqlSessionFactory.openSession();
            //将sqlSession对象绑定到当前线程上
            local.set(sqlSession);
        }
        return sqlSession;
    }

    //关闭sqlSession对象(从当前线程中移除SqlSession对象)
    public static void close(SqlSession sqlSession){
        if(sqlSession != null){
            sqlSession.close();
            //注意移除SqlSession对象和当前线程的绑定关系
            //因为Tomcat服务器支持线程池,也就是说:用过的线程对象t1,可能下一次还会使用这个t1线程。
            local.remove();
        }
    }

}
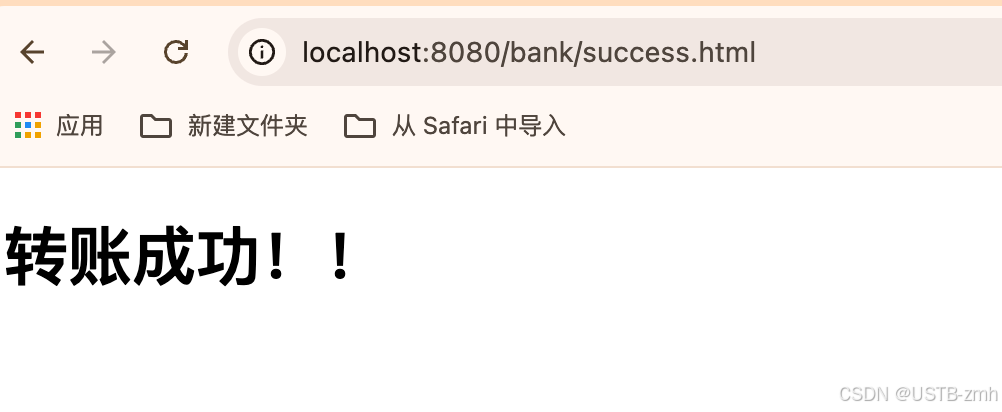
5.2.10 第十步:测试
启动服务器
把模拟异常的代码注释掉,然后测试转账,结果如下:
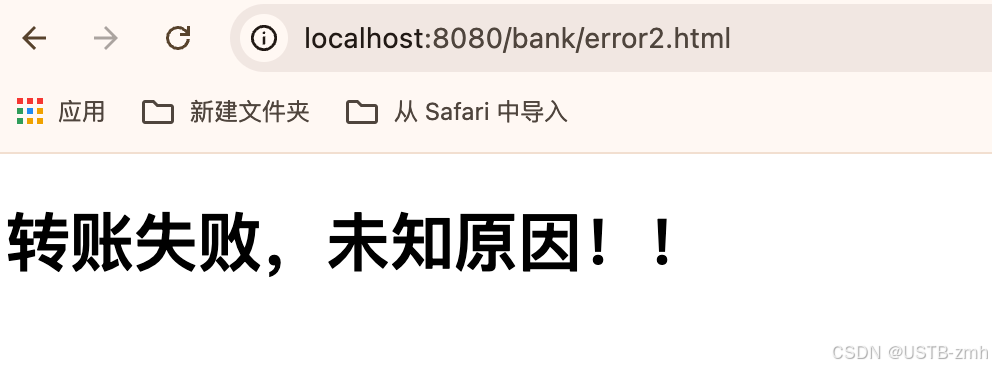
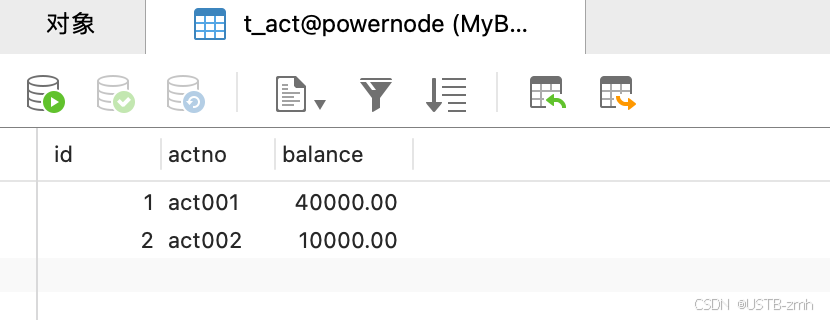
加上模拟异常的代码进行测试:
可知转账失败,数据库也并未做出改变。
原因:我们这里的SqlSession对象存储在了ThreadLocal当中,因此一个线程只有一个sqlSession对象,每次进行sql操作的时候用的就是ThreadLocal中的SqlSession对象,因此事务的提交和SqlSession对象的关闭需要在Service的末尾即程序正常运行了,这时候再去提交事务。如果在Dao层的sql操作中对事务进行提交,那么当Service层出现异常的时候,不能阻止sql的改变,因为在执行sql完成之后就已经对数据库进行操作了,这样会出现数据丢失的情况。
5.3 MyBatis对象作用域
Mybatis核心对象的作用域和生命周期
SqlSessionFactoryBuilder
这个类可以被实例化、使用和丢弃,一旦创建了 SqlSessionFactory,就不再需要它了。 因此 SqlSessionFactoryBuilder 实例的最佳作用域是方法作用域(也就是局部方法变量)。 你可以重用 SqlSessionFactoryBuilder 来创建多个 SqlSessionFactory 实例,但最好还是不要一直保留着它,以保证所有的 XML 解析资源可以被释放给更重要的事情。
SqlSessionFactory
SqlSessionFactory 一旦被创建就应该在应用的运行期间一直存在,没有任何理由丢弃它或重新创建另一个实例。 使用 SqlSessionFactory 的最佳实践是在应用运行期间不要重复创建多次,多次重建 SqlSessionFactory 被视为一种代码“坏习惯”。因此 SqlSessionFactory 的最佳作用域是应用作用域。 有很多方法可以做到,最简单的就是使用单例模式或者静态单例模式。
SqlSession
每个线程都应该有它自己的 SqlSession 实例。SqlSession 的实例不是线程安全的,因此是不能被共享的,所以它的最佳的作用域是请求或方法作用域。 绝对不能将 SqlSession 实例的引用放在一个类的静态域,甚至一个类的实例变量也不行。 也绝不能将 SqlSession 实例的引用放在任何类型的托管作用域中,比如 Servlet 框架中的 HttpSession。 如果你现在正在使用一种 Web 框架,考虑将 SqlSession 放在一个和 HTTP 请求相似的作用域中。 换句话说,每次收到 HTTP 请求,就可以打开一个 SqlSession,返回一个响应后,就关闭它。 这个关闭操作很重要,为了确保每次都能执行关闭操作,你应该把这个关闭操作放到 finally 块中。 下面的示例就是一个确保 SqlSession 关闭的标准模式:
try (SqlSession session = sqlSessionFactory.openSession()) {
  // 你的应用逻辑代码
}
在所有代码中都遵循这种使用模式,可以保证所有数据库资源都能被正确地关闭。
六、使用javassist生成类
Javassist是一个开源的分析、编辑和创建Java字节码的类库。是由东京工业大学的数学和计算机科学系的 Shigeru Chiba (千叶 滋)所创建的。它已加入了开放源代码JBoss 应用服务器项目,通过使用Javassist对字节码操作为JBoss实现动态"AOP"框架。
6.1 Javassist的使用
首先要引入它的依赖
<dependency>
  <groupId>org.javassist</groupId>
  <artifactId>javassist</artifactId>
  <version>3.29.1-GA</version>
</dependency>
样例代码:
public class JavassistTest {

    @Test
    public void testGenerateFirstClass() throws Exception{
        //获取类池,这个类池就是用来给我生成class的
        ClassPool pool = ClassPool.getDefault();
        //制造类(需要告诉javassist 类名是啥)
        CtClass ctClass = pool.makeClass("com.powernode.bank.dao.impl.AccountDaoImpl");
        //制造方法
        String methodCode = "public void insert(){System.out.println(123);}";
        CtMethod ctMethod = CtMethod.make(methodCode, ctClass);
        //将方法添加到类中
        ctClass.addMethod(ctMethod);
        //在内存中生成class
        ctClass.toClass();


        // 类加载到JVM当中,返回AccountDaoImpl类的字节码
        Class<?> clazz = Class.forName("com.powernode.bank.dao.impl.AccountDaoImpl");
        // 创建对象
        Object object = clazz.newInstance();
        // 获取AccountDaoImpl中的insert方法
        Method insert = clazz.getDeclaredMethod("insert");
        //调用方法insert
        insert.invoke(object);
    }
}
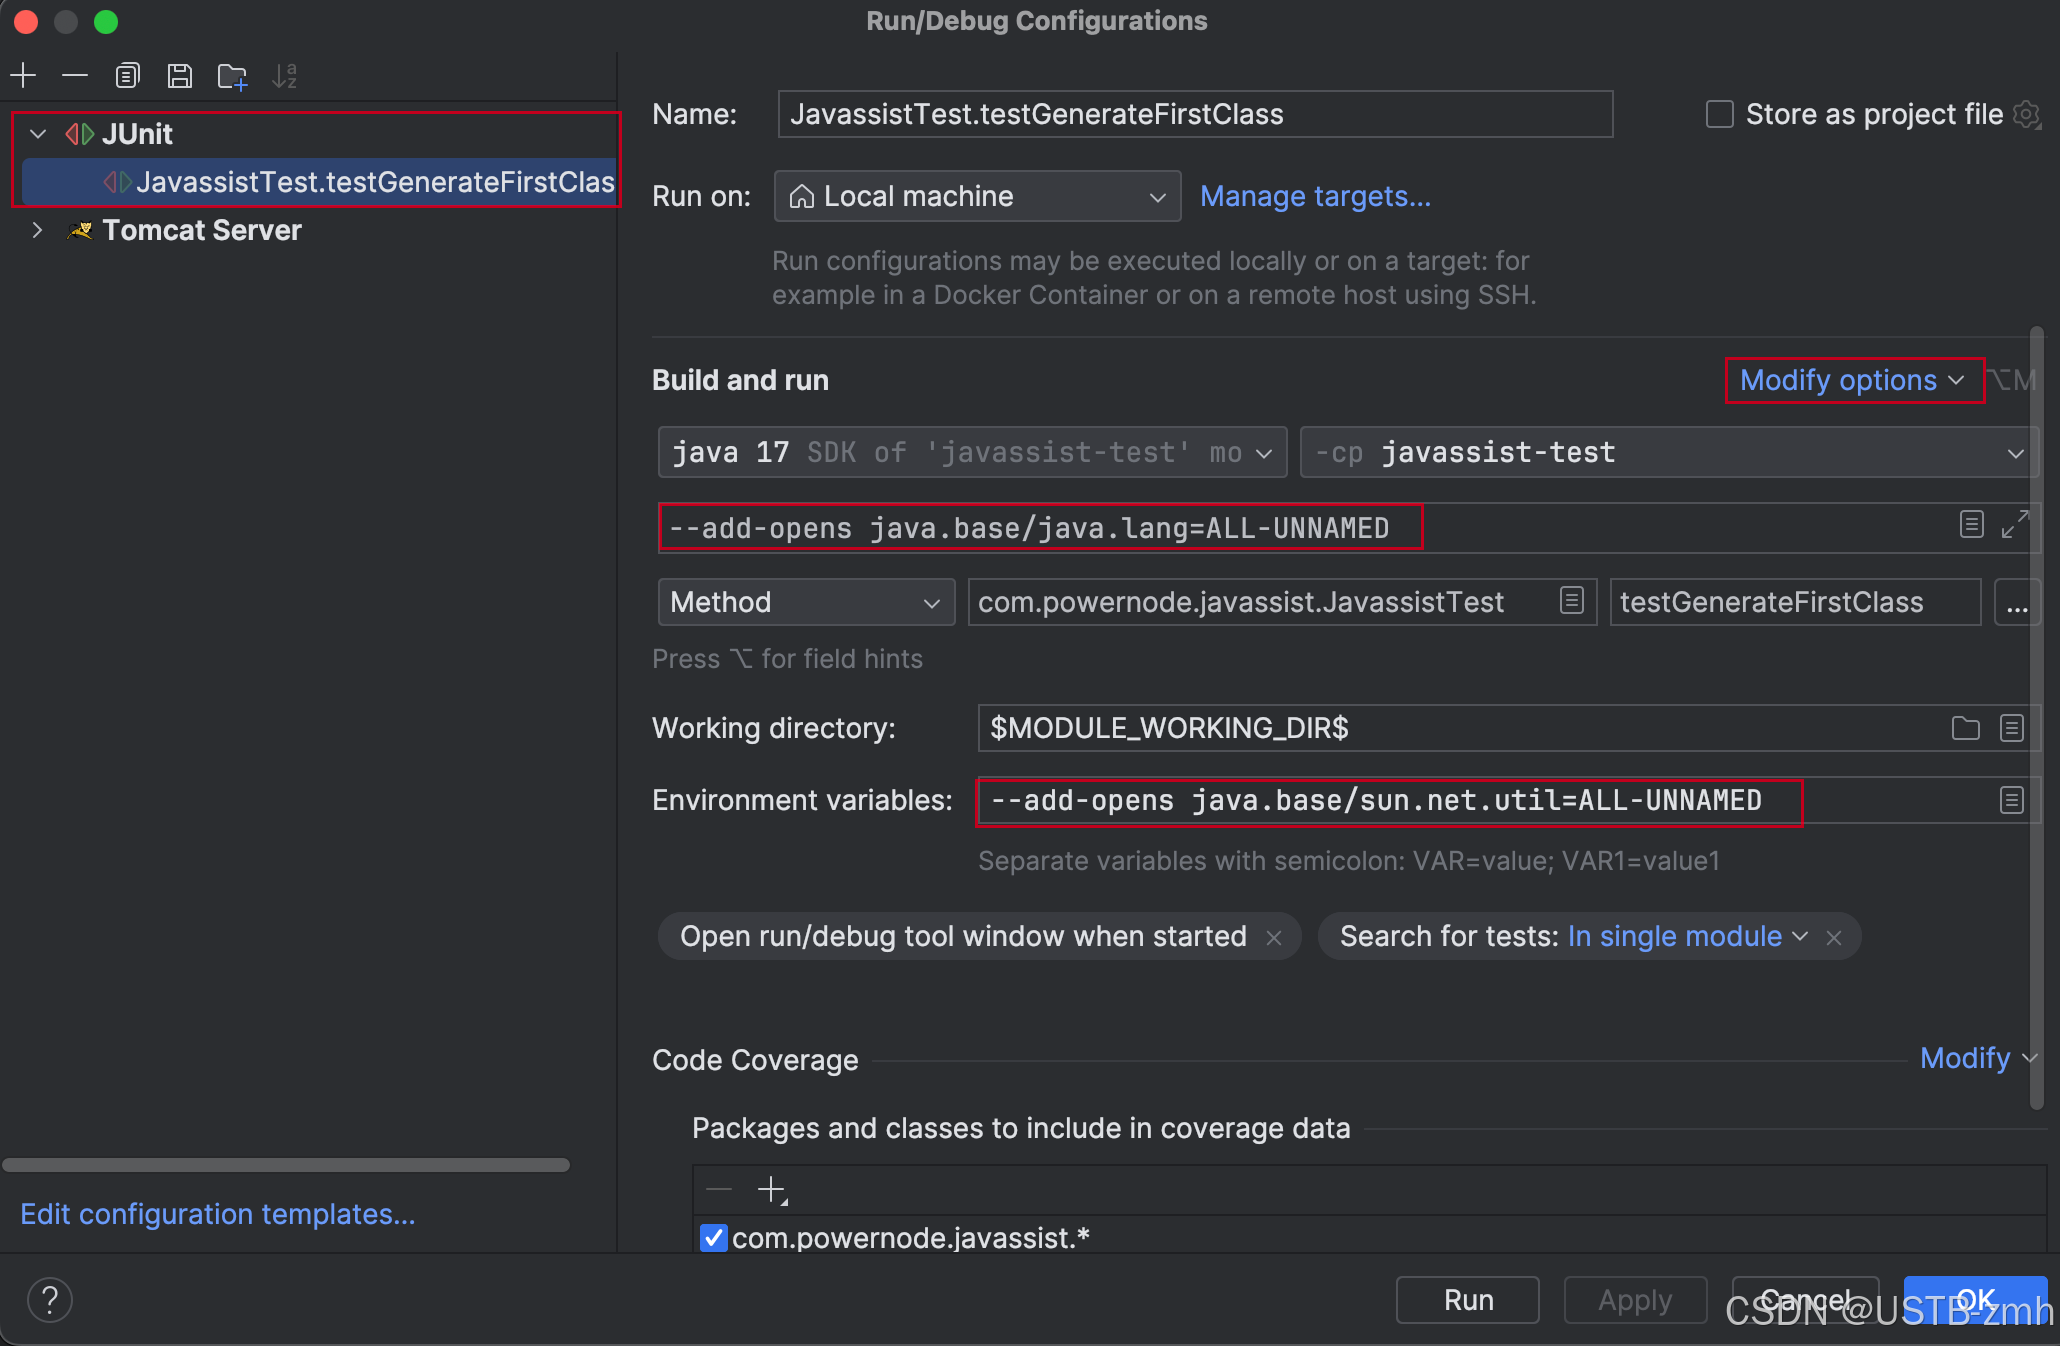
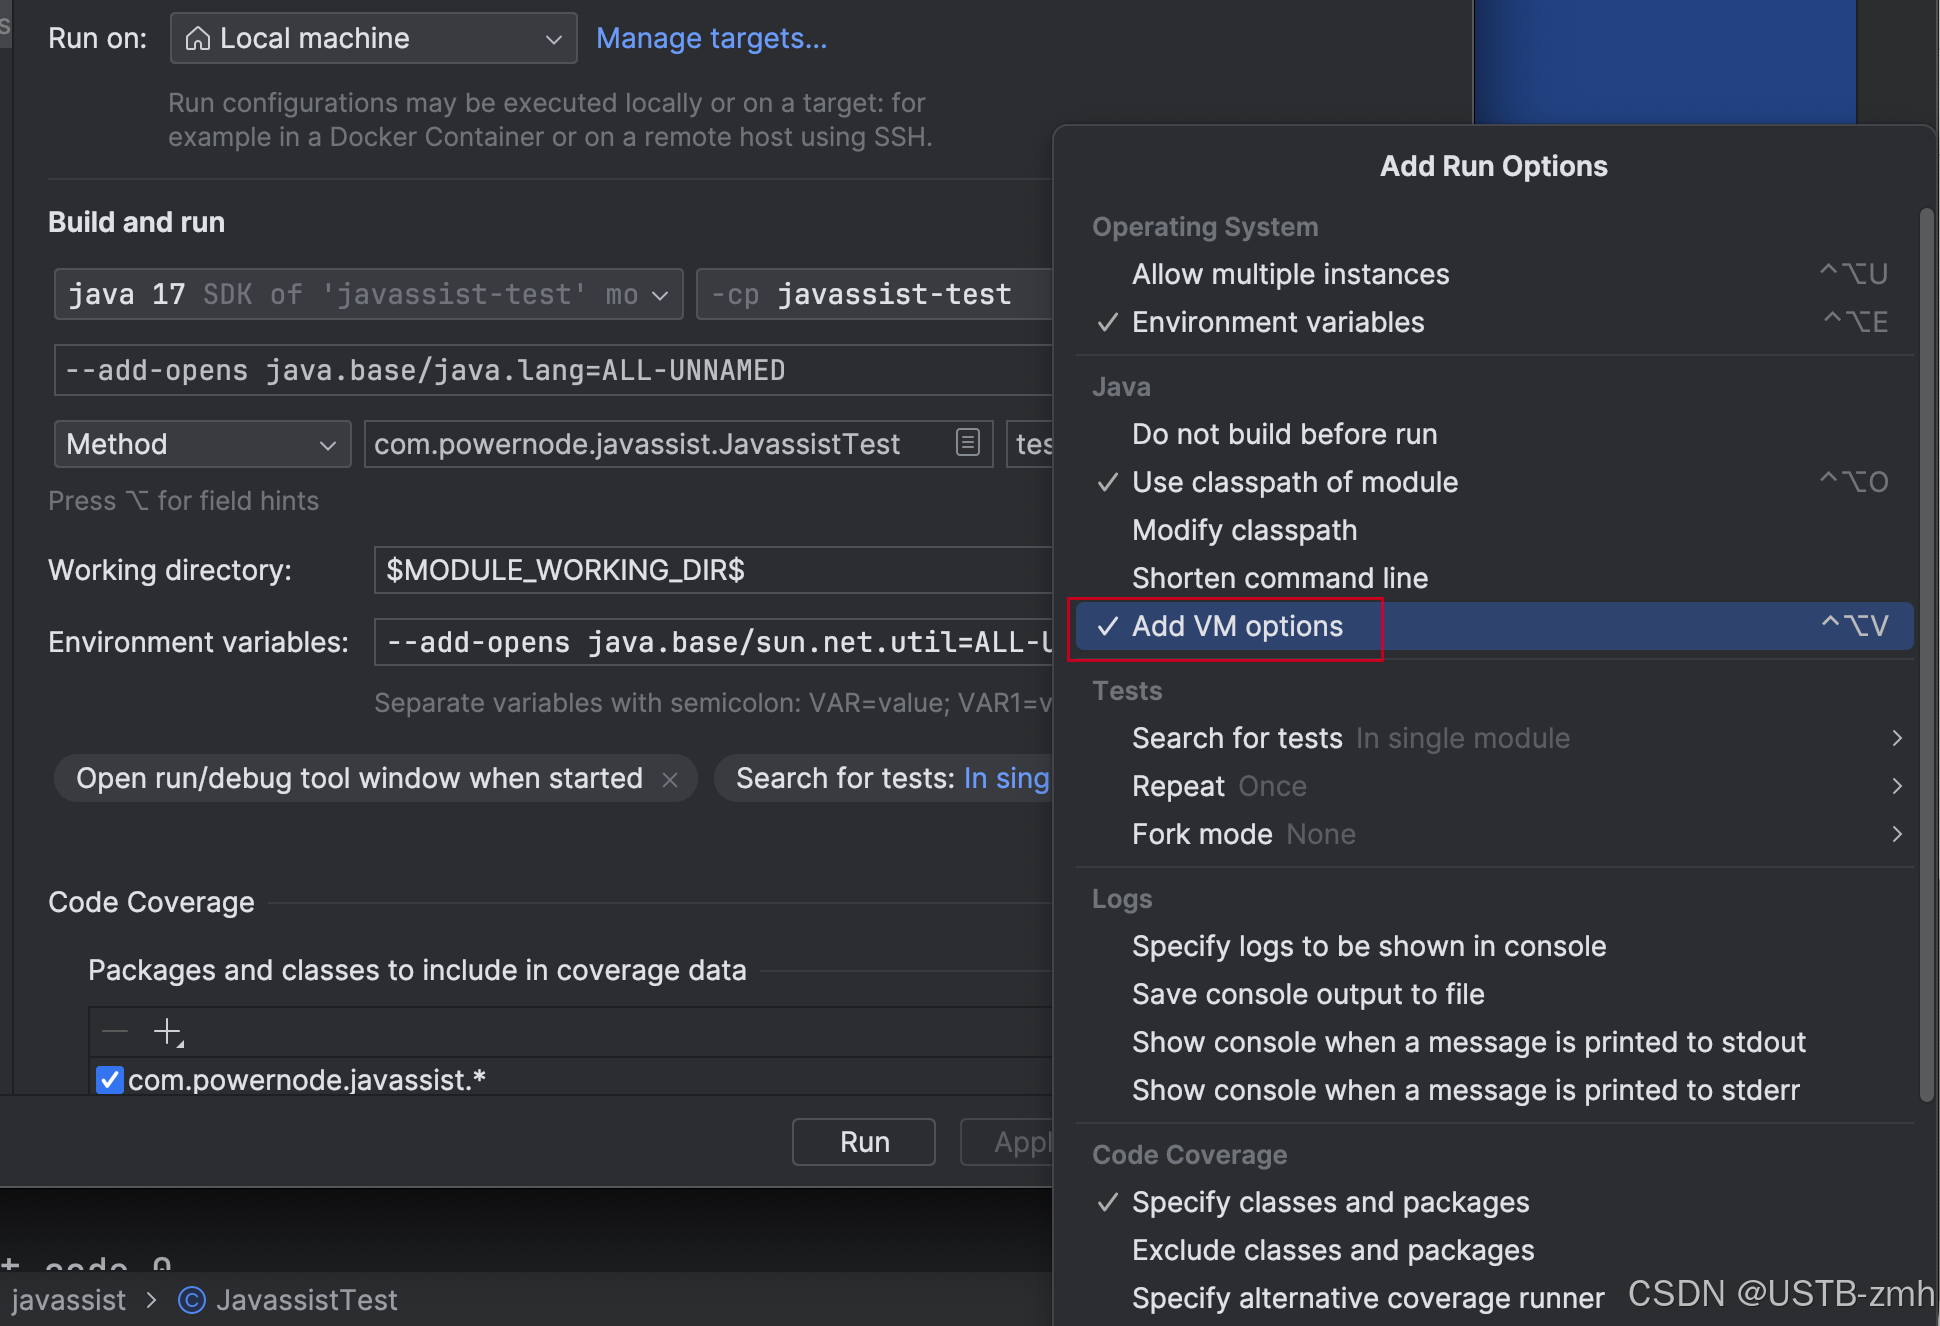
报错解决方法:
运行要注意:加两个参数,要不然会有异常。
- –add-opens java.base/java.lang=ALL-UNNAMED
- –add-opens java.base/sun.net.util=ALL-UNNAMED
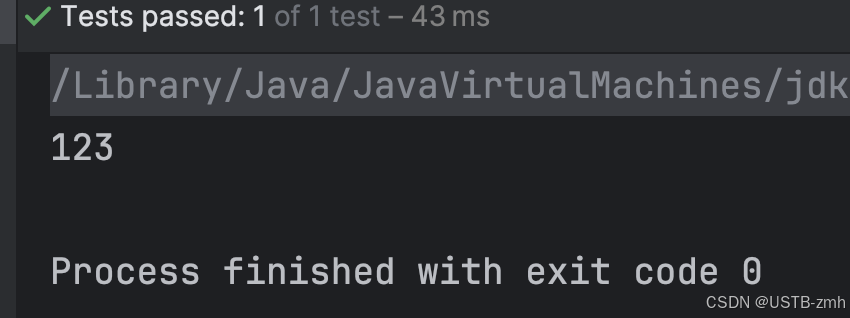
运行结果:
6.2 使用Javassist生成DaoImpl类
创建一个接口:
package com.powernode.bank.dao;

public interface AccountDao {

    void delete();
}
@Test
public void testGenerateImpl() throws Exception{
//获取类池
ClassPool pool = ClassPool.getDefault();
//制造类
CtClass ctClass = pool.makeClass("com.powernode.bank.dao.impl.AccountDaoImpl");
//制造接口
CtClass ctInterface = pool.makeInterface("com.powernode.bank.dao.AccountDao");
//添加接口到类中
ctClass.addInterface(ctInterface);
//实现接口中的方法
//制造方法
CtMethod ctMethod = CtMethod.make("public void delete(){System.out.println(\"hello word!\");}", ctClass);
//将方法添加到类中
ctClass.addMethod(ctMethod);
//在内存中生成类,同时将生成的类加载到JVM当中
Class<?> clazz = ctClass.toClass();
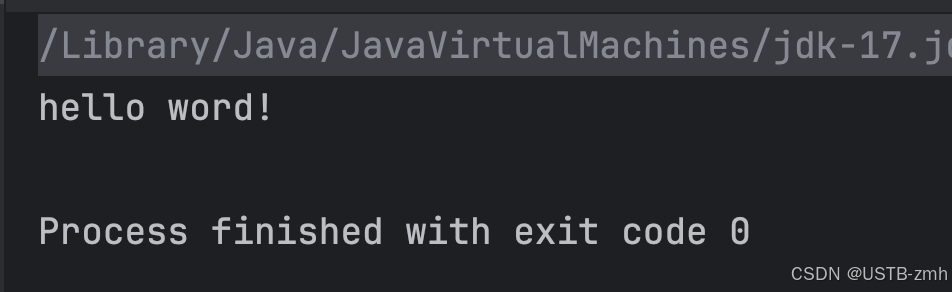
AccountDao accountDao = (AccountDao) clazz.newInstance();
accountDao.delete();
}
七、MyBatis小技巧
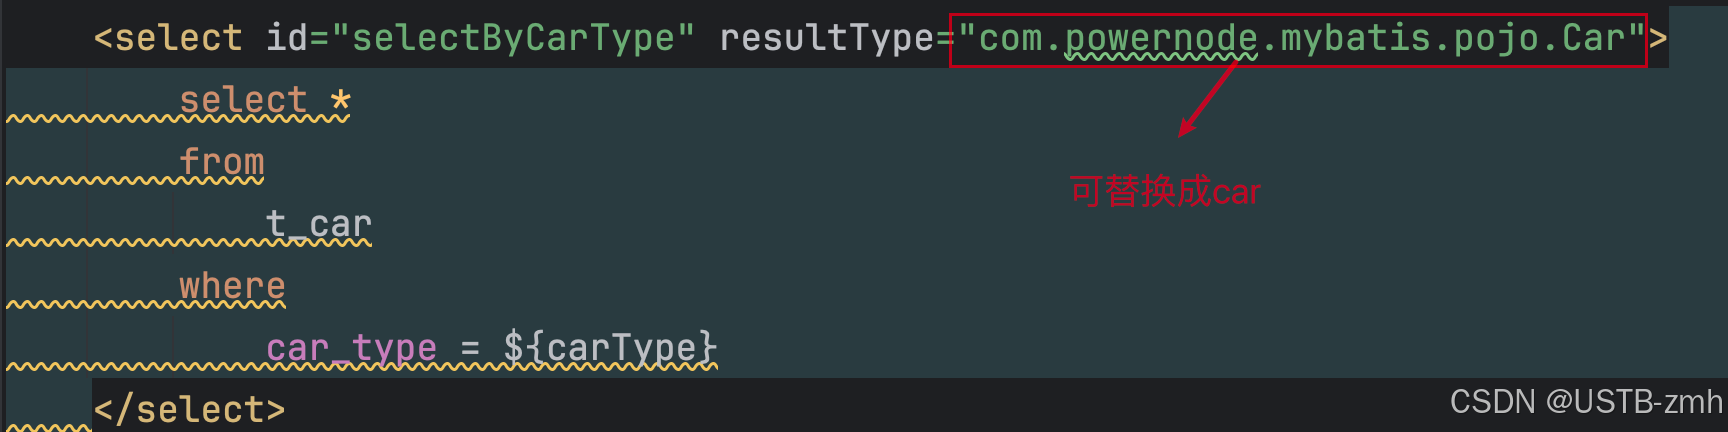
7.1 #{}和${}
#{}:先编译sql语句,再给占位符传值,底层是PreparedStatement实现。可以防止sql注入,比较常用。
${}:先进行sql语句拼接,然后再编译sql语句,底层是Statement实现。存在sql注入现象。只有在需要进行sql语句关键字拼接的情况下才会用到。
优先使用#{},这是原则,避免SQL注入的风险。
测试语句:
@Test
    public void testSelectByCarType(){
        SqlSession sqlSession = SqlSessionUtil.openSession();
        //mapper实际上就是daoImpl对象
        //底层不但为CarMapper接口生成了字节码,并且还new实现类对象
        CarMapper mapper = sqlSession.getMapper(CarMapper.class);
        List<Car> cars = mapper.selectByCarType("新能源");
        //遍历
        cars.forEach(car -> System.out.println(car));
        sqlSession.close();
    }
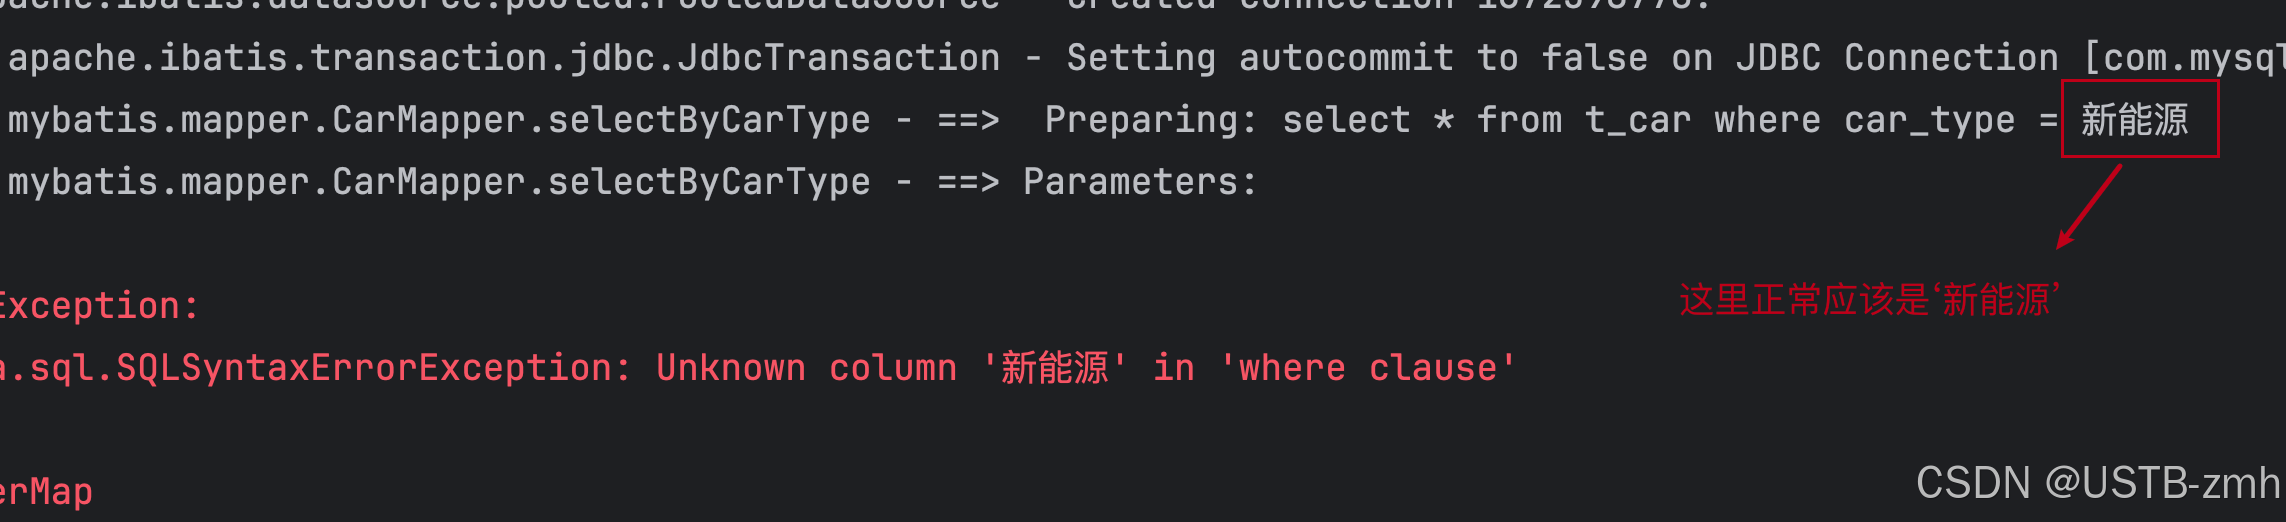
使用${}时,报错:
当测试代码:
@Test
    public void testSelectAllByAscOrDesc(){
        SqlSession sqlSession = SqlSessionUtil.openSession();
        CarMapper mapper = sqlSession.getMapper(CarMapper.class);
        List<Car> cars = mapper.selectAllByAscOrDesc("asc");
        //遍历
        cars.forEach(car -> System.out.println(car));
        SqlSessionUtil.close(sqlSession);
    }
SQL语句:
    <select id="selectAllByAscOrDesc" resultType="com.powernode.mybatis.pojo.Car">
        select *
        from
            t_car
        order by
            produce_time ${ascOrDesc}
    </select>
运行结果可以看出,通过生产日期进行升序排序:
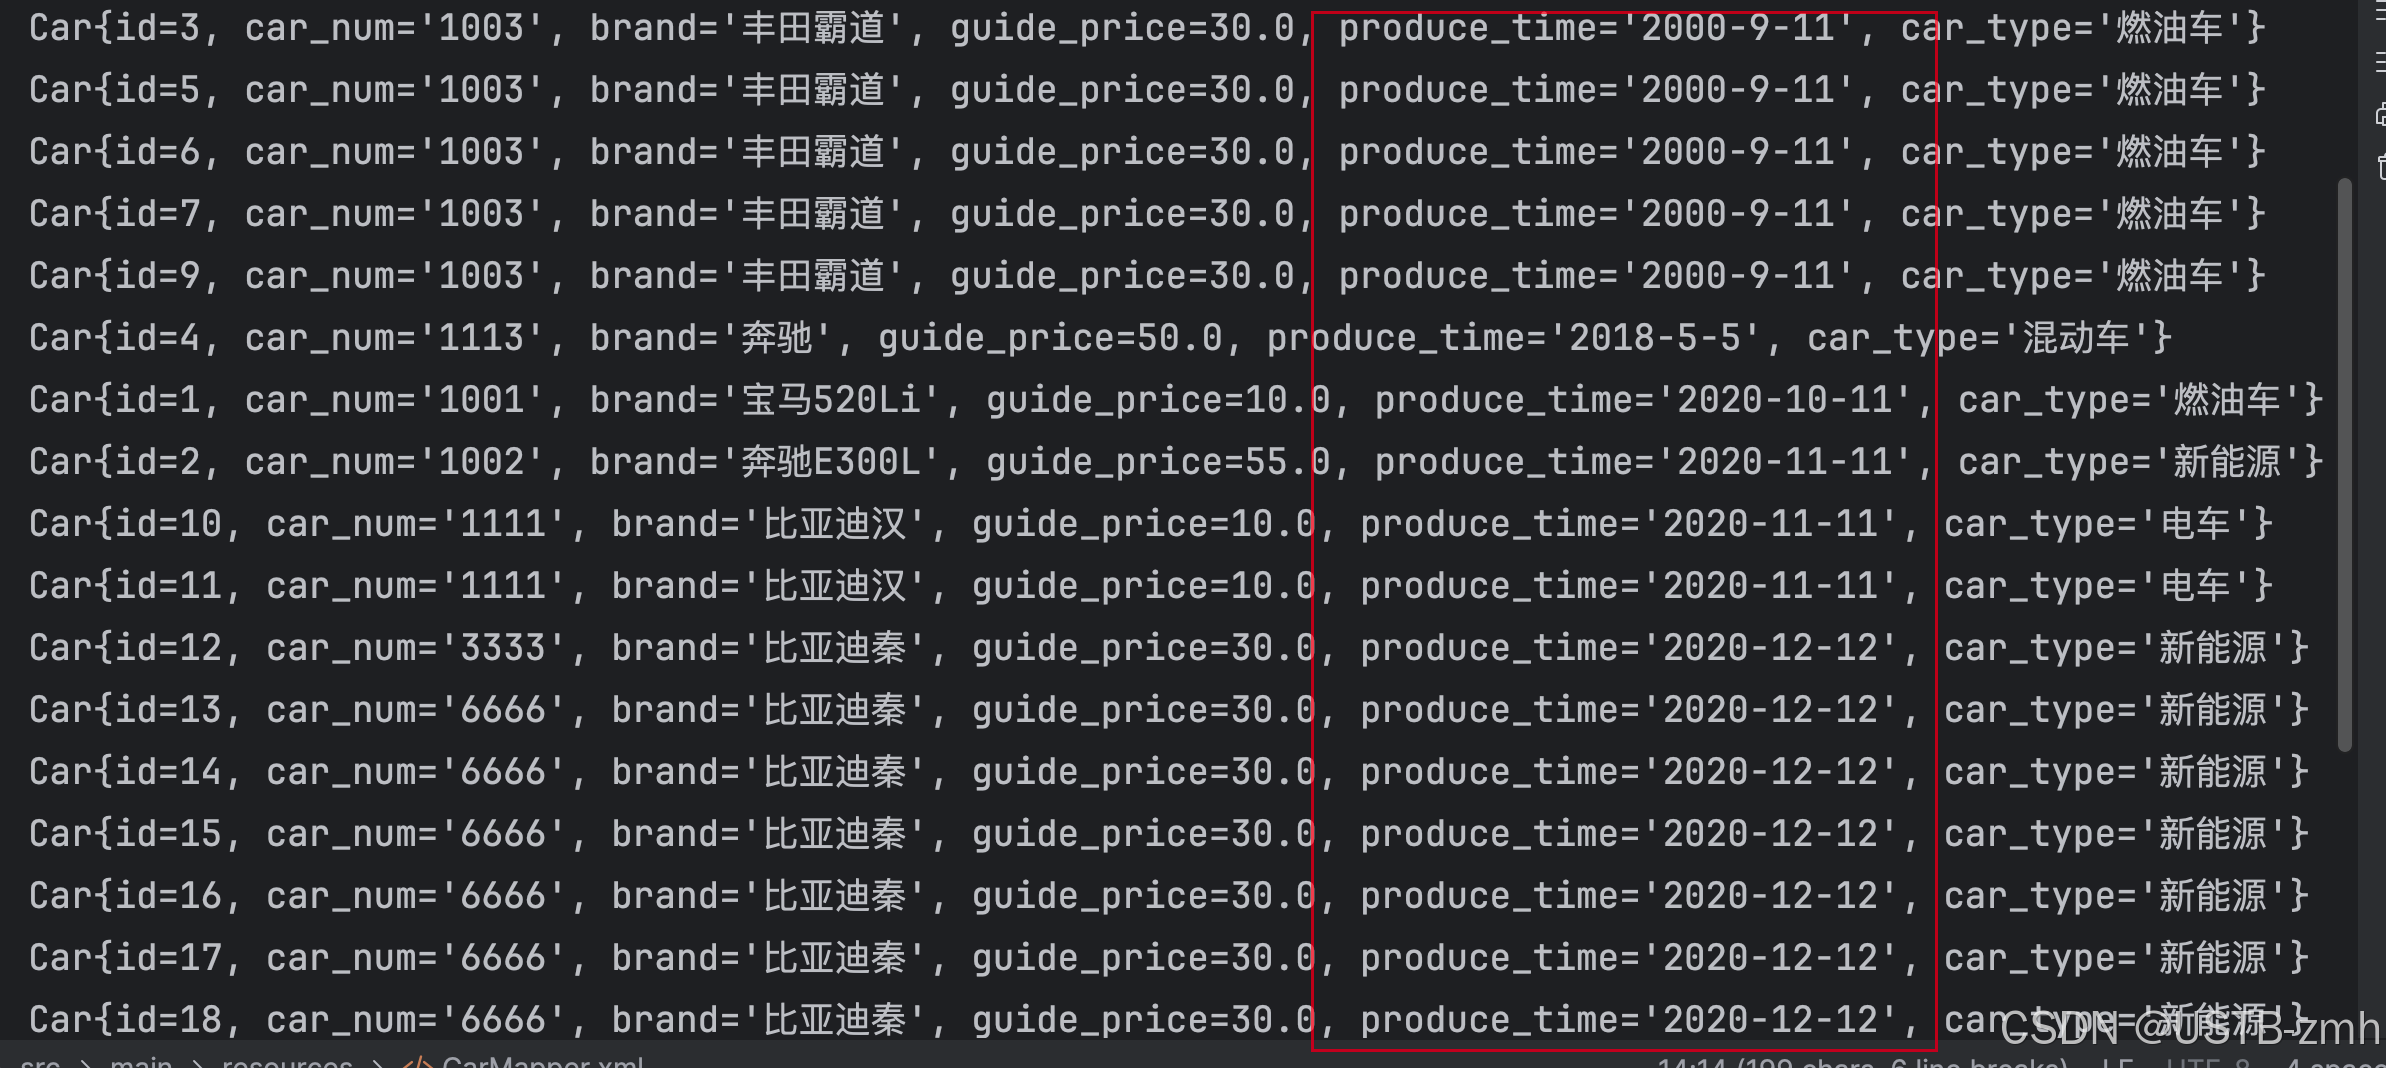
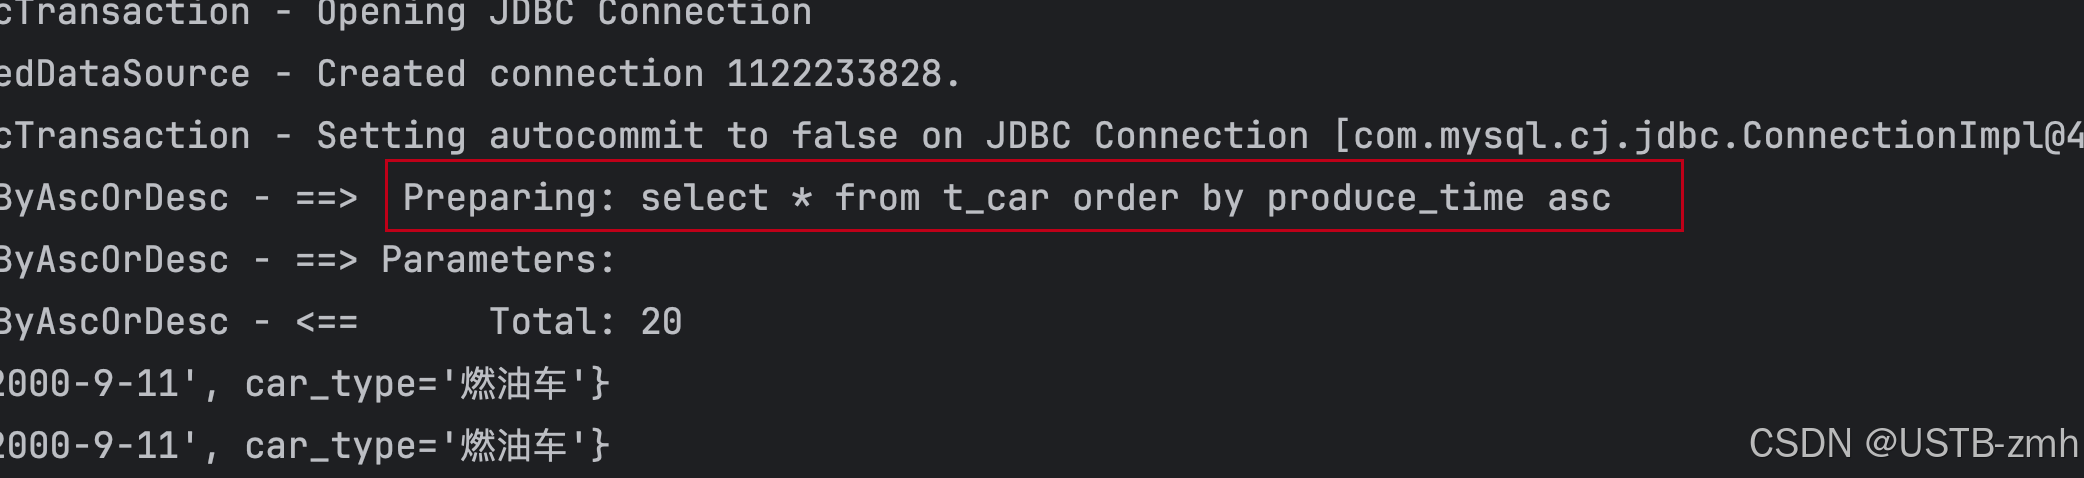
注:这个时候SQL语句不能使用#{},因此#{}传入的是值,而不是直接对SQL进行拼接,这个时候需要对SQL语句进行拼接。即如果需要SQL语句的关键字放到SQL语句中,只能使用${},因为#{}是以值的形式放到SQL语句当中的。
7.1.1 表名的拼接
业务背景:实际开发中,有的表数据量非常庞大,可能会采用分表方式进行存储,比如每天生成一张表,表的名字与日期挂钩,例如:2022年8月1日生成的表:t_user20220108。2000年1月1日生成的表:t_user20000101。此时前端在进行查询的时候会提交一个具体的日期,比如前端提交的日期为:2000年1月1日,那么后端就会根据这个日期动态拼接表名为:t_user20000101。有了这个表名之后,将表名拼接到sql语句当中,返回查询结果。
因此在查询的时候需要${}进行拼接:
<mapper namespace="com.powernode.mybatis.mapper.LogMapper">

    <select id="selectAllByTable" resultType="com.powernode.mybatis.pojo.Log">
        select * from t_log_${data}
    </select>

</mapper>
7.1.2 批量删除
批量删除的SQL语句有两种写法:
第一种or:delete from t_car where id=1 or id=2 or id=3
第二种int: delete from t_car where id in(1,2,3)
演示第二种,java测试代码:
@Test
    public void testDeleteBatch(){
        SqlSession sqlSession = SqlSessionUtil.openSession();
        CarMapper mapper = sqlSession.getMapper(CarMapper.class);
        int count = mapper.deleteBatch("11,12,13");
        System.out.println(count);
        sqlSession.commit();
        SqlSessionUtil.close(sqlSession);
    }
SQL语句:
    <delete id="deleteBatch">
        delete from t_car where id in(${ids})
    </delete>
由此可见,这里需要的是SQL的拼接,因此需要使用${}。
运行结果,数据库也成功删除:

7.1.3 模糊查询
需求:根据汽车品牌进行模糊查询
select * from t_car where brand like ‘%比亚迪%’
第一种方案:
‘%${brand}%’
第二种方案:concat函数,这个是mysql数据库当中的一个函数,专门进行字符串拼接的。
concat(‘%’,#{brand},‘%d’)
第三种方案:
“%”#{}“%”
注:第一种方案不可以用’%#{}%‘,因为占位符?会被当中里面的一个符号,即’%?%'。
 <select id="selectByBrandLike" resultType="com.powernode.mybatis.pojo.Car">
        select *
        from
            t_car
        where
            brand like '%${brand}%'
    </select>
测试代码:
    @Test
    public void testSelectByBrandLike(){
        SqlSession sqlSession = SqlSessionUtil.openSession();
        CarMapper mapper = sqlSession.getMapper(CarMapper.class);
        List<Car> cars = mapper.selectByBrandLike("比亚迪");
        cars.forEach(car -> System.out.println(car));
        SqlSessionUtil.close(sqlSession);
    }
运行结果,汽车品牌包含比亚迪的全部输出,
若使用’%#{brand}%',运行结果:
占位符被当作其中的一个字符了,因此无法进行传值,可以使用第二种或第三种方案。


7.2 typeAliases
<configuration>
    <properties resource="jdbc.properties"/>

    <!--起别名-->
    <typeAliases>
        <!--
            type: 指定给哪个类型起别名
            alise: 指定别名
            注意:别名不区分大小写
            也可以省略alias,那么默认就是类的简名,如car,Car,caR等。
        -->
        <typeAlias type="com.powernode.mybatis.pojo.Car" alias="aaa"/>

        <!--将这个包下的所有类全部自动起别名,别名就是类的简名,不区分大小写-->
        <package name="com.powernode.mybatis.pojo"/>

    </typeAliases>

    <!--一般一个数据库就会对应一个SqlSessionFactory对象。-->
    <!--一个环境environment会对应一个SqlSessionFactory。-->
    <environments default="development">
        <environment id="development">
            <transactionManager type="JDBC"/>
            <dataSource type="POOLED">
                <property name="driver" value="${jdbc.driver}"/>
                <property name="url" value="${jdbc.url}"/>
                <property name="username" value="${jdbc.username}"/>
                <property name="password" value="${jdbc.password}"/>
            </dataSource>
        </environment>
    </environments>
    <mappers>
        <!--执行XxxMapper.xml文件的路径-->
        <!--resource属性默认自动会从类的根路径下开始查找资源-->
        <mapper resource="CarMapper.xml"/>
        <mapper resource="LogMapper.xml"/>
    </mappers>
</configuration>
有两种起别名的方式,观察上述mybatis配置文件。当起完别名之后,可以将SQL语句的resultType属性用别名表示,不用书写那么长了。
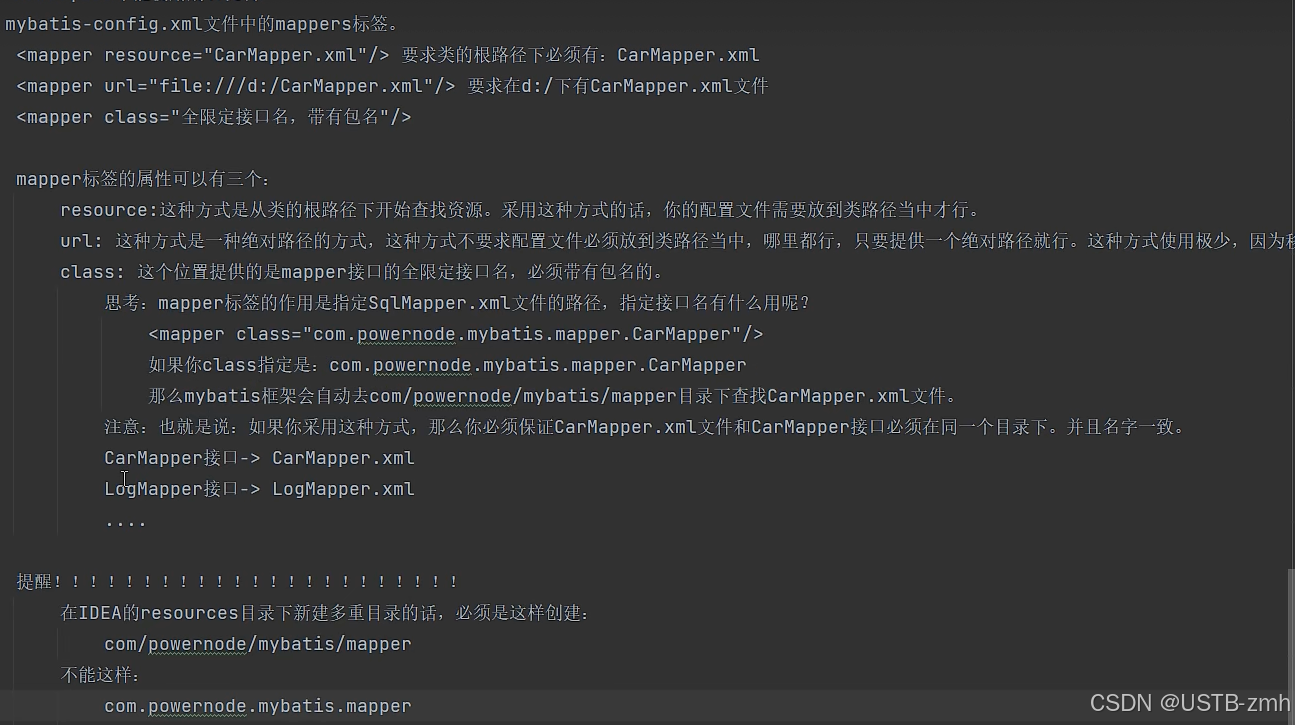
7.3 mappers
SQL映射文件的配置方式包括四种:
- resource:从类路径中加载
- url:从指定的全限定资源路径中加载
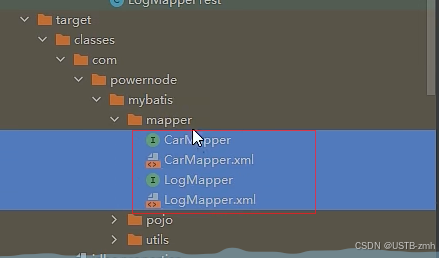
- class:使用映射器接口实现类的完全限定类名
- package:将包内的映射器接口实现全部注册为映射器
注意:java文件和resource文件都是在根路径下的,因此在这个创建相同的目录,其实最终都是同一个目录
如果mapper中有多个Mapper接口,那么可以直接使用如下(这种是最常用的):

<!-- 将包内的映射器接口实现全部注册为映射器 -->
<mappers>
  <package name="com.powernode.mybatis.mapper"/>
</mappers>
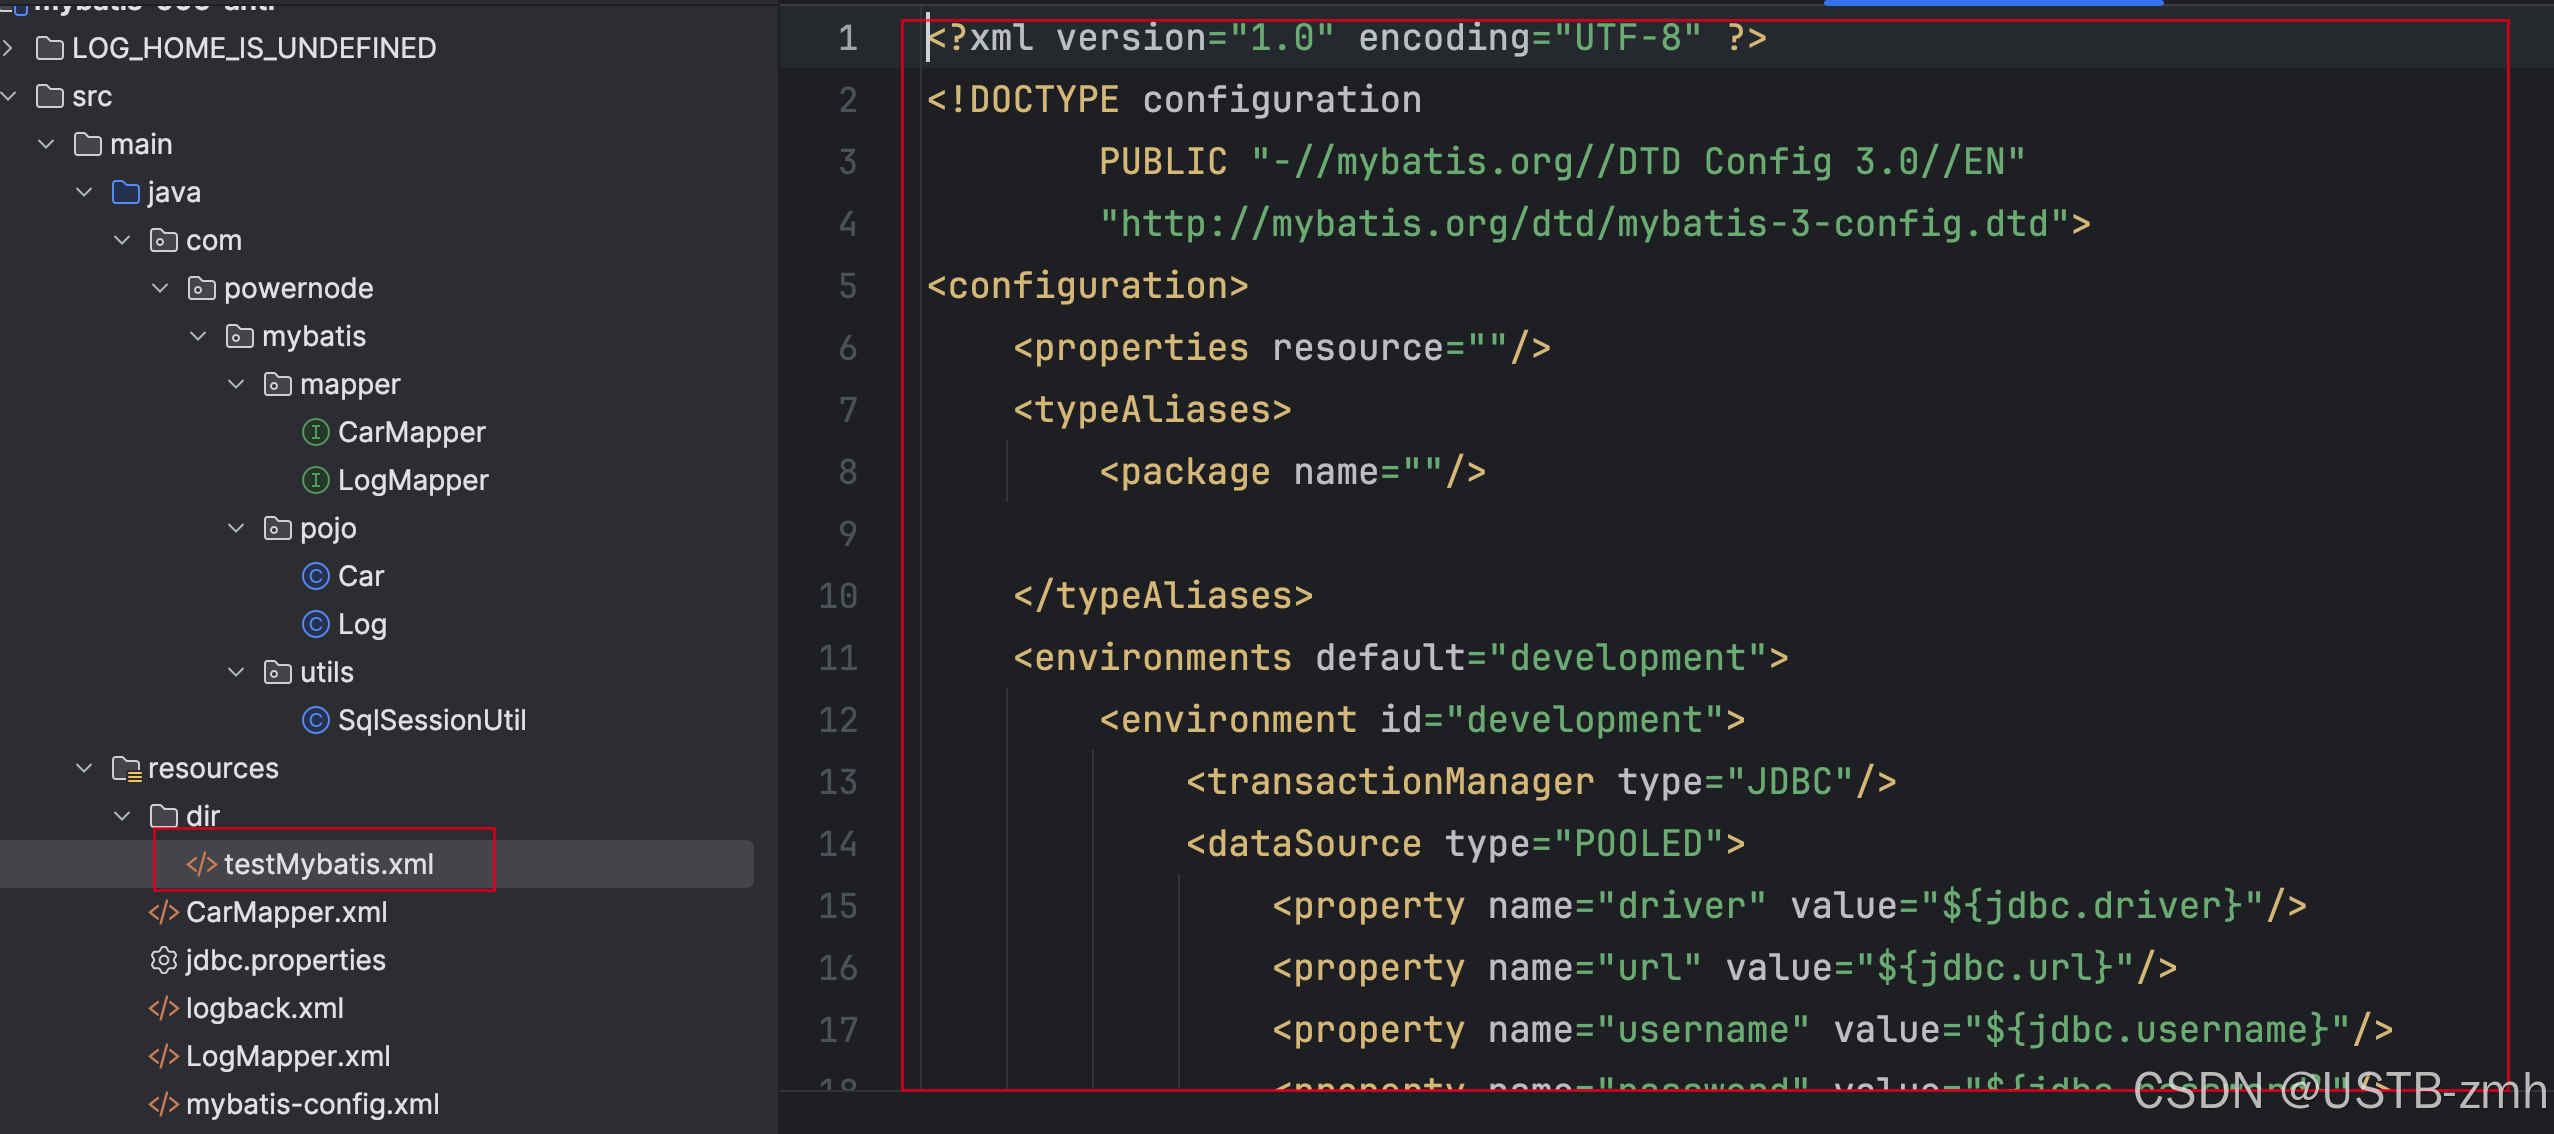
7.4 idea配置文件模板
mybatis-config.xml和SqlMapper.xml文件可以在IDEA中提前创建好模板,以后通过模板创建配置文件。打开Settings
把想要一次性生生成的代码填写到模版中:
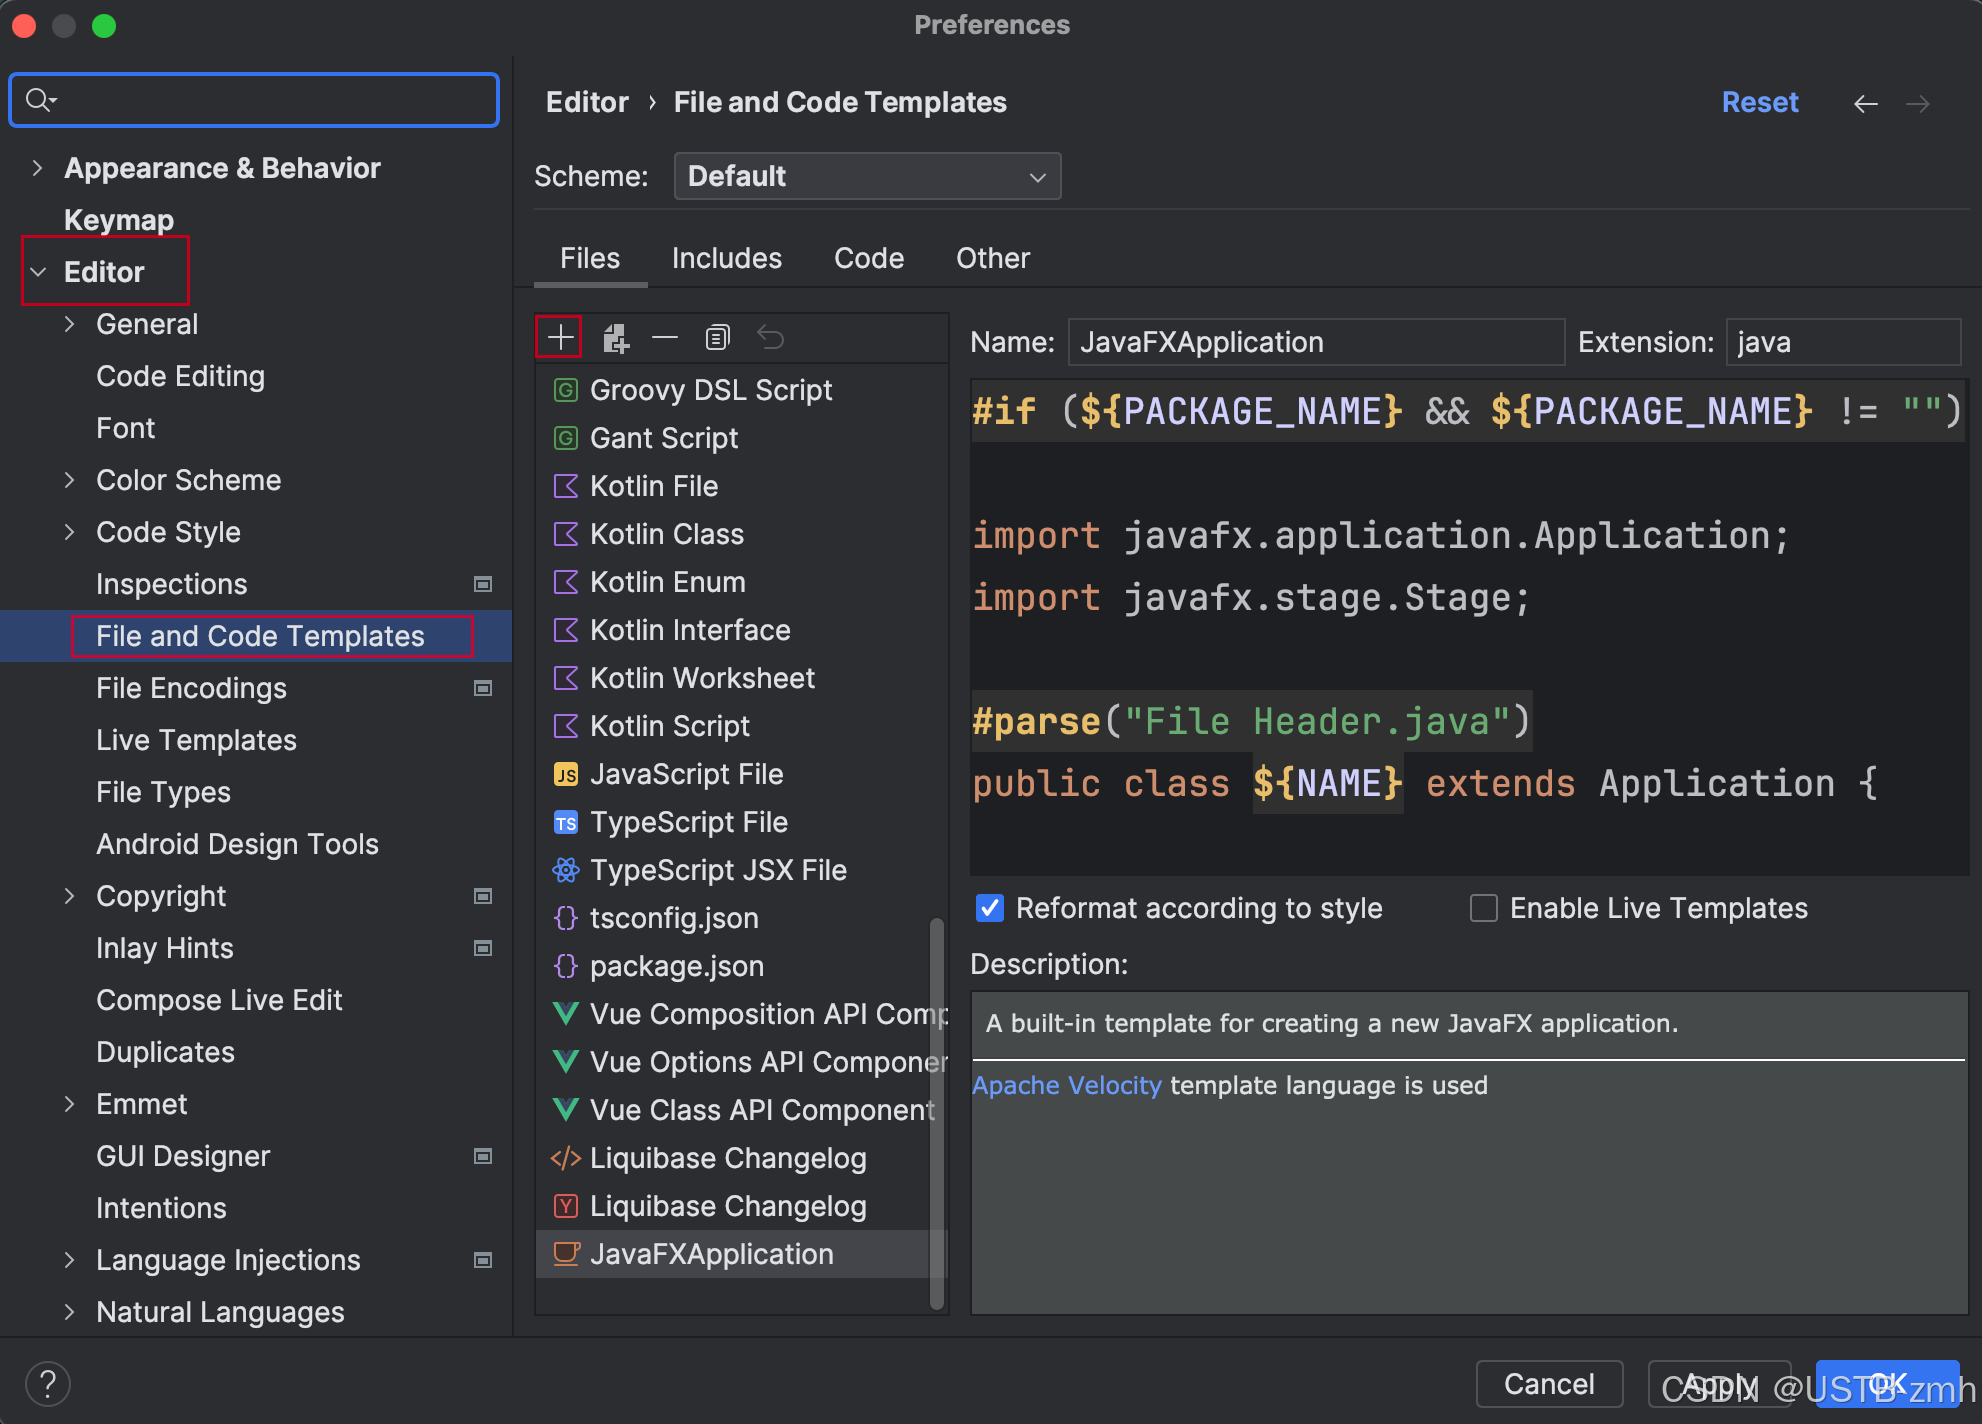
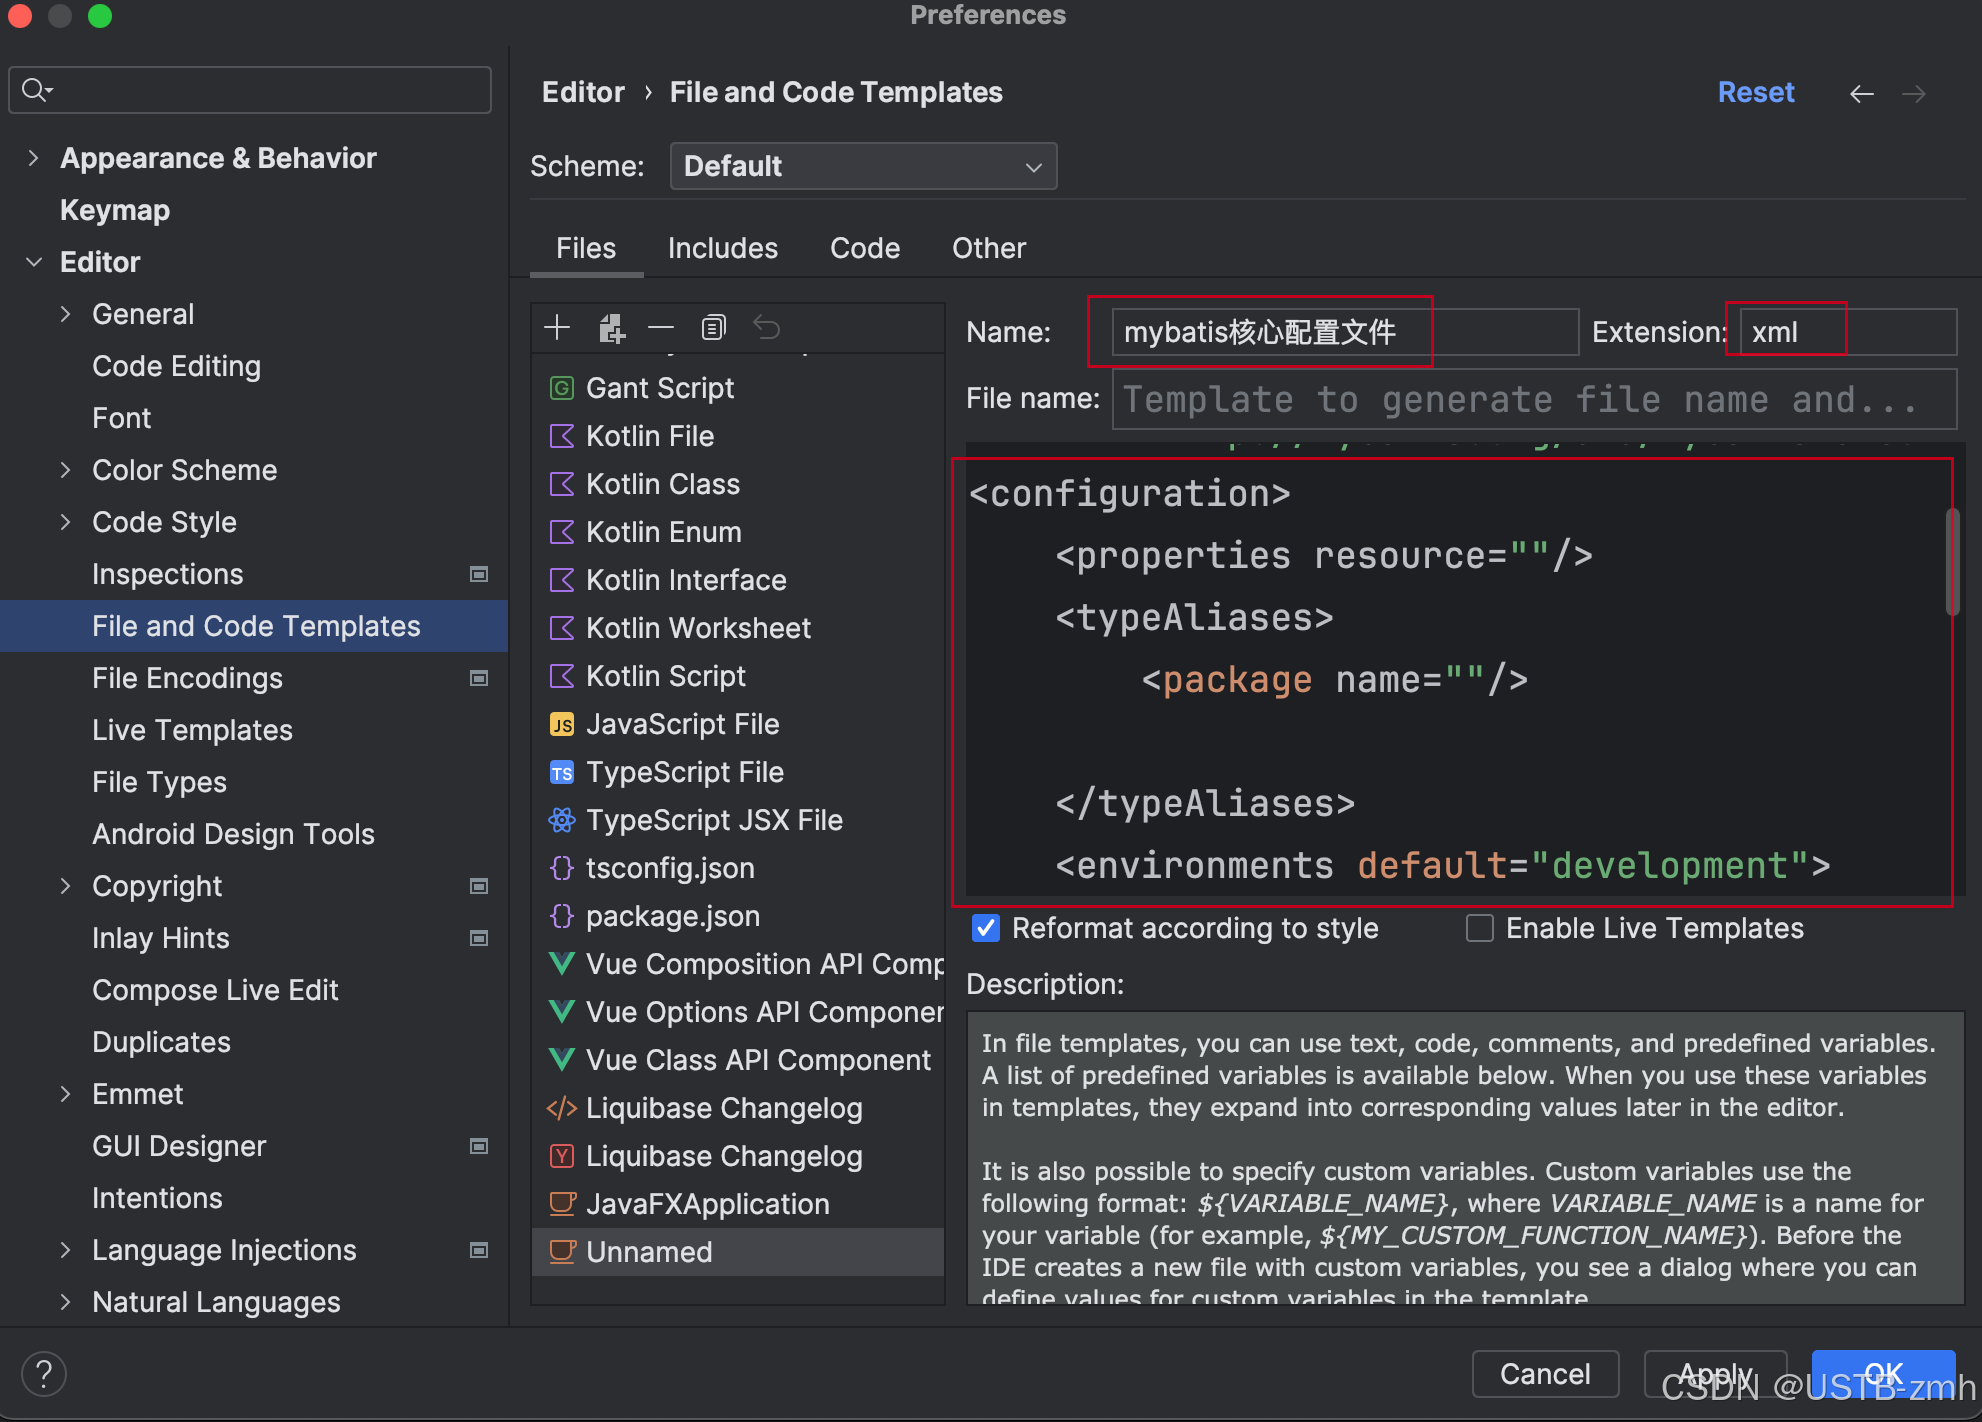
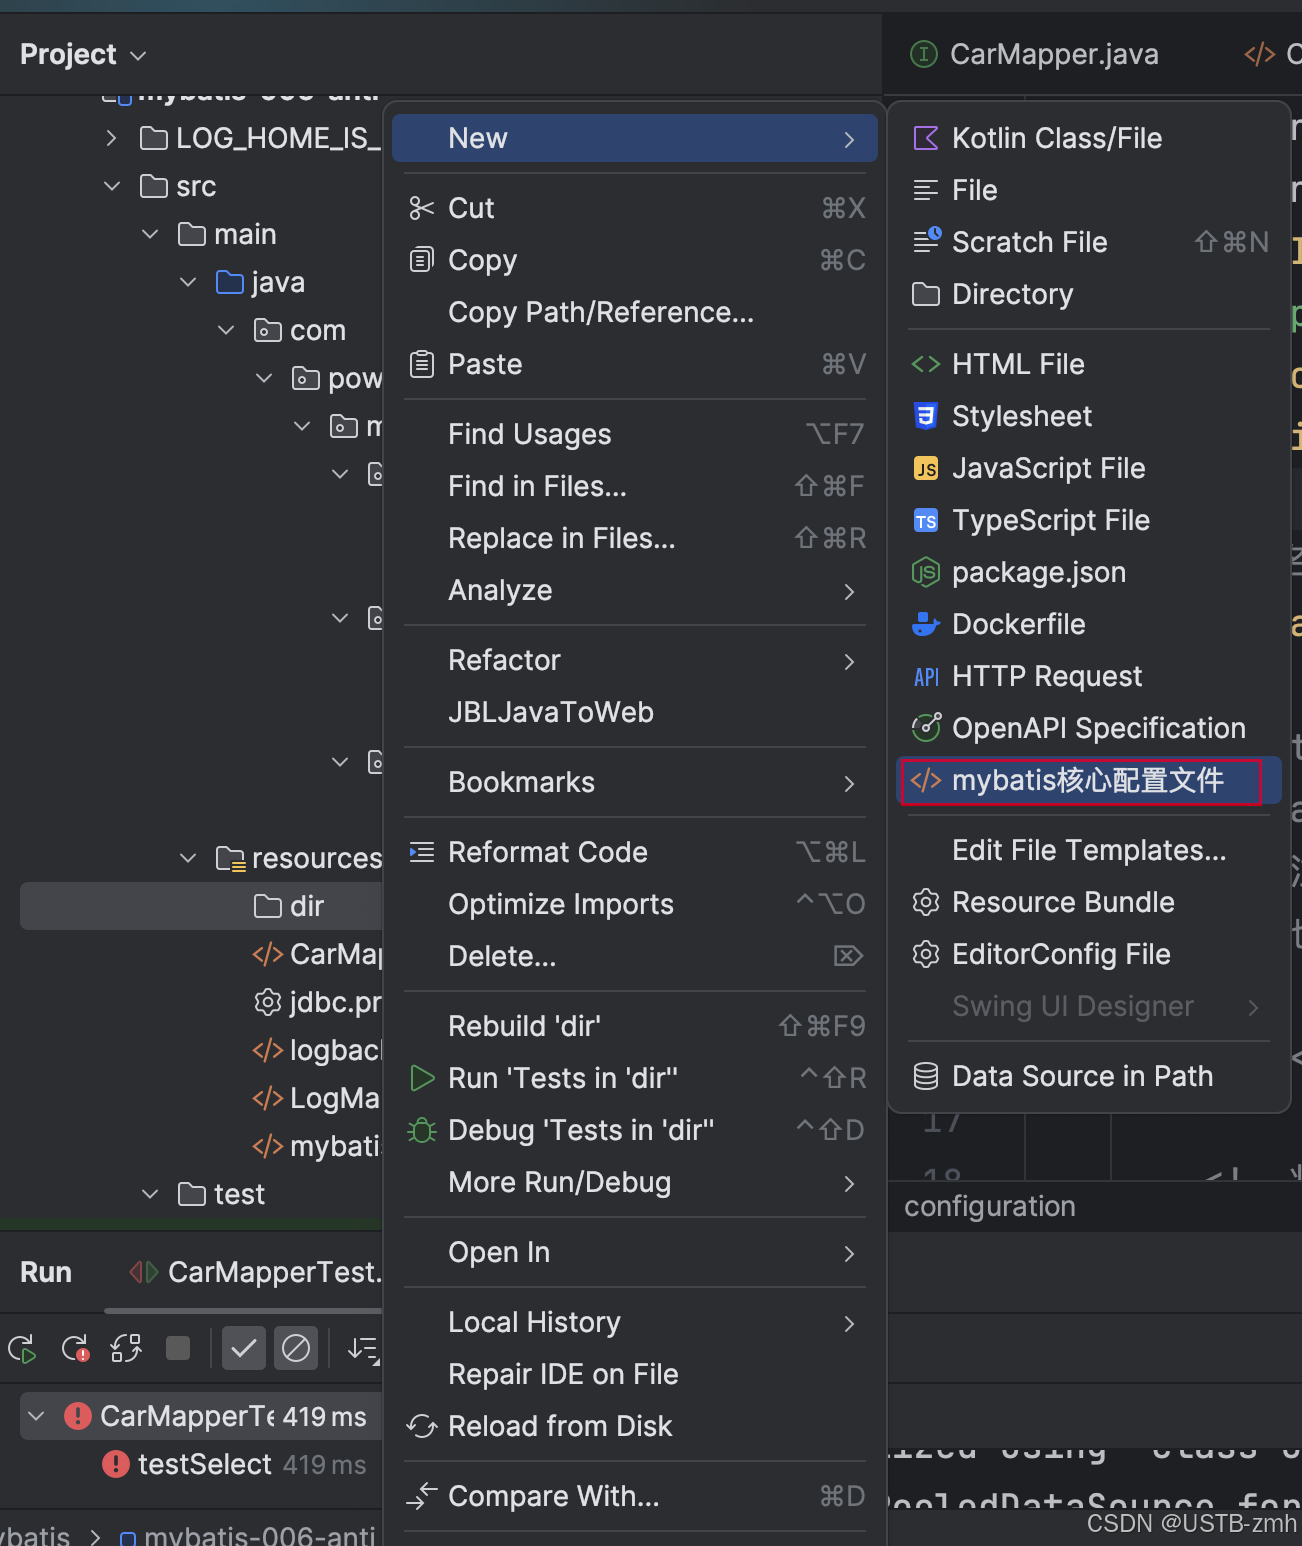
其他同理。
7.5 插入数据时获取自动生成的主键
前提是:主键是自动生成的。
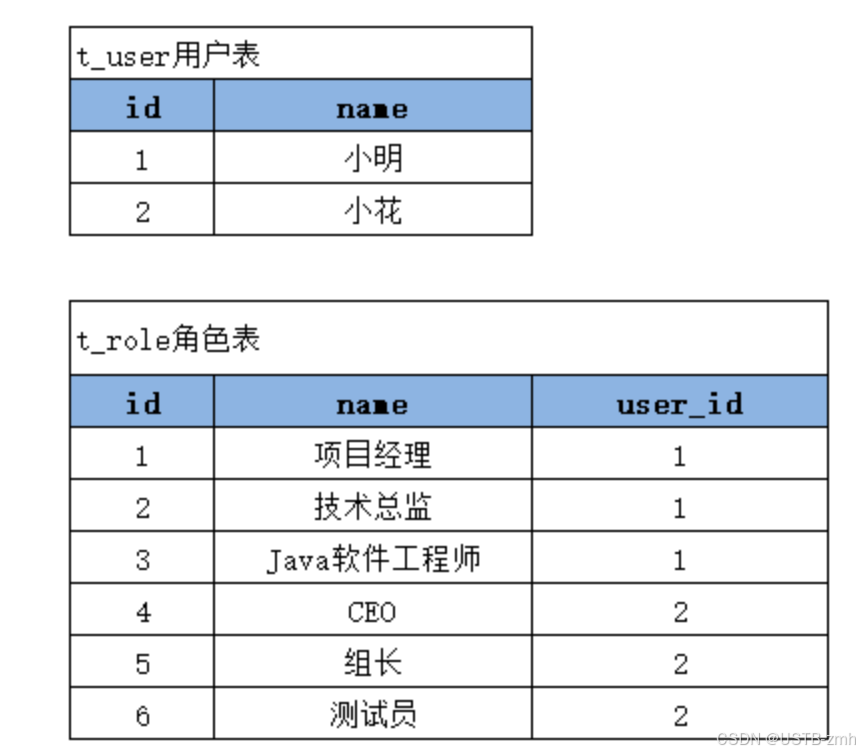
业务背景:一个用户有多个角色。
插入一条新的记录之后,自动生成了主键,而这个主键需要在其他表中使用时。
插入一个用户数据的同时需要给该用户分配角色:需要将生成的用户的id插入到角色表的user_id字段上。
第一种方式:可以先插入用户数据,再写一条查询语句获取id,然后再插入user_id字段。【比较麻烦】
第二种方式:mybatis提供了一种方式更加便捷。
接口内的方法:
    //插入Car信息,并且使用生成的主键值
    int insertCarUseGeneratedKeys(Car car);
SQL语句:
<!--
        useGeneratedKeys="true" 使用自动生成的主键值
        keyProperty="id" 指定主键值赋值给对象的哪个属性,这个就表示将主键值赋值给Car对象的id属性
    -->
    <insert id="insertCarUseGeneratedKeys" useGeneratedKeys="true" keyProperty="id">
        insert into t_car values (null,#{car_num},#{brand},#{guide_price},#{produce_time},#{car_type})
    </insert>
测试:
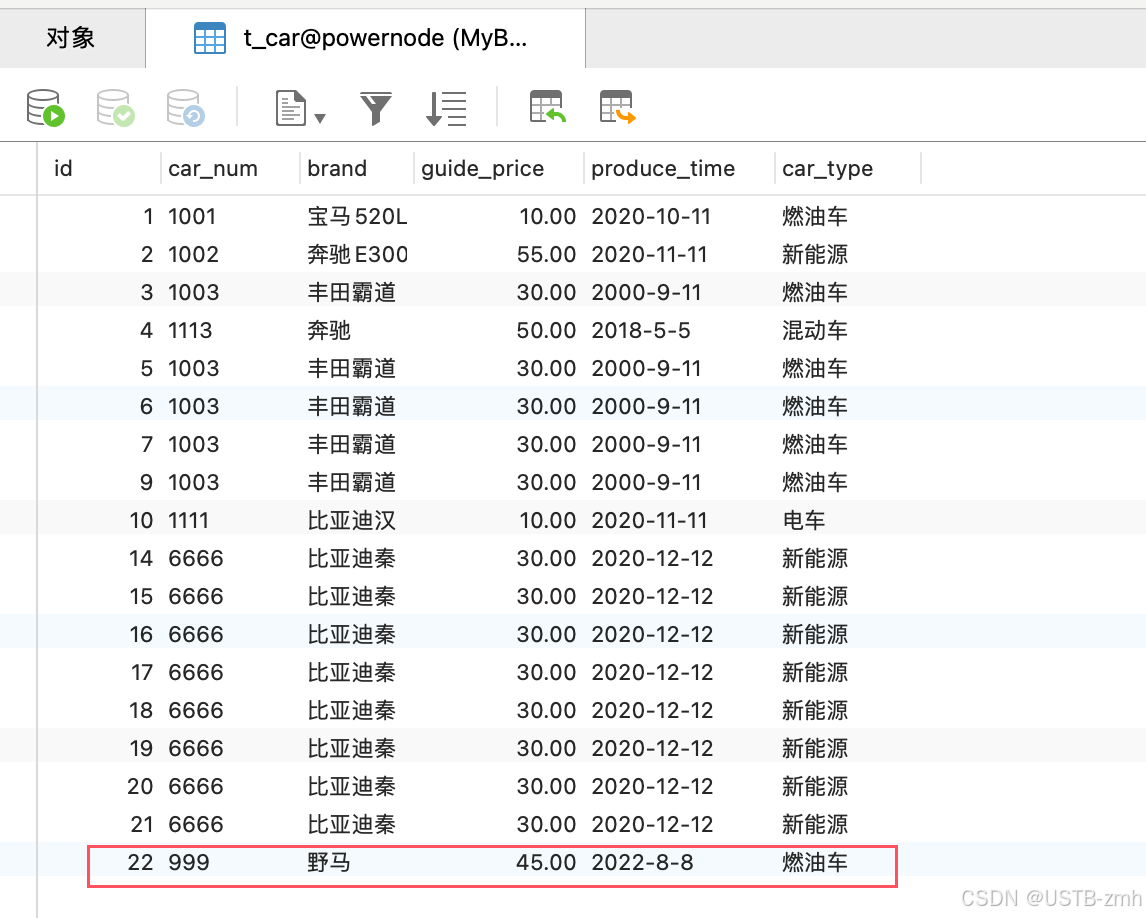
    @Test
    public void testInsertCarUseGeneratedKeys(){
        SqlSession sqlSession = SqlSessionUtil.openSession();
        CarMapper mapper = sqlSession.getMapper(CarMapper.class);
        Car car = new Car(null, "999", "野马", 45.0, "2022-8-8", "燃油车");
        int count = mapper.insertCarUseGeneratedKeys(car);
        System.out.println(car);
        sqlSession.commit();
        SqlSessionUtil.close(sqlSession);
    }
运行结果,获取到了car的id值:

八、MyBatis参数处理(核心)
8.1 单个简单类型参数
简单类型包括:
- byte short int long float double char
- Byte Short Integer Long Float Double Character
- String
- java.util.Date
- java.sql.Date
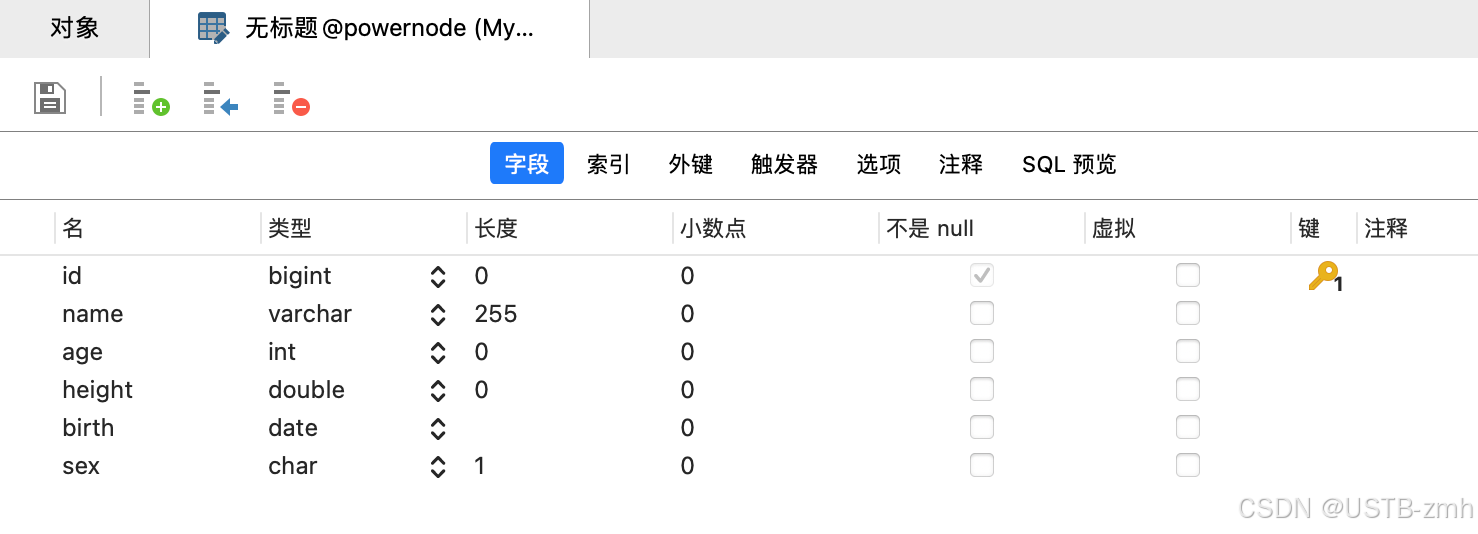
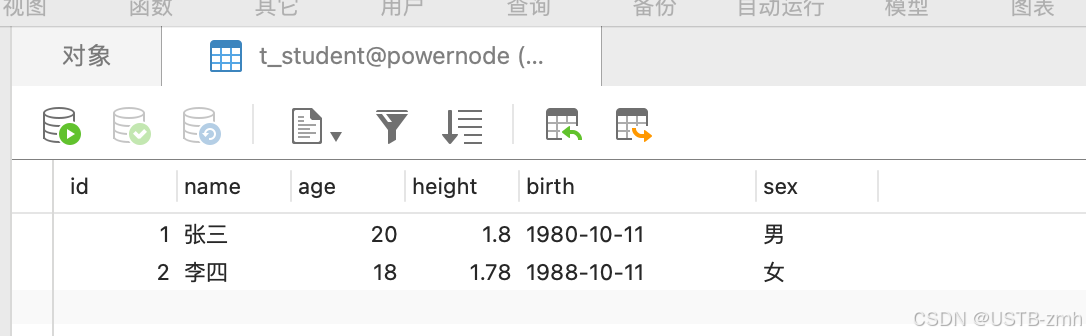
创建一个新表 t_student:
添加数据
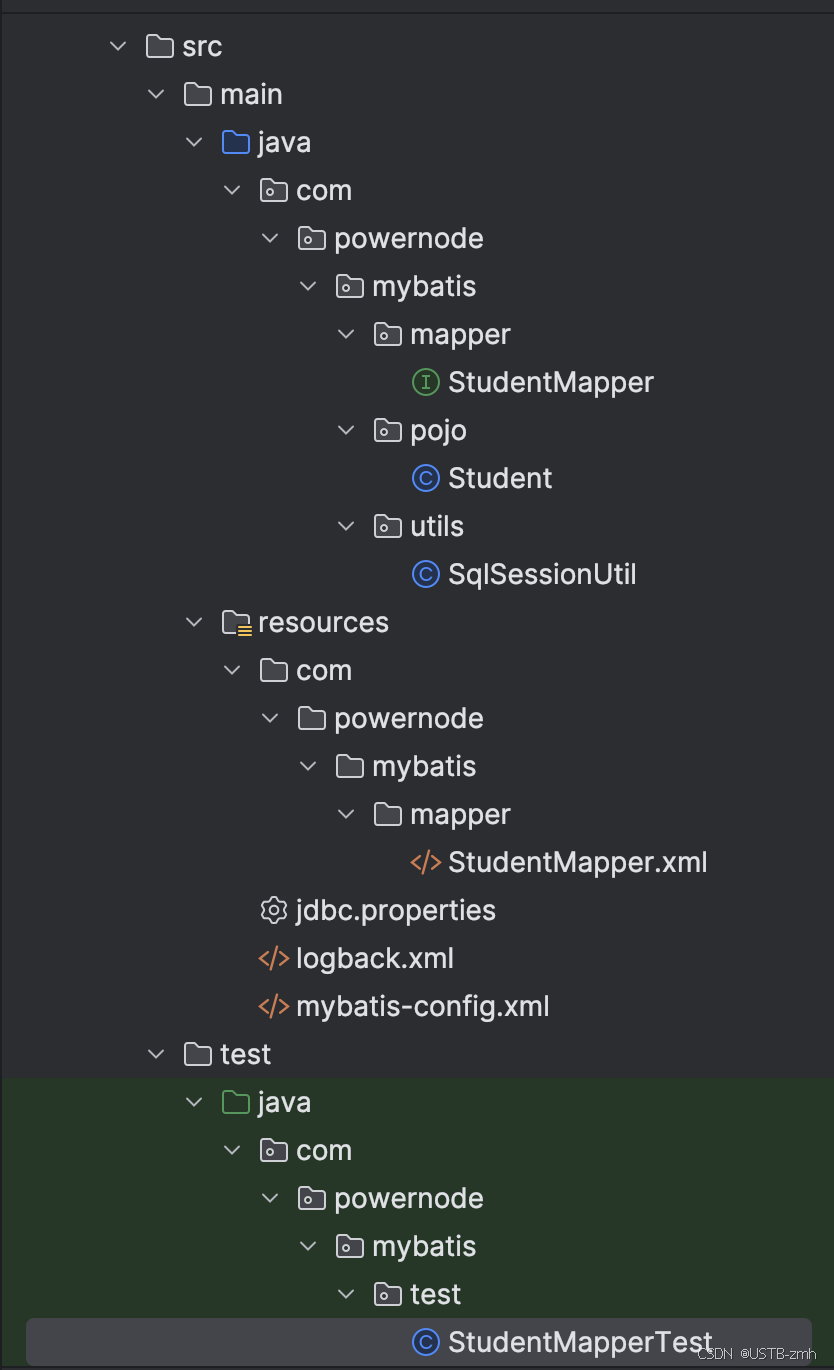
创建一个新的模块:
mybatis-config.xml 代码:
<?xml version="1.0" encoding="UTF-8" ?>
<!DOCTYPE configuration
        PUBLIC "-//mybatis.org//DTD Config 3.0//EN"
        "http://mybatis.org/dtd/mybatis-3-config.dtd">
<configuration>
    <properties resource="jdbc.properties"/>
    <typeAliases>
        <package name="com.powernode.mybatis.pojo"/>

    </typeAliases>
    <environments default="development">
        <environment id="development">
            <transactionManager type="JDBC"/>
            <dataSource type="POOLED">
                <property name="driver" value="${jdbc.driver}"/>
                <property name="url" value="${jdbc.url}"/>
                <property name="username" value="${jdbc.username}"/>
                <property name="password" value="${jdbc.password}"/>
            </dataSource>
        </environment>
    </environments>
    <mappers>
        <package name="com.powernode.mybatis.mapper"/>
    </mappers>
</configuration>
StudentMapper 接口:
public interface StudentMapper {

    //当接口中的方法的参数只有一个(单个参数),并且参数的数据类型都是简单类型。
    //根据id,name,birth,sex查询
    List<Student> selectById(Long id);
    List<Student> selectByName(String name);
    List<Student> selectByBirth(Date birth);
    List<Student> selectBySex(Character sex);
}
SQL语句:
    <select id="selectById" resultType="Student">
        select * from t_student where id = #{id}
    </select>
测试代码:
@Test
    public void testSelectById(){
        SqlSession sqlSession = SqlSessionUtil.openSession();
        StudentMapper mapper = sqlSession.getMapper(StudentMapper.class);
        List<Student> students = mapper.selectById(2L);
        students.forEach(student -> System.out.println(student));
        SqlSessionUtil.close(sqlSession);
    }
运行结果:
SQL语句:

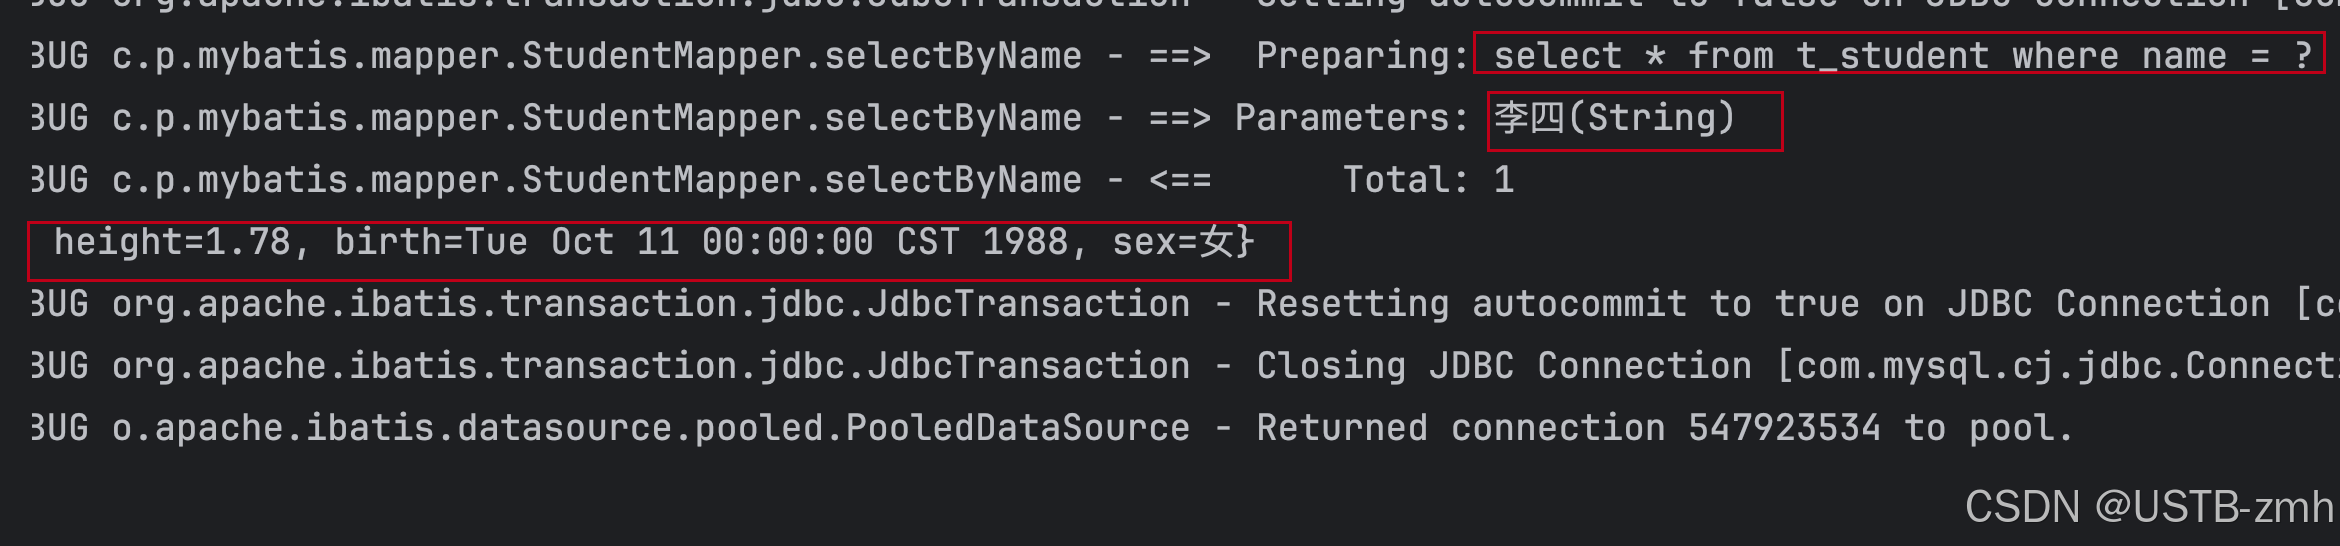
    <select id="selectByName" resultType="Student" parameterType="string">
        select * from t_student where name = #{name}
    </select>
注:正常来说JDBC需要知道传入值的类型,因此需要parameterType来指定传入值的类型,但是mybatis框架底层实现了类型的推断,因此大多数情况下不写这个属性也可以。不过加上去效率更高一些,因为mybatis底层不需要再进行类型推断了。这里的string是类型的别名,实际上它应该写的是java.lang.String,需要写得是包。
测试代码:
 @Test
    public void testSelectByName(){
        SqlSession sqlSession = SqlSessionUtil.openSession();
        StudentMapper mapper = sqlSession.getMapper(StudentMapper.class);
        List<Student> students = mapper.selectByName("李四");
        students.forEach(student -> System.out.println(student));
        SqlSessionUtil.close(sqlSession);
    }
运行结果:
SQL语句:
    <select id="selectByBirth" resultType="Student">
        select * from t_student where birth = #{date}
    </select>
测试代码:
 @Test
    public void testSelectByBirth() throws Exception {
        SqlSession sqlSession = SqlSessionUtil.openSession();
        StudentMapper mapper = sqlSession.getMapper(StudentMapper.class);
        SimpleDateFormat sdf = new SimpleDateFormat("yyyy-MM-dd");
        Date birth = sdf.parse("1980-10-11");
        List<Student> students = mapper.selectByBirth(birth);
        students.forEach(student -> System.out.println(student));
        SqlSessionUtil.close(sqlSession);
    }
运行结果:

8.2 Map参数
接口内的方法:
    //保存学生信息,通过Map参数。以下是单个参数,但是参数的类型不是简单类型,是Map集合。
    int insertStudentByMap(Map<String, Object> map);
SQL代码:
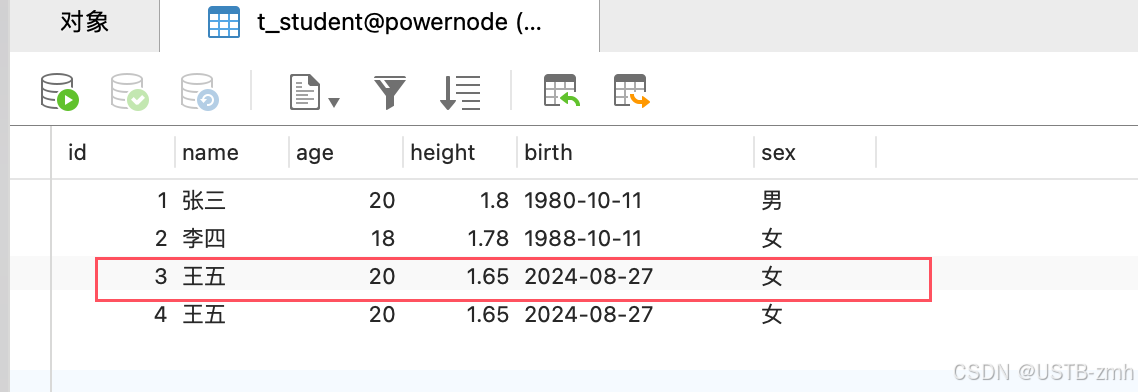
    <insert id="insertStudentByMap">
        insert into t_student(id,name,age,sex,birth,height) values (null,#{姓名},#{年龄},#{性别},#{生日},#{身高})
    </insert>
测试代码:
    @Test
    public void testInsertStudentByMap(){
        SqlSession sqlSession = SqlSessionUtil.openSession();
        StudentMapper mapper = sqlSession.getMapper(StudentMapper.class);
        Map<String, Object> map = new HashMap<>();
        map.put("姓名", "王五");
        map.put("年龄", 20);
        map.put("身高", 1.65);
        map.put("性别", '女');
        map.put("生日", new Date()); //系统当前时间
        mapper.insertStudentByMap(map);
        sqlSession.commit();
        SqlSessionUtil.close(sqlSession);
    }
结果:

8.3 实体类参数
接口内的方法:
    //保存学生信息,通过pojo参数。Student是单个参数,但不是简单类型。
    int insertStudentByPOJO(Student student);
SQL语句:
这里需要注意的是:#{} 里面写的是属性名字。这个属性名其本质上是:set/get方法名去掉set/get之后的名字。
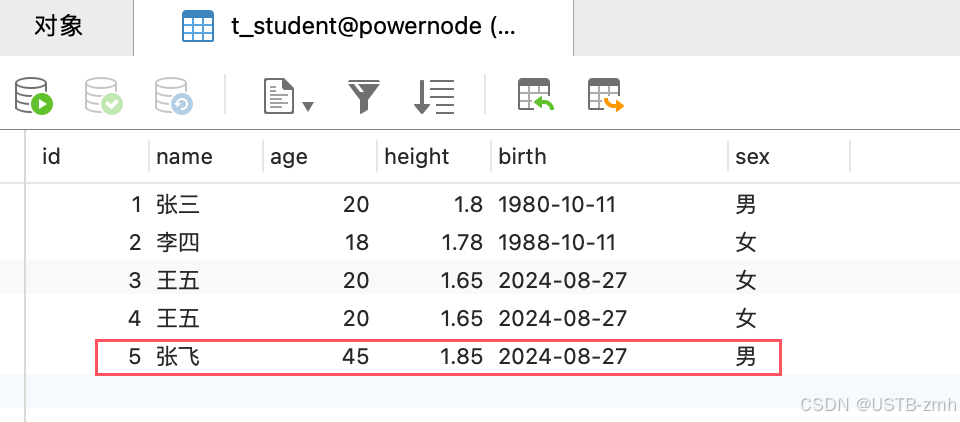
    <insert id="insertStudentByPOJO">
        insert into t_student(id,name,age,sex,birth,height) values (null,#{name},#{age},#{sex},#{birth},#{height})
    </insert>
测试:
@Test
    public void testInsertStudentByPOJO(){
        SqlSession sqlSession = SqlSessionUtil.openSession();
        StudentMapper mapper = sqlSession.getMapper(StudentMapper.class);

        Student student = new Student();
        student.setName("张飞");
        student.setAge(45);
        student.setHeight(1.85);
        student.setSex('男');
        student.setBirth(new Date());

        mapper.insertStudentByPOJO(student);
        sqlSession.commit();
        SqlSessionUtil.close(sqlSession);
    }
运行结果:

8.4 多参数
    //根据name和sex查询Student信息
    //如果是多个参数的话,mybatis会自动创建一个Map集合,并且Map集合会以这种方式存储参数的:
    //map.put("arg0", name);
    //map.put("arg1", sex);
    //map.put("param1", name);
    //map.put("param2", sex);
    List<Student> selectByNameAndSex(String name, Character sex);
SQL语句:
注:替换成param则为param1 param2;低版本的mybatis直接#{0},#{1}
    <select id="selectByNameAndSex" resultType="Student">
        select * from t_student where name = #{arg0} and sex = #{arg1}
    </select>
测试代码:
@Test
    public void testSelectByNameAndSex(){
        SqlSession sqlSession = SqlSessionUtil.openSession();
        StudentMapper mapper = sqlSession.getMapper(StudentMapper.class);
        List<Student> students = mapper.selectByNameAndSex("张三", '男');
        students.forEach(student -> System.out.println(student));
        SqlSessionUtil.close(sqlSession);
    }
运行结果:

8.5 @Param注解(命名参数)
接口方法:
//Param注解
    //mybatis底层实现原理:
    //map.put("name", name);
    //map.put("sex", sex);
    List<Student> selectByNameAndSex2(@Param("name") String name, @Param("sex") Character sex);
SQL语句:
    <select id="selectByNameAndSex2" resultType="Student">
        select * from t_student where name = #{name} and sex = #{sex}
    </select>
测试:
    @Test
    public void testSelectByNameAndSex(){
        SqlSession sqlSession = SqlSessionUtil.openSession();
        StudentMapper mapper = sqlSession.getMapper(StudentMapper.class);
        List<Student> students = mapper.selectByNameAndSex2("张三", '男');
        students.forEach(student -> System.out.println(student));
        SqlSessionUtil.close(sqlSession);
    }
运行结果:

九、MyBatis查询语句专题
创建一个新的模块:
9.1 返回Car
CarMapper接口:
    //根据id查询一个car
    Car selectById(Long id);
SQL语句:
注意:我这里Car类的属性名字与t_car表的字段名是完全一样,因此不需要起别名。如果属性名和字段名不同,需要起别名。
    <select id="selectById" resultType="Car">
        select * from t_car where id = #{id}
    </select>
测试代码:
    @Test
    public void testSelectById(){
        SqlSession sqlSession = SqlSessionUtil.openSession();
        CarMapper mapper = sqlSession.getMapper(CarMapper.class);
        Car car = mapper.selectById(1L);
        System.out.println(car);
        SqlSessionUtil.close(sqlSession);
    }
运行结果:

9.2 返回List Car
接口:
    //查询所有的Car
    List<Car> selectAll();
SQL语句:
    <select id="selectAll" resultType="car">
        select * from t_car
    </select>
测试方法:
    @Test
    public void testSelectAll(){
        SqlSession sqlSession = SqlSessionUtil.openSession();
        CarMapper mapper = sqlSession.getMapper(CarMapper.class);
        List<Car> cars = mapper.selectAll();
        cars.forEach(car -> System.out.println(car));
        SqlSessionUtil.close(sqlSession);
    }
运行结果:

9.3 返回Map
接口:
    //根据id获取汽车信息,并将信息放到Map集合中
    Map<String, Object> selectByIdRetMap(Long id);
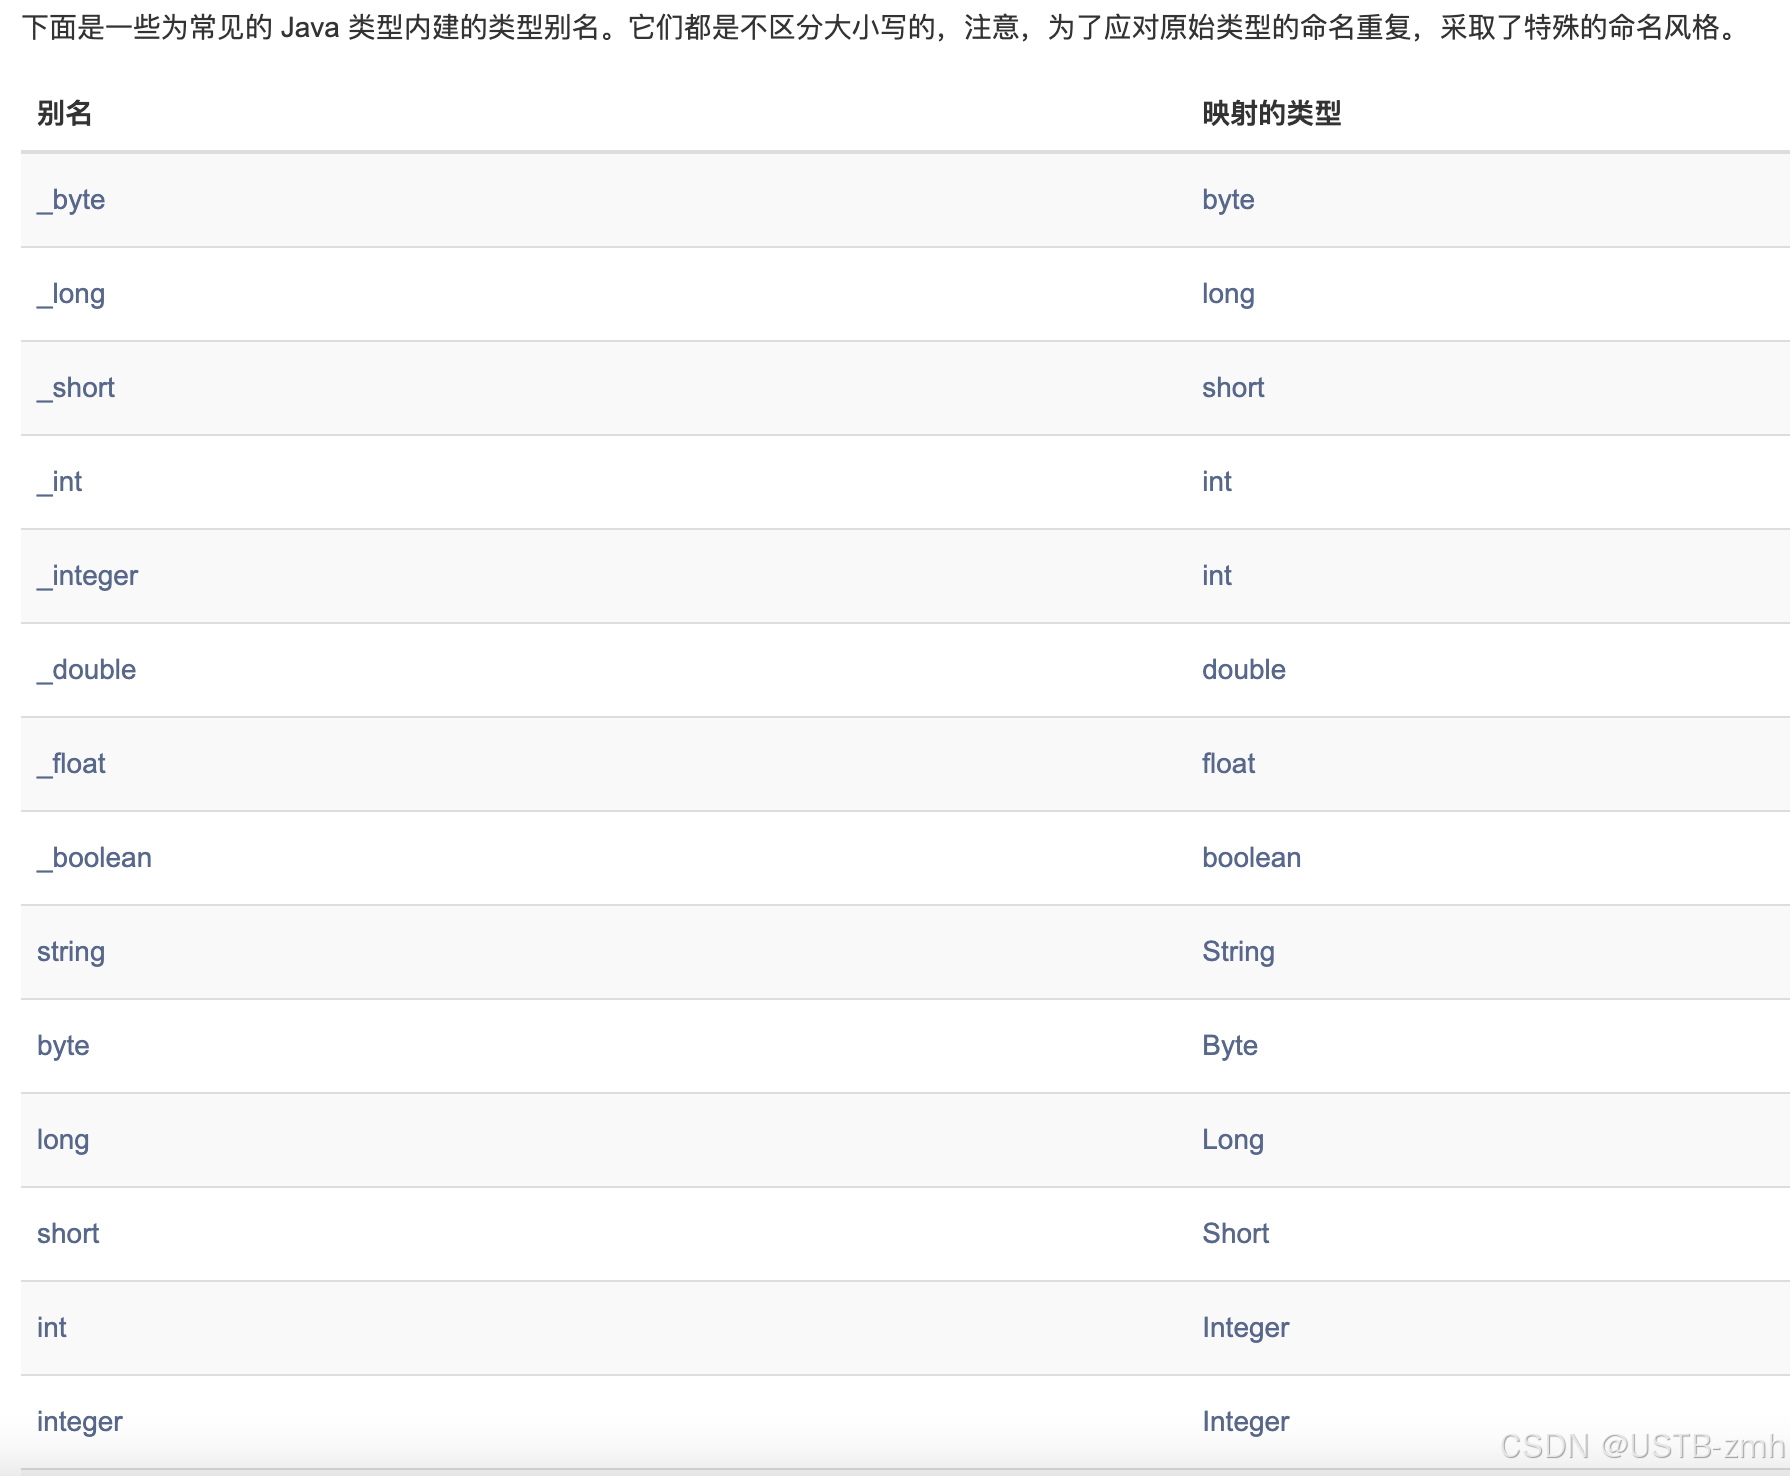
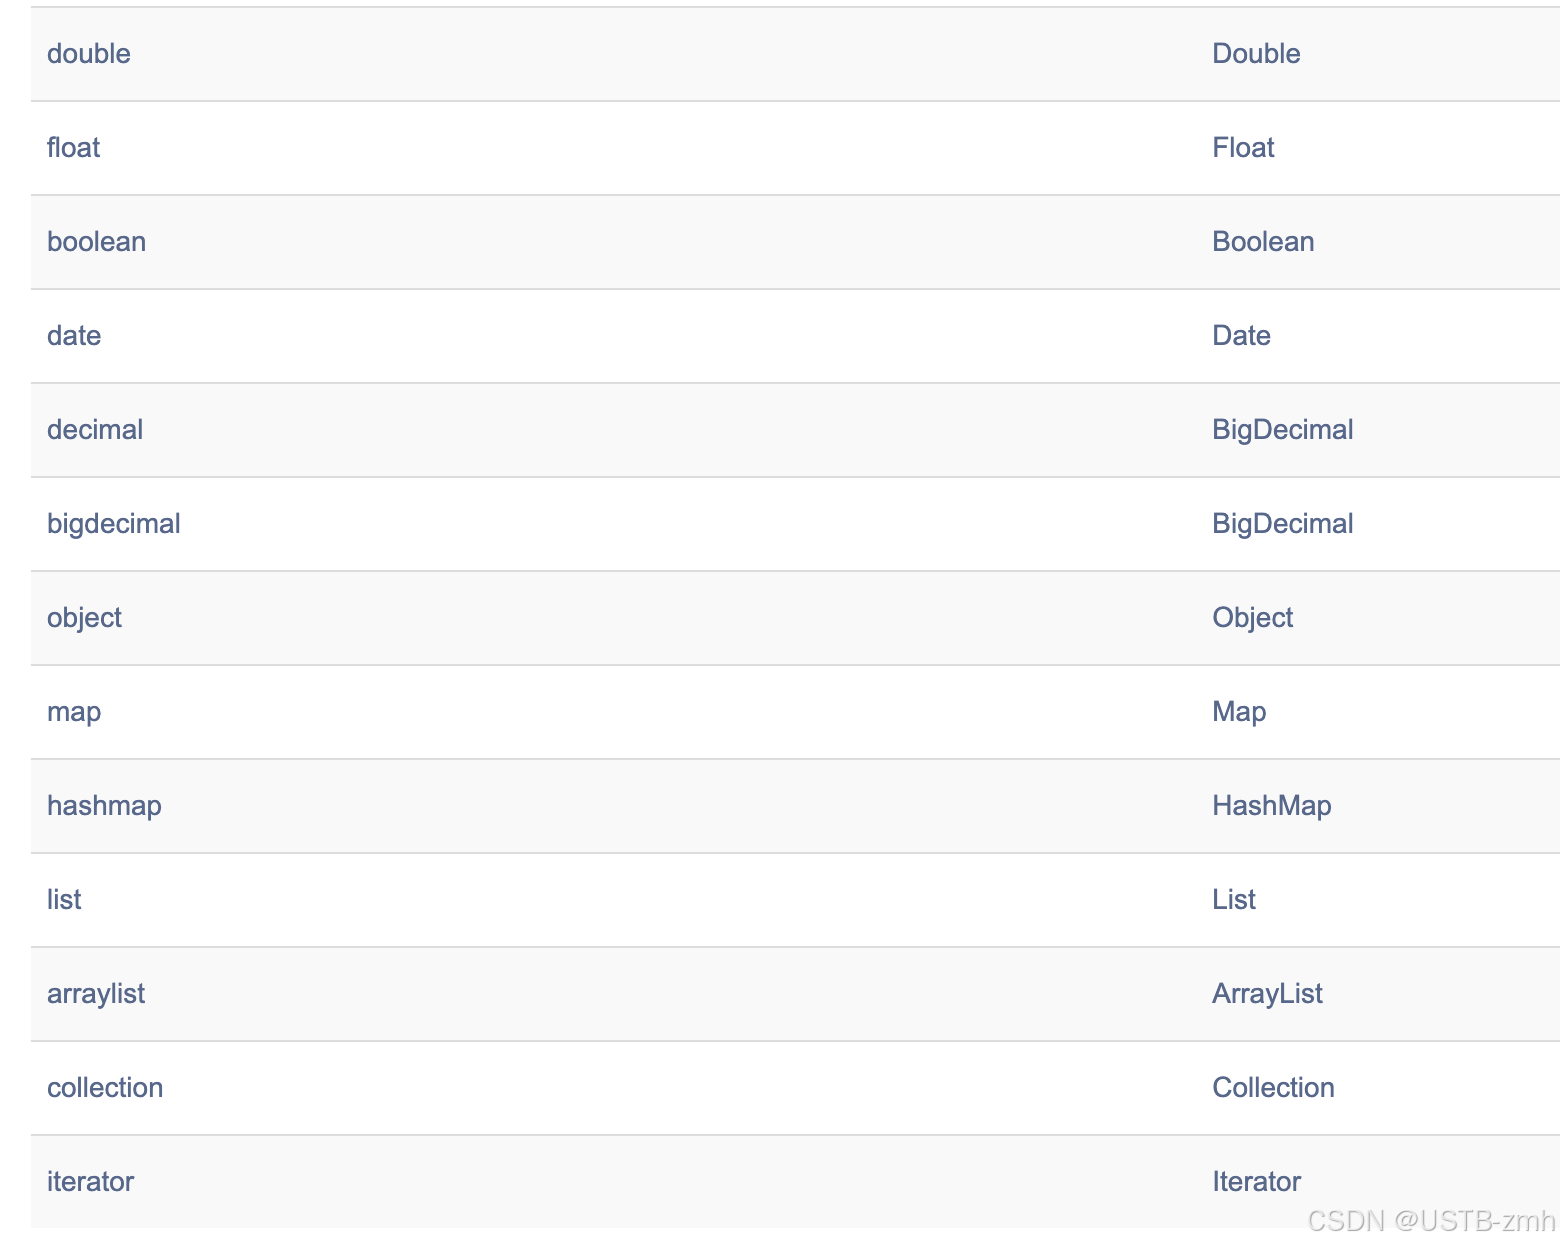
SQL语句:
resultMap=“map”,这是因为mybatis内置了很多别名。【参见mybatis开发手册】
    <select id="selectByIdRetMap" resultType="map">
        select * from t_car where id = #{id}
    </select>
测试代码:
    @Test
    public void testSelectByIdRetMap(){
        SqlSession sqlSession = SqlSessionUtil.openSession();
        CarMapper mapper = sqlSession.getMapper(CarMapper.class);
        Map<String, Object> map = mapper.selectByIdRetMap(1L);
        System.out.println(map);
        SqlSessionUtil.close(sqlSession);
    }
运行结果:

9.4 返回List Map
接口代码:
    //查询所有的car的信息,返回一个存放Map集合的List集合
    List<Map<String, Object>> selectAllRetListMap();
SQL语句:
注意:resultType是map,查询返回的是map,只不过放到List集合中了,为了存放多条map信息。
    <select id="selectAllRetListMap" resultType="map">
        select * from t_car
    </select>
测试代码:
    @Test
    public void testSelectAllRetListMap(){
        SqlSession sqlSession = SqlSessionUtil.openSession();
        CarMapper mapper = sqlSession.getMapper(CarMapper.class);
        List<Map<String, Object>> maps = mapper.selectAllRetListMap();
        maps.forEach(map -> System.out.println(map));
        SqlSessionUtil.close(sqlSession);
    }
运行结果:

9.5 返回Map<String,Map>
用上一种List Map 方法,并不是很便利。因为查询出来很多条语句,我想输出一个指定id的car的信息,那么必须去便利List集合去取出对应的car信息。因此用Car的id做key,以后取出对应的Map集合时更方便。
接口:
    //获取所有的Car,返回一个Map集合。
    //Map集合的key是Car的id。
    //Map集合的value是对应Car。
    @MapKey("id")  //将查询结果的id值作为整个大Map的key
    Map<Long, Map<String, Object>> selectAllRetMap();
SQL语句:
    <select id="selectAllRetMap" resultType="map">
        select * from t_car
    </select>
测试代码:
    @Test
    public void testSelectAllRetMap(){
        SqlSession sqlSession = SqlSessionUtil.openSession();
        CarMapper mapper = sqlSession.getMapper(CarMapper.class);
        Map<Long, Map<String,Object>> maps = mapper.selectAllRetMap();
        System.out.println(maps);
        SqlSessionUtil.close(sqlSession);
    }
运行结果:

9.6 resultMap结果映射
查询结果的列名和java对象的属性名对应不上怎么办?
- 第一种方式:as 给列起别名
- 第二种方式:使用resultMap进行结果映射
- 第三种方式:是否开启驼峰命名自动映射(配置settings)
使用resultMap进行结果映射
接口:
    //查询所有的Car信息,使用resultMap标签进行结果的映射
    List<Car> selectAllByResultMap();
SQL语句:
本人这里的POJO类的属性名和数据库的字段名一致。
    <!--
        1.专门定义一个结果映射,在这个结果映射当中指定数据库的字段名和Java类的属性名的对应关系。
        2.type属性:用来指定POJO类的类名(我们已经在mybaits的配置文件进行配置,因此只需要POJO类的别名即可)。
        3.id属性:指定resultMap的唯一标识。这个id将来要在select标签中使用。
    -->
    <resultMap id="carResultMap" type="Car">
        <!--如果数据库表中有主键,一般都是有主键,要不然不符合数据库设计第一范式-->
        <!--如果有主键,建议这里配置一个id标签,注意:这不是必须的,但mybatis解释说这样配置可以让mybatis提高效率-->
        <id property="id" column="id"/>
        <!--property后面填写POJO类的属性名-->
        <!--column后面填写数据库表的字段名-->
        <result property="car_num" column="car_num"/>
        <!--如果column和property是一样的,是可以省略的-->
        <result property="brand" column="brand"/>
        <result property="guide_price" column="guide_price"/>
        <result property="produce_time" column="produce_time"/>
        <result property="car_type" column="car_type"/>
    </resultMap>

    <!--select标签的resultMap属性,用来指定使用哪个结果映射。resultMap后面的值是resultMap的id-->
    <select id="selectAllByResultMap" resultMap="carResultMap">
        select * from t_car
    </select>
测试代码:
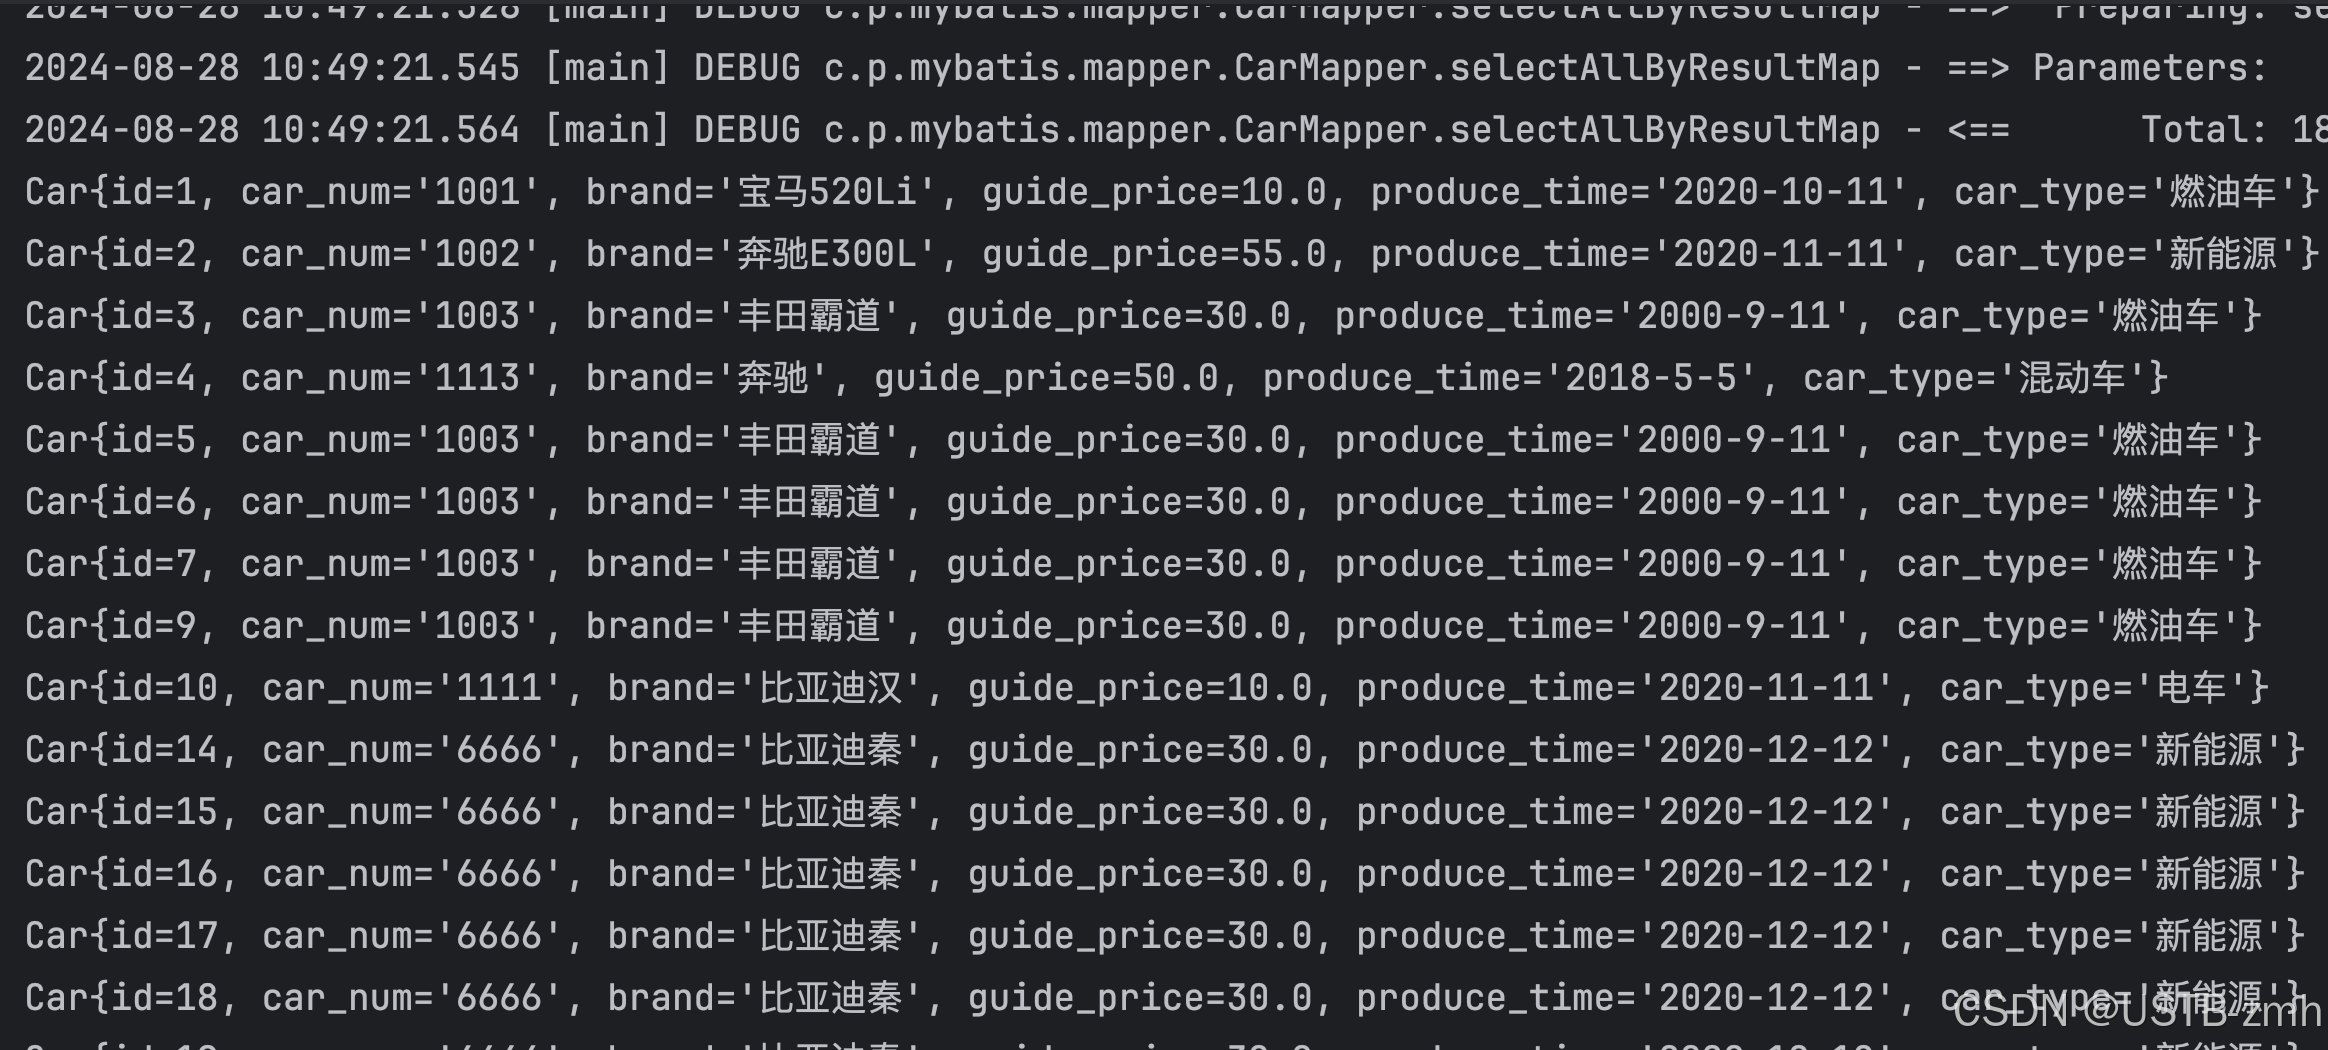
    @Test
    public void testSelectAllByResultMap(){
        SqlSession sqlSession = SqlSessionUtil.openSession();
        CarMapper mapper = sqlSession.getMapper(CarMapper.class);
        List<Car> cars = mapper.selectAllByResultMap();
        cars.forEach(car -> System.out.println(car));
        SqlSessionUtil.close(sqlSession);
    }
运行结果:
是否开启驼峰命名自动映射
使用这种方式的前提是:属性名遵循Java的命名规范,数据库表的列名遵循SQL的命名规范。
Java命名规范:首字母小写,后面每个单词首字母大写,遵循驼峰命名方式。
SQL命名规范:全部小写,单词之间采用下划线分割。
比如以下的对应关系:
如何启用该功能,在mybatis-config.xml文件中进行配置:

<!--放在properties标签后面-->
<settings>
  <setting name="mapUnderscoreToCamelCase" value="true"/>
</settings>
9.7 返回总记录条数
接口:
    //获取总记录条数
    Long selectTotal();
SQL语句:
    <select id="selectTotal" resultType="long">
        select count(*) from t_car
    </select>
测试代码:
    @Test
    public void testSelectTotal(){
        SqlSession sqlSession = SqlSessionUtil.openSession();
        CarMapper mapper = sqlSession.getMapper(CarMapper.class);
        Long total = mapper.selectTotal();
        System.out.println("总记录条数: " + total);
        SqlSessionUtil.close(sqlSession);
    }
运行结果:

十、动态SQL
有的业务场景,也需要SQL语句进行动态拼接,例如:
- 批量删除
- 多条件查询
创建一个新模块:
这个模块的mybatis-config.xml中配置了:
<!--放在properties标签后面-->
<settings>
  <setting name="mapUnderscoreToCamelCase" value="true"/>
</settings>
10.1 if标签
CarMapper接口中的代码:
    //多条件查询
    List<Car> selectByMultiCondition(@Param("brand") String brand, @Param("guidePrice") Double guidePrice, @Param("carType") String carType);
SQL语句:
注:SQL语句中的1 = 1是防止SQL语句错误报错。如果没有1 = 1的话,那么当参数都为空时SQL语句 where 后为空,会报错。
    <select id="selectByMultiCondition" resultType="car">
        select * from t_car where 1 = 1
        <!--
            1.if标签中test属性是必须的。
            2.if标签中test属性的值是false或true
            3.如果test是true,则if标签中的sql语句就会拼接。反之则不会拼接。
            4.test属性中可以使用的是:
                当使用了@Param注解,那么test中要出现的是@Param注解指定的参数名。@Param("brand"),那么这里只能使用brand
                当没有使用@Param注解,那么test中要出现的是:param1,param2,arg0,arg1
                当使用了POJO类,那么test中出现的是POJO类的属性名。
            5.在mybatis的动态SQL当中,不能使用&&,只能使用and
        -->
        <if test="brand != null and brand != ''">
            and brand like "%"#{brand}"%"
        </if>
        <if test="guidePrice != null and guidePrice != ''">
            and guide_price > #{guidePrice}
        </if>
        <if test="carType != null and carType != ''">
            and car_type = #{carType}
        </if>
测试代码:
    @Test
    public void testSelectByMultiCondition(){
        SqlSession sqlSession = SqlSessionUtil.openSession();
        CarMapper mapper = sqlSession.getMapper(CarMapper.class);
        List<Car> cars =  mapper.selectByMultiCondition("比亚迪", 20.0, "新能源");
        cars.forEach(car -> System.out.println(car));
        SqlSessionUtil.close(sqlSession);
    }
运行结果:
大于20万的比亚迪新能源汽车都输出了!


10.2 where标签
where标签的作用:让where子句更加动态智能。
- 所有条件都为空时,where标签保证不会生成where子句。
- 自动去除某些条件前面多余的and或or。
CarMapper接口:
    //使用where标签,让where子句更加智能
    List<Car> selectByMultiConditionWithWhere(@Param("brand") String brand, @Param("guidePrice") Double guidePrice, @Param("carType") String carType);
SQL语句:
注意:这里的and关键字 where标签也可以智能的去掉(如果有必要的话)。
   <select id="selectByMultiConditionWithWhere" resultType="car">
        select * from t_car
        <!--where标签是专门负责where子句动态生成的-->
        <where>
            <if test="brand != null and brand != ''">
                and brand like "%"#{brand}"%"
            </if>
            <if test="guidePrice != null and guidePrice != ''">
                and guide_price > #{guidePrice}
            </if>
            <if test="carType != null and carType != ''">
                and car_type = #{carType}
            </if>
        </where>
    </select>
测试代码:
这里将brand变为空字符串
@Test
public void testSelectByMultiConditionWithWhere(){
SqlSession sqlSession = SqlSessionUtil.openSession();
CarMapper mapper = sqlSession.getMapper(CarMapper.class);
//List<Car> cars = mapper.selectByMultiCondition("比亚迪", 20.0, "新能源");
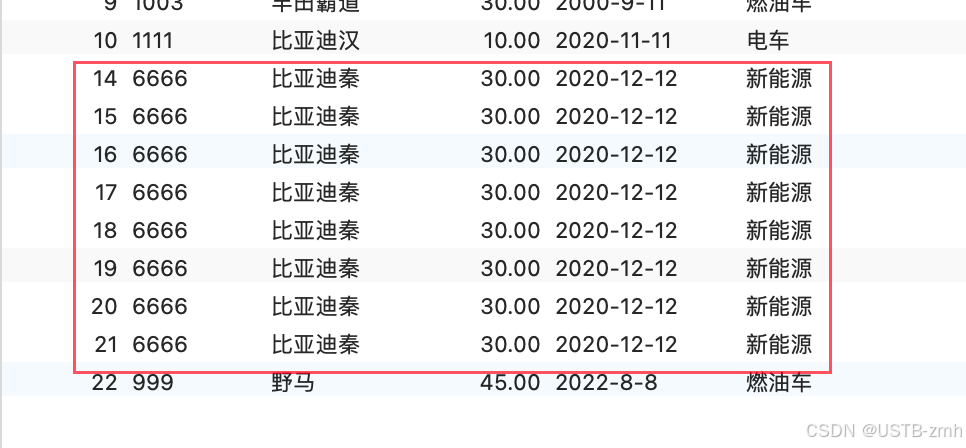
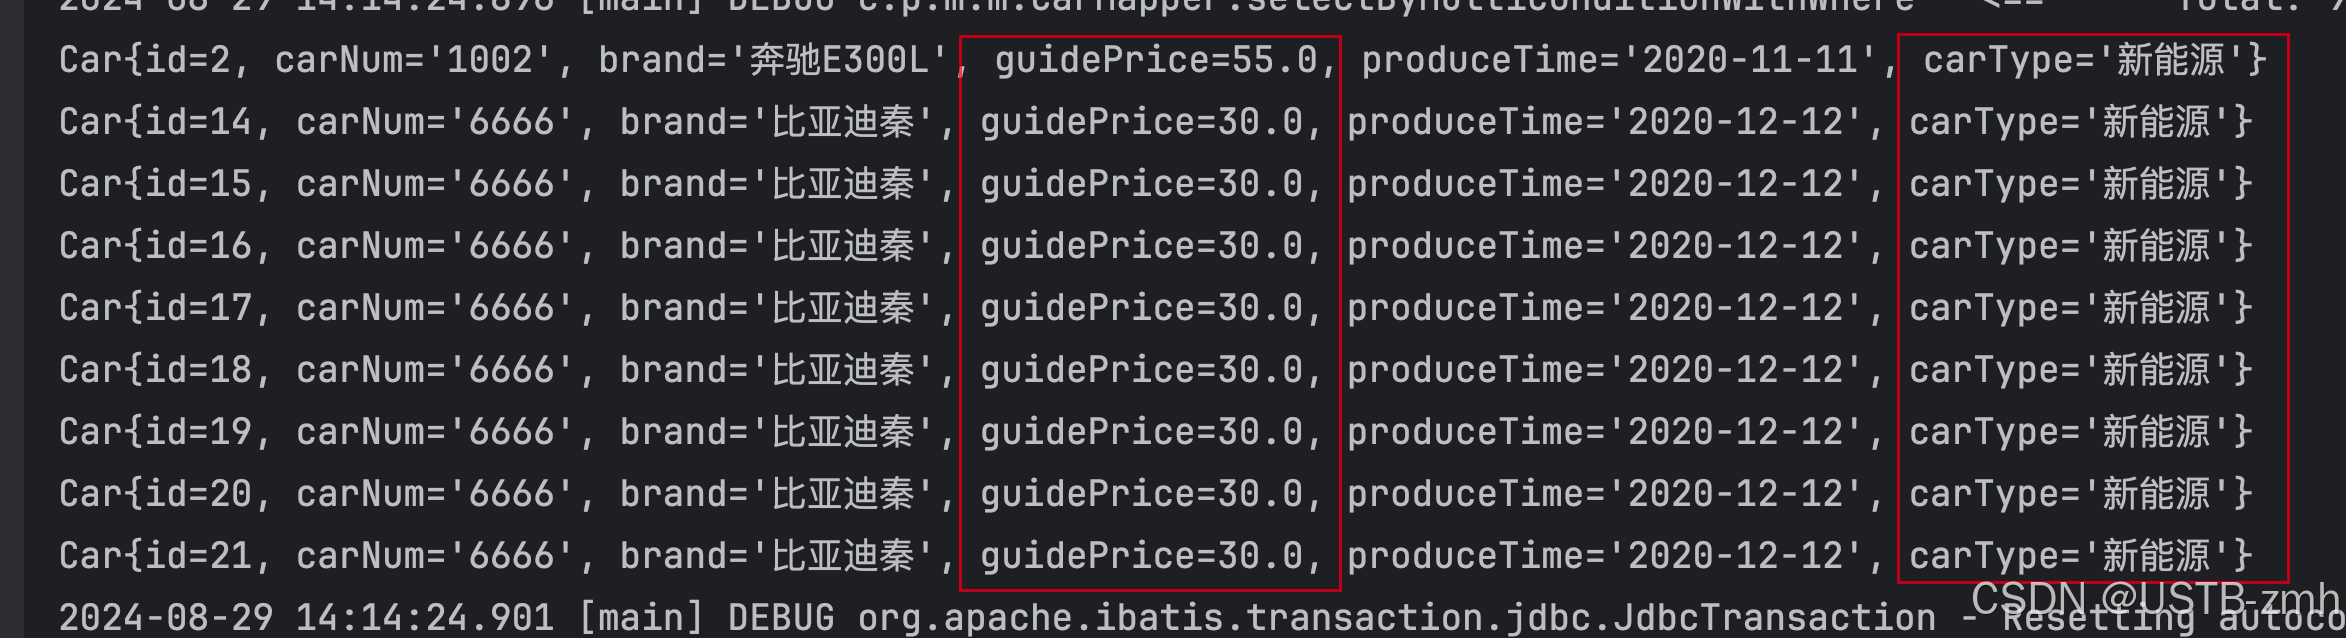
List<Car> cars = mapper.selectByMultiConditionWithWhere("", 20.0, "新能源");
cars.forEach(car -> System.out.println(car));
SqlSessionUtil.close(sqlSession);
}
运行结果:

10.3 trim标签
trim标签的属性:
- prefix:在trim标签中的语句前添加内容
- suffix:在trim标签中的语句后添加内容
- prefixOverrides:前缀覆盖掉(去掉)
- suffixOverrides:后缀覆盖掉(去掉)
CarMapper接口:
    //使用trim标签
    List<Car> selectByMultiConditionWithTrim(@Param("brand") String brand, @Param("guidePrice") Double guidePrice, @Param("carType") String carType);
SQL语句:
    <select id="selectByMultiConditionWithTrim" resultType="car">
        select * from t_car
        <!--prefix="where" 是在trim标签所有内容的前面添加 where-->
        <!--suffixOverrides="and|or" 把trim标签中内容的后缀and或or去掉-->
        <trim prefix="where" suffixOverrides="and|or">
            <if test="brand != null and brand != ''">
                brand like "%"#{brand}"%" and
            </if>
            <if test="guidePrice != null and guidePrice != ''">
                guide_price > #{guidePrice} and
            </if>
            <if test="carType != null and carType != ''">
                car_type = #{carType}
            </if>
        </trim>
    </select>
测试代码:
@Test
public void testSelectByMultiConditionWithTrim(){
SqlSession sqlSession = SqlSessionUtil.openSession();
CarMapper mapper = sqlSession.getMapper(CarMapper.class);
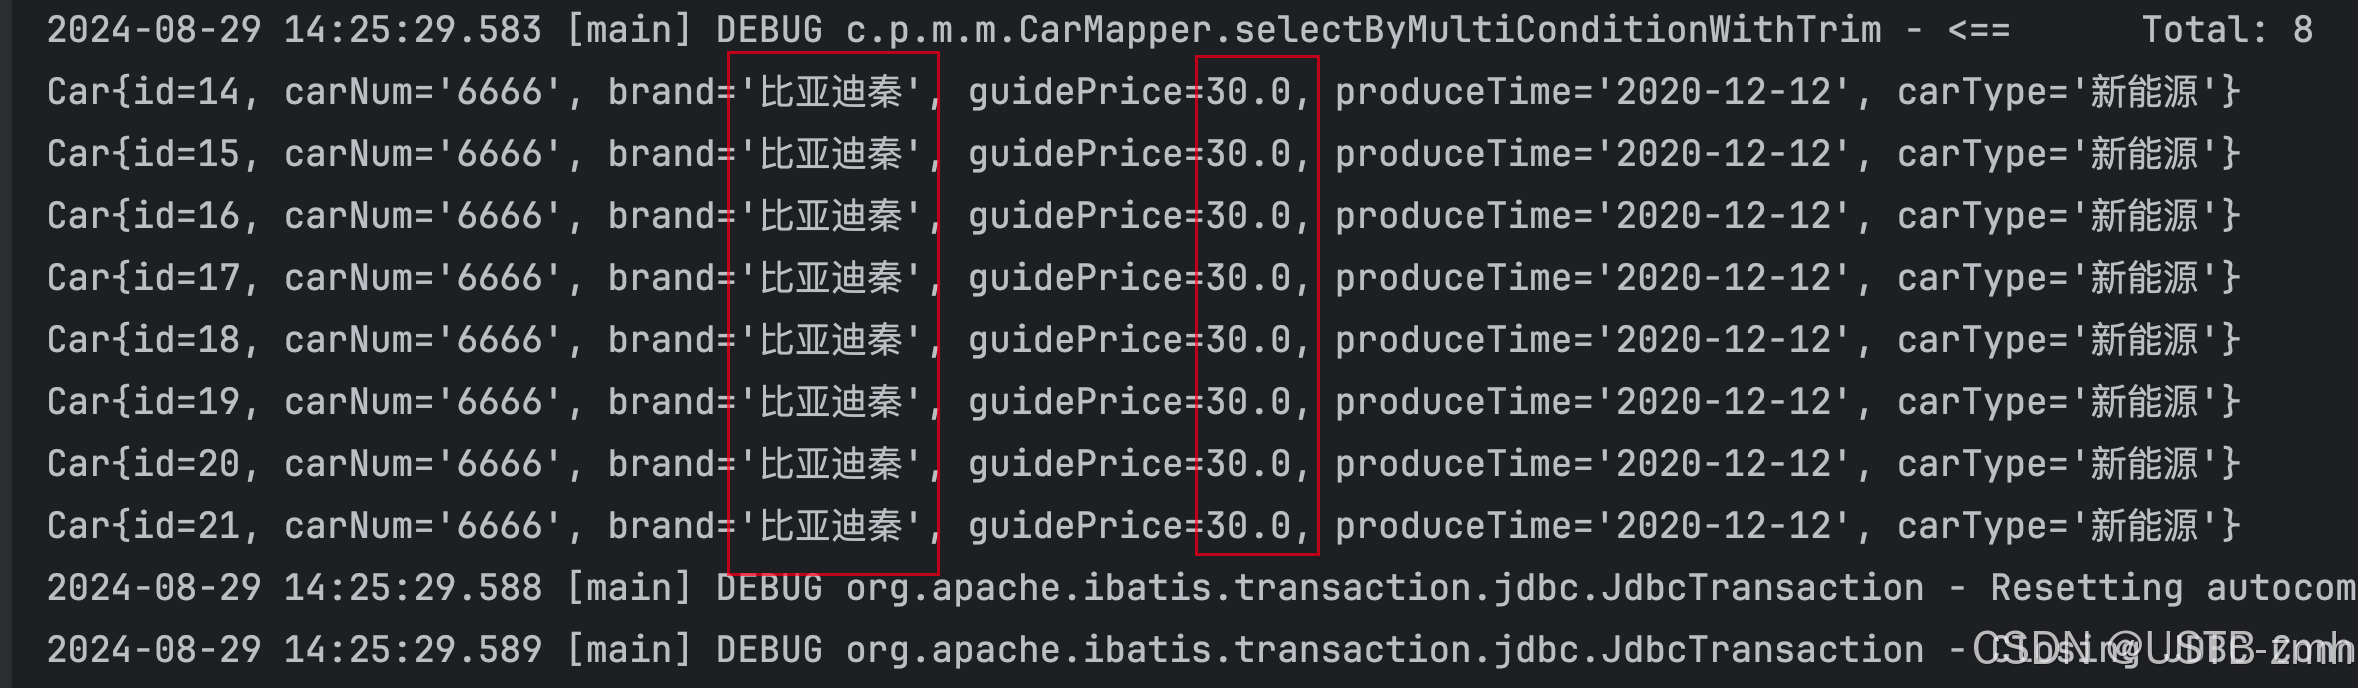
List<Car> cars = mapper.selectByMultiConditionWithTrim("比亚迪", 20.0, "");
cars.forEach(car -> System.out.println(car));
SqlSessionUtil.close(sqlSession);
}
运行结果:
可以看出智能增加了where 删除了后缀的and

10.4 set标签
主要使用在update语句当中,用来生成set关键字,同时去掉最后多余的“,”
比如我们只更新提交的不为空的字段,如果提交的数据是空或者"",那么这个字段我们将不更新。
CarMapper接口:
    //更新Car
    int updateByIdWithSet(Car car);
SQL语句:
    <update id="updateByIdWithSet">
        update t_car
        <set>
            <if test="carNum != null and carNum != ''">car_num = #{carNum},</if>
            <if test="brand != null and brand != ''">brand = #{brand},</if>
            <if test="guidePrice != null and guidePrice != ''">guide_price = #{guidePrice},</if>
            <if test="produceTime != null and produceTime != ''">produce_time = #{produceTime},</if>
            <if test="carType != null and carType != ''">car_type = #{carType},</if>
        </set>
        where id = #{id}
    </update>
测试代码:
@Test
public void testUpdateByIdWithSet(){
SqlSession sqlSession = SqlSessionUtil.openSession();
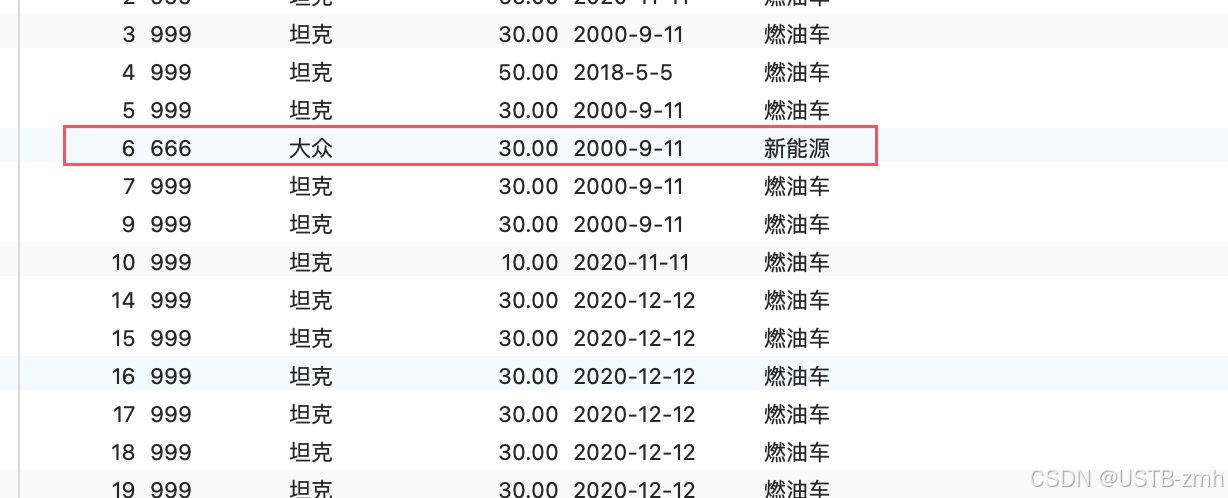
CarMapper mapper = sqlSession.getMapper(CarMapper.class);
Car car = new Car(6L,"666","大众",null,null,"新能源");
int count = mapper.updateByIdWithSet(car);
sqlSession.commit();
SqlSessionUtil.close(sqlSession);
}
运行结果:
可以看到增加了set,末尾的逗号也进行了删除。

10.5 choose when otherwise
这三个标签是在一起使用的:
<choose>
  <when></when>
  <when></when>
  <when></when>
  <otherwise></otherwise>
</choose>
等同于:
if(){

}else if(){

}else if(){

}else if(){

}else{

}
只有一个分支会被选择!!!!
需求:先根据品牌查询,如果没有提供品牌,再根据指导价格查询,如果没有提供指导价格,就根据生产日期查询。
CarMapper接口:
    //使用choose when otherwise标签。
    List<Car> selectByChoose(@Param("brand") String brand, @Param("guidePrice") Double guidePrice, @Param("carType") String carType);
SQL语句:
    <select id="selectByChoose" resultType="Car">
        select * from t_car
        <where>
            <choose>
                <when test="brand != null and brand != ''">
                    brand like "%"#{brand}"%"
                </when>
                <when test="guidePrice != null and guidePrice != ''">
                    guide_price > #{guidePrice}
                </when>
                <otherwise>
                    car_type = #{carType}
                </otherwise>
            </choose>
        </where>
    </select>
测试代码:
    @Test
    public void testSelectByChoose(){
        SqlSession sqlSession = SqlSessionUtil.openSession();
        CarMapper mapper = sqlSession.getMapper(CarMapper.class);
        List<Car> cars = mapper.selectByChoose("",null, "新能源");
        cars.forEach(car -> System.out.println(car));
        SqlSessionUtil.close(sqlSession);
    }
运行结果:


10.6 foreach标签
10.6.1 批量删除
循环数组或集合,动态生成sql,比如这样的SQL:
CarMapper接口:
    //批量删除
    int deleteByIds(@Param("ids") Long[] ids);
SQL代码:
也可以在SQL语句中不加’(', ‘)’,用标签属性open close。
<!--
foreach标签的属性:
collection:指定数组或者集合
item:代表数组或集合中的元素(即变量名)
separator:循环之间的分隔符
open:foreach循环拼接的所有sql语句的最前面以什么开始
close:foreach循环拼接的所有sql语句的最后面以什么开始
collection="ids" 第一次执行这个会报错,报错信息:[array, arg0]
即:mybatis底层执行:map.put("array", 数组); map.put("arg0", 数组);
因此collection="array" 或 collection="arg0"
但是可读性较差,我们可以加注解@Param("ids")就可以用collection="ids"
-->
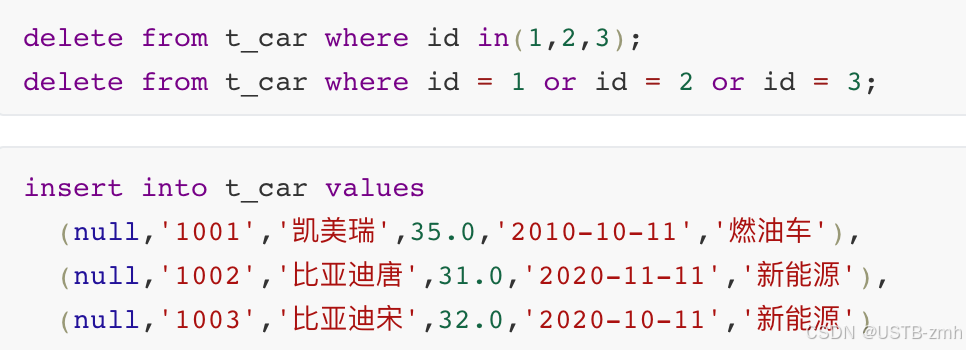
<delete id="deleteByIds">
delete from t_car where id in(
<foreach collection="ids" item="idx" separator=",">
#{idx}
</foreach>
)
</delete>
也可以用这种方式,这里就不进行测试了!
	<delete id="deleteByIds2">
		delete from t_car where
		<foreach collection="ids" item="idx" separator="or">
			id = #{idx}
		<foreach>
	<delete>
测试代码:
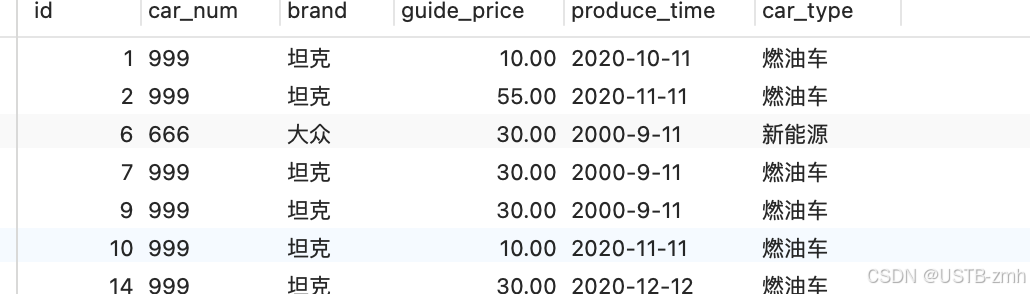
    @Test
    public void testDeleteByIds(){
        SqlSession sqlSession = SqlSessionUtil.openSession();
        CarMapper mapper = sqlSession.getMapper(CarMapper.class);
        Long[] ids = {3L,4L,5L};
        int count = mapper.deleteByIds(ids);
        System.out.println(count);
        sqlSession.commit();
        SqlSessionUtil.close(sqlSession);
    }
运行结果:

10.6.2 批量添加
CarMapper接口:
    //批量插入
    int insertBatch(@Param("cars") List<Car> cars);
SQL语句:
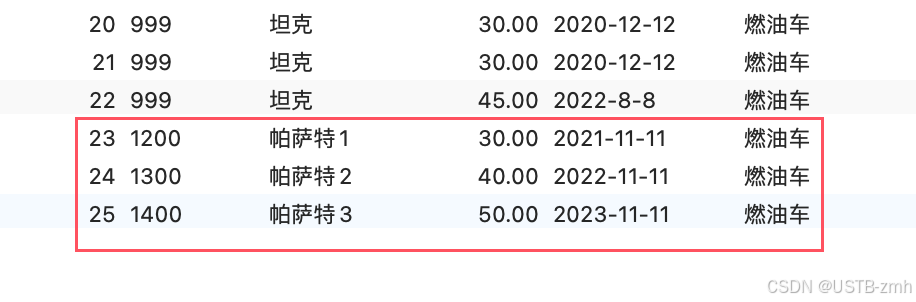
    <insert id="insertBatch">
        insert into t_car values
        <foreach collection="cars" item="car" separator=",">
            (null, #{car.carNum}, #{car.brand}, #{car.guidePrice}, #{car.produceTime}, #{car.carType})
        </foreach>
    </insert>
测试代码:
    @Test
    public void testInsertBatch(){
        SqlSession sqlSession = SqlSessionUtil.openSession();
        CarMapper mapper = sqlSession.getMapper(CarMapper.class);
        List<Car> cars = new ArrayList<>();
        Car car1 = new Car(null, "1200", "帕萨特1", 30.0, "2021-11-11", "燃油车");
        Car car2 = new Car(null, "1300", "帕萨特2", 40.0, "2022-11-11", "燃油车");
        Car car3 = new Car(null, "1400", "帕萨特3", 50.0, "2023-11-11", "燃油车");
        cars.add(car1);
        cars.add(car2);
        cars.add(car3);
        mapper.insertBatch(cars);
        sqlSession.commit();
        SqlSessionUtil.close(sqlSession);
    }
运行结果:

10.7 sql标签与include标签
sql标签用来声明sql片段
include标签用来将声明的sql片段包含到某个sql语句当中
作用:代码复用。易维护。

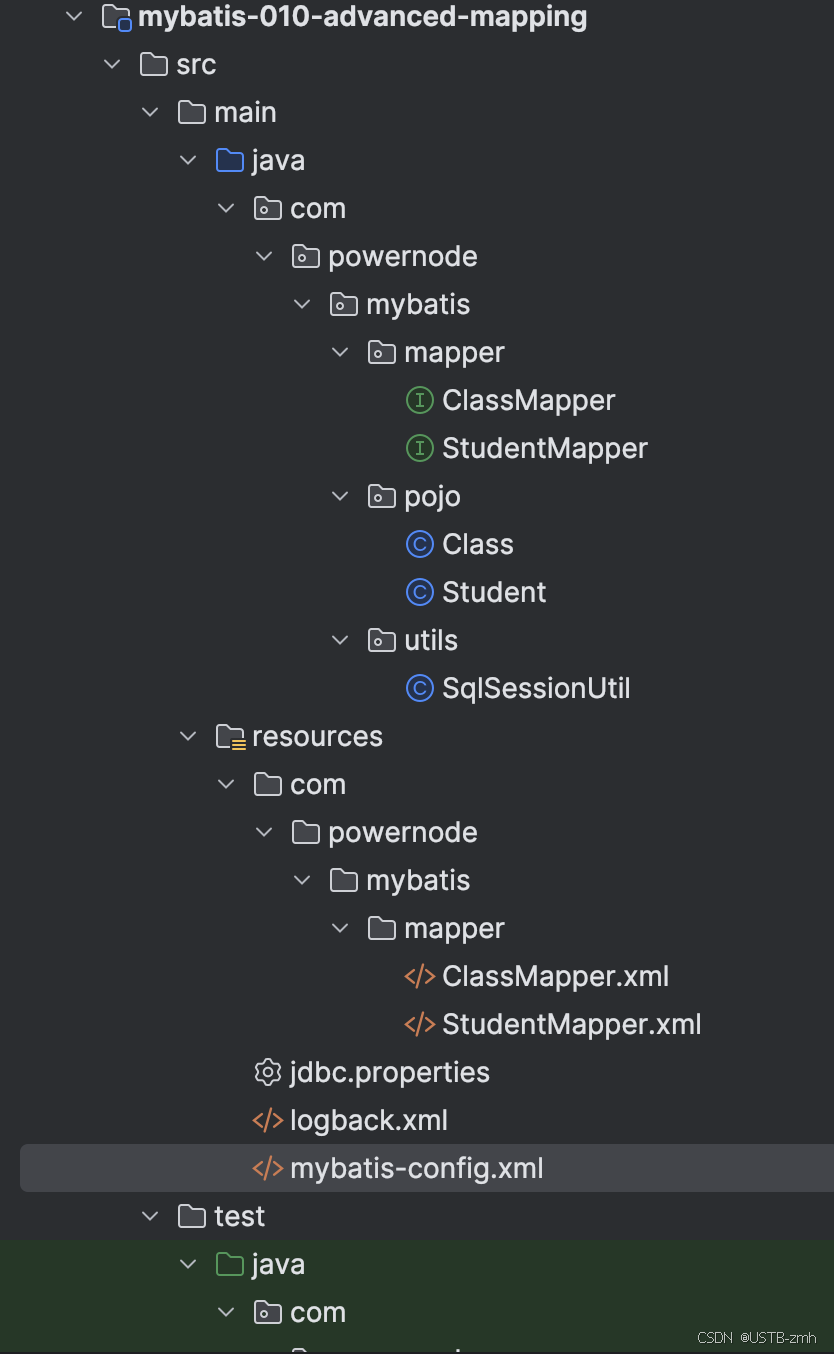
十一、 MyBatis的高级映射及延迟加载
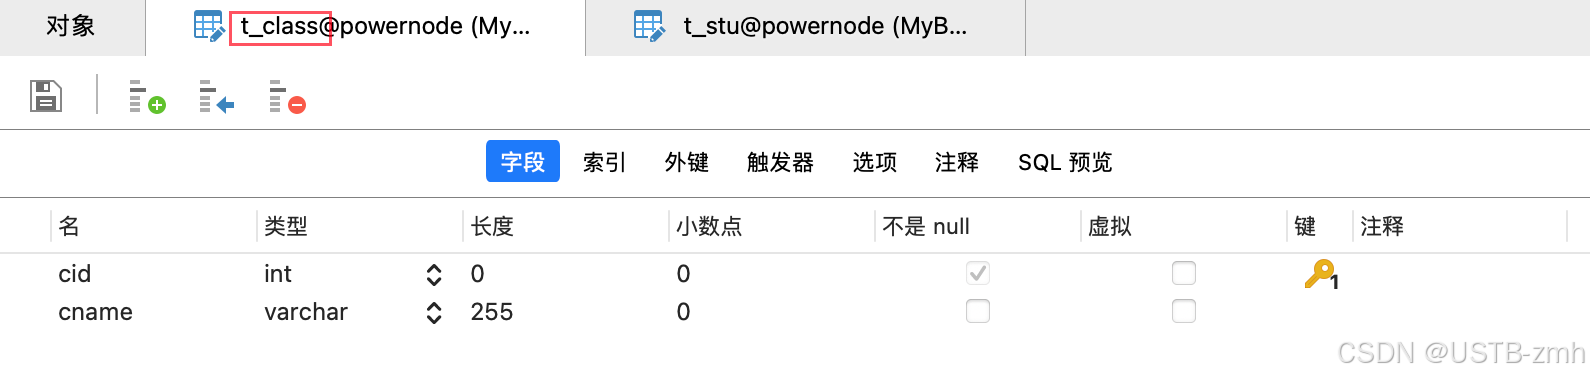
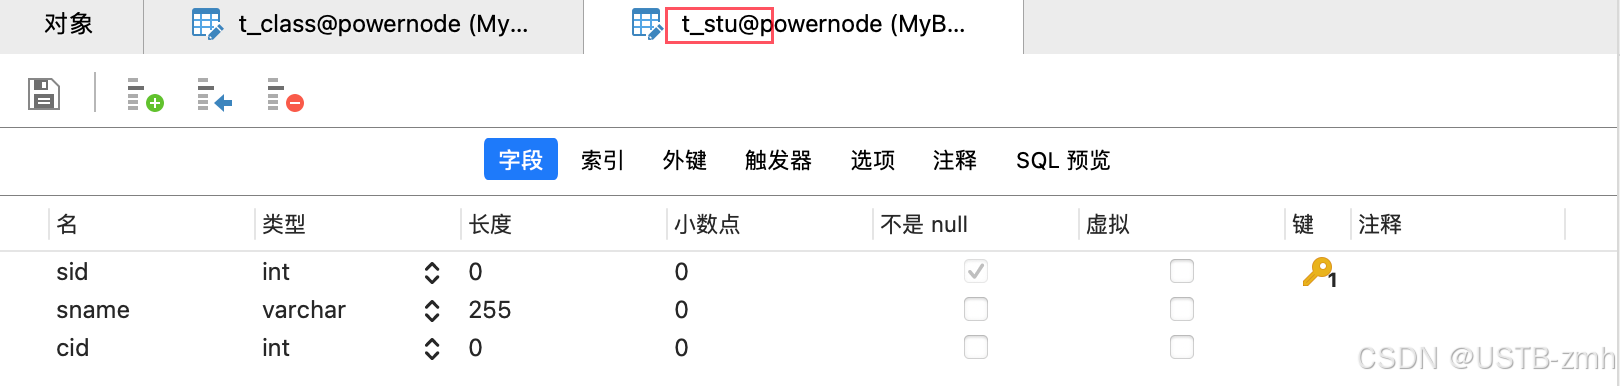
创建两张表:
创建一个新的模块:
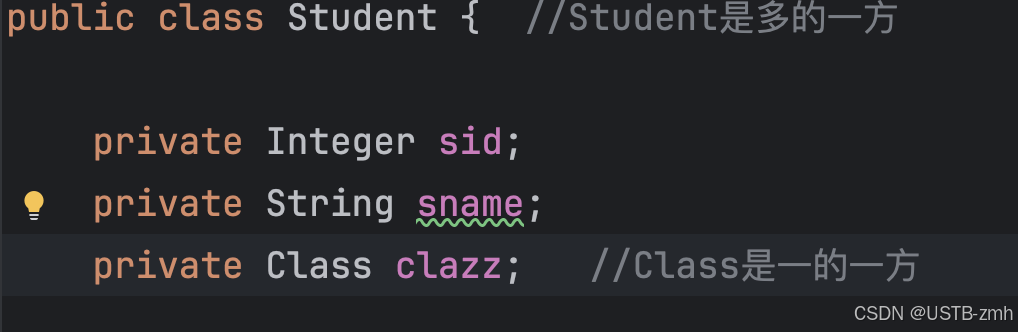
有几个pojo类就创建几个mapper,Student的属性的cid(两表相连的外键)不加,有特殊的处理方法。
11.1 多对一
多对一:
多的一方是:Student
一的一方是:Class
怎么分主表和副表:
原则:谁在前谁就是主表
多对一:多在前,那么多就是主表
一对多:一在前,那么一就是主表
多种方式,常见的包括三种:
- 第一种方式:一条SQL语句,级联属性映射。
- 第二种方式:一条SQL语句,association。
- 第三种方式:两条SQL语句,分步查询。(这种方式常用:优点一是可复用。优点二是支持懒加载。)
第一种方式:级联属性映射
StudentMapper接口:
    //根据id获取学生信息,同时获取学生关联的班级信息
    //返回的是学生对象,但是学生对象当中含有班级对象
    Student selectById(Integer id);
SQL语句:
    <resultMap id="studentResultMap" type="Student">
        <id property="sid" column="sid"/>
        <result property="sname" column="sname"/>
        <result property="clazz.cid" column="cid"/>
        <result property="clazz.cname" column="cname"/>
    </resultMap>

    <select id="selectById" resultMap="studentResultMap">
        select
            s.sid, s.sname, c.cid, c.cname
        from
            t_stu s join t_class c on s.cid = c.cid
        where
            s.sid = #{sid}
    </select>
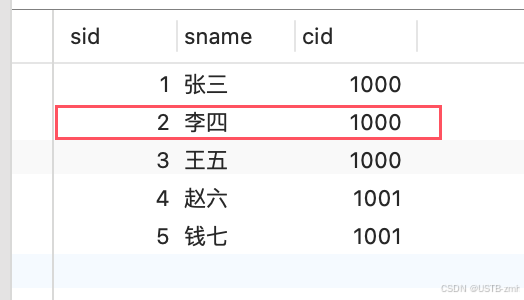
测试代码:
    @Test
    public void testSelectById(){
        SqlSession sqlSession = SqlSessionUtil.openSession();
        StudentMapper mapper = sqlSession.getMapper(StudentMapper.class);
        Student student = mapper.selectById(2);
        System.out.println(student);
        SqlSessionUtil.close(sqlSession);
    }
运行结果:


第二种方式:association
其他位置都不需要修改,只需要修改resultMap中的配置:association即可。
StudentMapper接口:
Student selectByIdAssociation(Integer id);
SQL语句:
    <resultMap id="studentResultMapAssociation" type="Student">
        <id property="sid" column="sid"/>
        <result property="sname" column="sname"/>
        <!--
            association:翻译为关联。一个Student对象关联一个Class对象
                property:提供要映射的POJO类的属性名
                javaType:用来指定要映射的java类型
        -->
        <association property="clazz" javaType="Class">
            <id property="cid" column="cid"/>
            <result property="cname" column="cname"/>
        </association>
    </resultMap>

    <select id="selectByIdAssociation" resultMap="studentResultMapAssociation">
        select
            s.sid, s.sname, c.cid, c.cname
        from
            t_stu s join t_class c on s.cid = c.cid
        where
            s.sid = #{sid}
    </select>
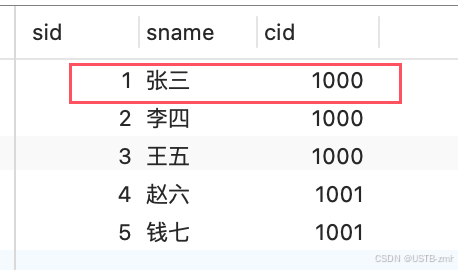
测试代码:
    @Test
    public void testSelectByIdAssociation(){
        SqlSession sqlSession = SqlSessionUtil.openSession();
        StudentMapper mapper = sqlSession.getMapper(StudentMapper.class);
        Student student = mapper.selectByIdAssociation(1);
        System.out.println(student);
        SqlSessionUtil.close(sqlSession);
    }
运行结果:

第三种方式:分步查询
StudentMapper接口:
    //分布查询第一步:先根据学生的sid查询学生的信息
    Student selectByIdStep1(Integer id);
ClassMapper接口:
    //分布查询第二步:根据cid获取班级信息
    Class selectByIdStep2(Integer cid);
StudentMapper.xml的SQL语句:
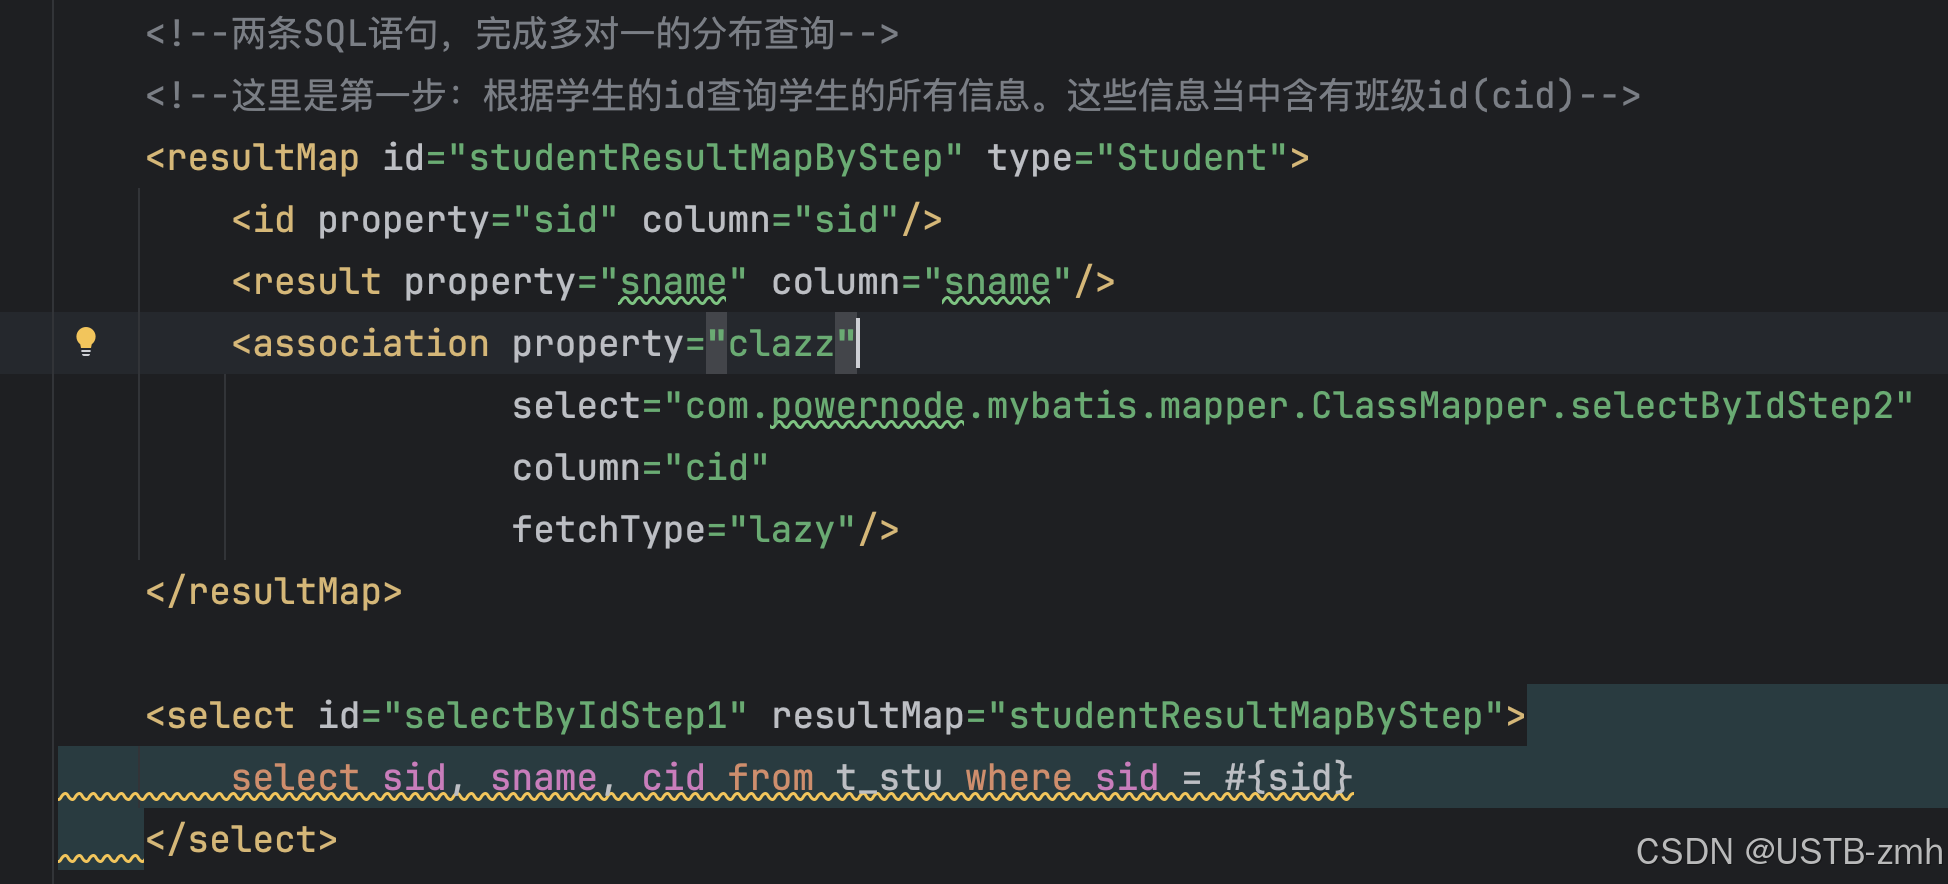
    <!--两条SQL语句,完成多对一的分布查询-->
    <!--这里是第一步:根据学生的id查询学生的所有信息。这些信息当中含有班级id(cid)-->
    <resultMap id="studentResultMapByStep" type="Student">
        <id property="sid" column="sid"/>
        <result property="sname" column="sname"/>
        <association property="clazz"
                     select="com.powernode.mybatis.mapper.ClassMapper.selectByIdStep2"
                     column="cid"/>
    </resultMap>

    <select id="selectByIdStep1" resultMap="studentResultMapByStep">
        select sid, sname, cid from t_stu where sid = #{sid}
    </select>
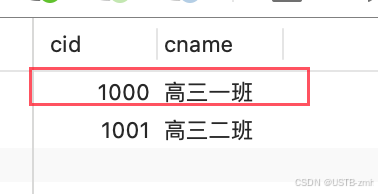
ClassMapper.xml的SQL语句:
    <!--分布查询第二步:根据cid获取班级信息。-->
    <select id="selectByIdStep2" resultType="Class">
        select cid, cname from t_class where cid = #{cid}
    </select>
测试代码:
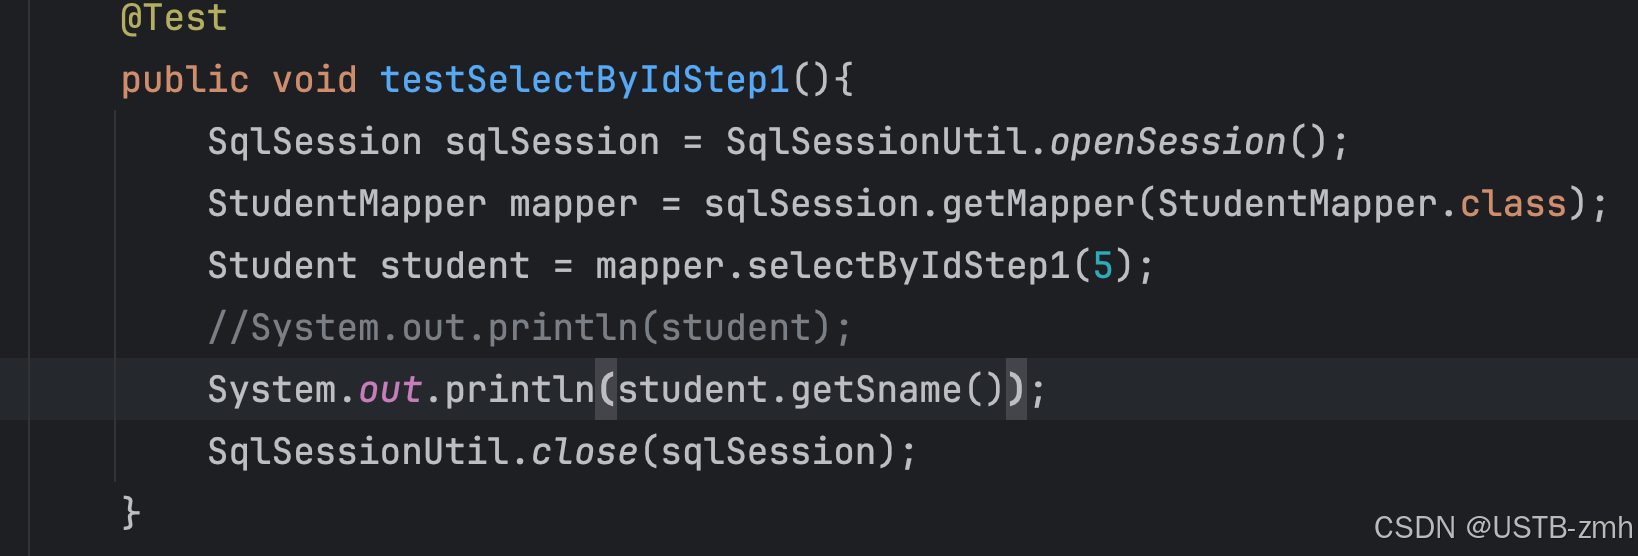
    @Test
    public void testSelectByIdStep1(){
        SqlSession sqlSession = SqlSessionUtil.openSession();
        StudentMapper mapper = sqlSession.getMapper(StudentMapper.class);
        Student student = mapper.selectByIdStep1(5);
        System.out.println(student);
        SqlSessionUtil.close(sqlSession);
    }
运行结果:
分步优点:


- 第一个优点:代码复用性增强。
- 第二个优点:支持延迟加载(懒加载)。【暂时访问不到的数据可以先不查询。提高程序的执行效率。】
延迟加载的核心原理是:用的时候再执行查询语句,不用的时候不查询。
作用:提高性能。尽可能的不查,或者说尽可能的少查,来提高效率。
11.2 多对一延迟加载
要想支持延迟加载,非常简单,只需要在association标签中添加fetchType="lazy"即可。
这个时候我们只输出学生的姓名:
运行结果:
可以看出只运行了一条SQL语句,如果没有设置懒加载,则会运行两条SQL语句。
在mybatis中如何开启全局的延迟加载呢?需要setting配置,如下:

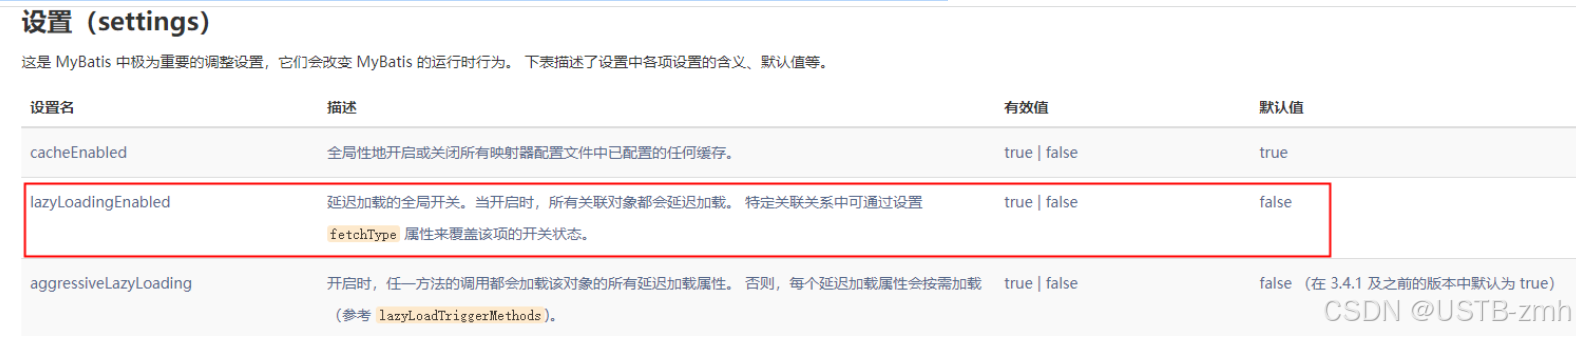
<settings>
  <setting name="lazyLoadingEnabled" value="true"/>
</settings>
开启全局延迟加载之后,所有的sql都会支持延迟加载,如果某个sql你不希望它支持延迟加载怎么办呢?将fetchType设置为eager
11.3 一对多
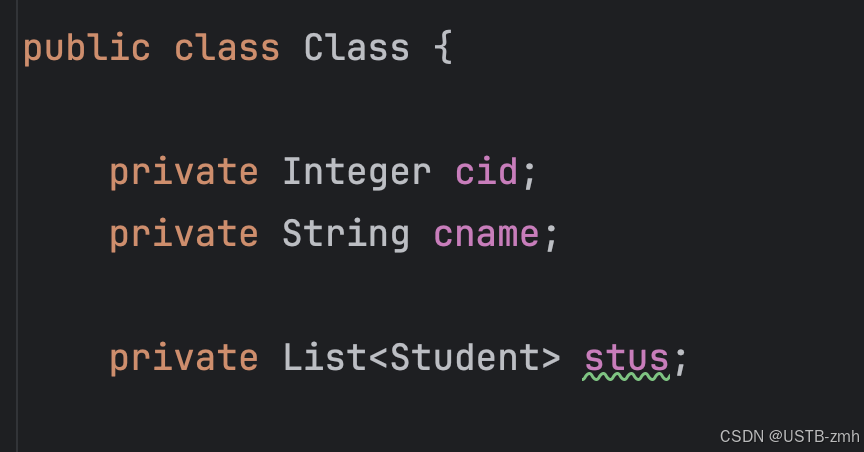
一对多的实现,通常是在一的一方中有List集合属性。
在Clazz类中添加List stus; 属性。
一对多的实现通常包括两种实现方式:
- 第一种方式:collection
- 第二种方式:分步查询
第一种方式:collection
ClassMapper接口:
    //根据班级编号查询班级信息
    Class selectByCollection(Integer cid);
ClassMapper.xml:
    <resultMap id="abc" type="Class">
        <id property="cid" column="cid"/>
        <result property="cname" column="cname"/>
        <!--一对多,这里是collection。collection是集合的意思-->
        <!--ofType 属性用来指定集合当中的元素类型-->
        <collection property="stus" ofType="Student">
            <id property="sid" column="sid"/>
            <result property="sname" column="sname"/>
        </collection>
    </resultMap>

    <select id="selectByCollection" resultMap="abc">
        select c.cid, c.cname, s.sid, s.sname from t_class c left join t_stu s on c.cid = s.cid where c.cid = #{cid}
    </select>
测试代码:
    @Test
    public void testSelectByCollection(){
        SqlSession sqlSession = SqlSessionUtil.openSession();
        ClassMapper mapper = sqlSession.getMapper(ClassMapper.class);
        Class aClass = mapper.selectByCollection(1000);
        System.out.println(aClass);
        SqlSessionUtil.close(sqlSession);
    }
运行结果:

第二种方式:分步查询
ClassMapper接口:
    //分布查询。第一步:根据班级编号获取班级信息
    Class selectByStep1(Integer cid);
StudentMapper接口:
    //根据班级编号查询学生信息
    List<Student> selectByCidStep2(Integer cid);
ClassMapper.xml:
    <resultMap id="classResultMapStep" type="Class">
        <id property="cid" column="cid"/>
        <result property="cname" column="cname"/>
        <collection property="stus"
                    select="com.powernode.mybatis.mapper.StudentMapper.selectByCidStep2"
                    column="cid"/>
    </resultMap>

    <select id="selectByStep1" resultMap="classResultMapStep">
        select cid, cname from t_class where cid = #{cid}
    </select>
StudentMapper.xml:
    <select id="selectByCidStep2" resultType="Student">
        select * from t_stu where cid = #{cid}
    </select>
测试代码:
    @Test
    public void testSelectByStep1(){
        SqlSession sqlSession = SqlSessionUtil.openSession();
        ClassMapper mapper = sqlSession.getMapper(ClassMapper.class);
        Class aClass = mapper.selectByStep1(1000);
        System.out.println(aClass);
   //     System.out.println(aClass.getCname());
        SqlSessionUtil.close(sqlSession);
    }
运行结果:
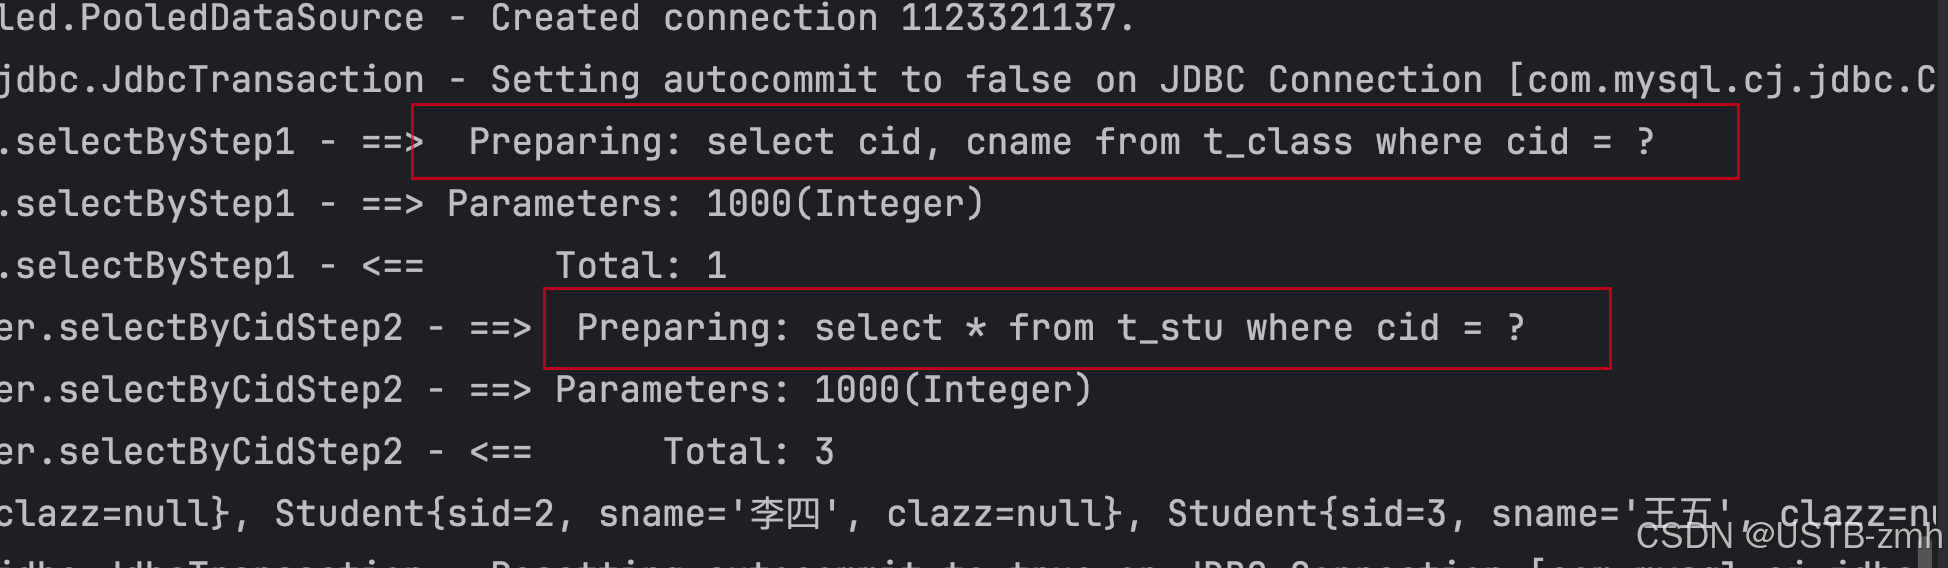
十二、 MyBatis的缓存
缓存:cache
缓存的作用:通过减少IO的方式,来提高程序的执行效率。
mybatis的缓存:将select语句的查询结果放到缓存(内存)当中,下一次还是这条select语句的话,直接从缓存中取,不再查数据库。一方面是减少了IO。另一方面不再执行繁琐的查找算法。效率大大提升。
mybatis缓存包括:
- 一级缓存:将查询到的数据存储到SqlSession中。
- 二级缓存:将查询到的数据存储到SqlSessionFactory中。
- 或者集成其它第三方的缓存:比如EhCache【Java语言开发的】、Memcache【C语言开发的】等。
缓存只针对于DQL语句,也就是说缓存机制只对应select语句。
十三、 MyBatis的逆向工程
所谓的逆向工程是:根据数据库表逆向生成Java的pojo类,SqlMapper.xml文件,以及Mapper接口类等。
要完成这个工作,需要借助别人写好的逆向工程插件。
使用这个插件的话,需要给这个插件配置哪些信息?
- pojo类名、包名以及生成位置。
- SqlMapper.xml文件名以及生成位置。
- Mapper接口名以及生成位置。
- 连接数据库的信息。
- 指定哪些表参与逆向工程。
- …
13.1 逆向工程配置与生成
第一步:基础环境准备
新建模块:mybatis-011-generator
打包方式:jar
第二步:在pom中添加逆向工程插件
<!--定制构建过程-->
<build>
  <!--可配置多个插件-->
  <plugins>
    <!--其中的一个插件:mybatis逆向工程插件-->
    <plugin>
      <!--插件的GAV坐标-->
      <groupId>org.mybatis.generator</groupId>
      <artifactId>mybatis-generator-maven-plugin</artifactId>
      <version>1.4.1</version>
      <!--允许覆盖-->
      <configuration>
        <overwrite>true</overwrite>
      </configuration>
      <!--插件的依赖-->
      <dependencies>
        <!--mysql驱动依赖-->
        <dependency>
          <groupId>mysql</groupId>
          <artifactId>mysql-connector-java</artifactId>
          <version>8.0.30</version>
        </dependency>
      </dependencies>
    </plugin>
  </plugins>
</build>
第三步:配置generatorConfig.xml
该文件名必须叫做:generatorConfig.xml
该文件必须放在类的根路径下。
<?xml version="1.0" encoding="UTF-8"?>
<!DOCTYPE generatorConfiguration
        PUBLIC "-//mybatis.org//DTD MyBatis Generator Configuration 1.0//EN"
        "http://mybatis.org/dtd/mybatis-generator-config_1_0.dtd">

<generatorConfiguration>
    <!--
        targetRuntime有两个值:
            MyBatis3Simple:生成的是基础版,只有基本的增删改查。
            MyBatis3:生成的是增强版,除了基本的增删改查之外还有复杂的增删改查。
    -->
    <context id="DB2Tables" targetRuntime="MyBatis3">
        <!--防止生成重复代码-->
        <plugin type="org.mybatis.generator.plugins.UnmergeableXmlMappersPlugin"/>

        <commentGenerator>
            <!--是否去掉生成日期-->
            <property name="suppressDate" value="true"/>
            <!--是否去除注释-->
            <property name="suppressAllComments" value="true"/>
        </commentGenerator>

        <!--连接数据库信息-->
        <jdbcConnection driverClass="com.mysql.cj.jdbc.Driver"
                        connectionURL="jdbc:mysql://localhost:3306/powernode"
                        userId="root"
                        password="root">
        </jdbcConnection>

        <!-- 生成pojo包名和位置 -->
        <javaModelGenerator targetPackage="com.powernode.mybatis.pojo" targetProject="src/main/java">
            <!--是否开启子包-->
            <property name="enableSubPackages" value="true"/>
            <!--是否去除字段名的前后空白-->
            <property name="trimStrings" value="true"/>
        </javaModelGenerator>

        <!-- 生成SQL映射文件的包名和位置 -->
        <sqlMapGenerator targetPackage="com.powernode.mybatis.mapper" targetProject="src/main/resources">
            <!--是否开启子包-->
            <property name="enableSubPackages" value="true"/>
        </sqlMapGenerator>

        <!-- 生成Mapper接口的包名和位置 -->
        <javaClientGenerator
                type="xmlMapper"
                targetPackage="com.powernode.mybatis.mapper"
                targetProject="src/main/java">
            <property name="enableSubPackages" value="true"/>
        </javaClientGenerator>

        <!-- 表名和对应的实体类名-->
        <table tableName="t_car" domainObjectName="Car"/>

    </context>
</generatorConfiguration>
第四步:运行插件
双击
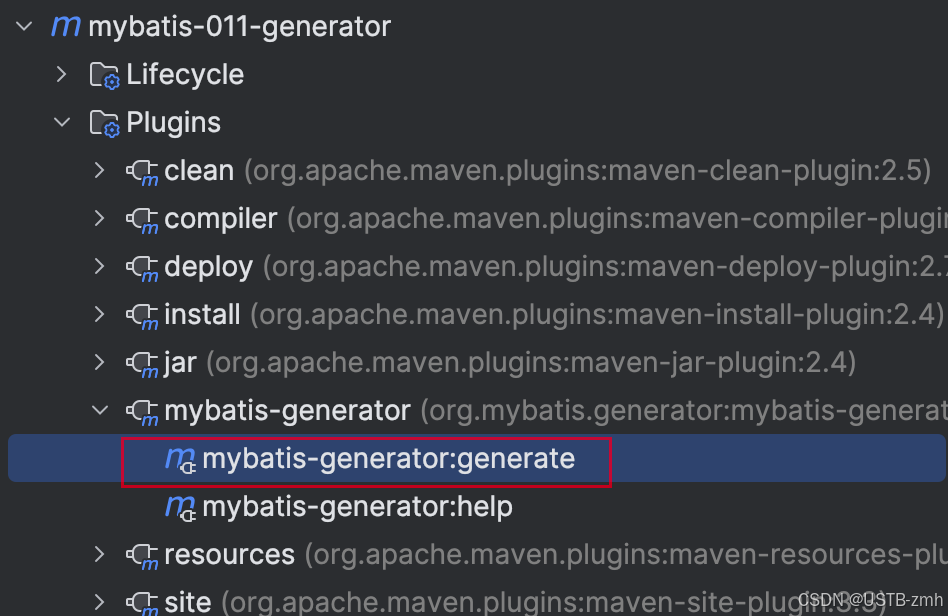
十四、 MyBatis使用PageHelper
14.1 limit分页
mysql的limit后面两个数字:
- 第一个数字:startIndex(起始下标。下标从0开始。)
- 第二个数字:pageSize(每页显示的记录条数)
假设已知页码pageNum,还有每页显示的记录条数pageSize,第一个数字可以动态的获取吗?
- startIndex = (pageNum - 1) * pageSize
所以,标准通用的mysql分页SQL:
select
  *
from
  tableName ......
limit
  (pageNum - 1) * pageSize, pageSize
public interface CarMapper {

    /**
    * 通过分页的方式获取Car列表
    * @param startIndex 页码
    * @param pageSize 每页显示记录条数
    * @return
    */
    List<Car> selectAllByPage(@Param("startIndex") Integer startIndex, @Param("pageSize") Integer pageSize);
}
  <select id="selectAllByPage" resultType="Car">
        select * from t_car limit #{startIndex},#{pageSize}
  </select>
 @Test
    public void testPage()throws Exception{
        SqlSessionFactory sqlSessionFactory = new SqlSessionFactoryBuilder().build(Resources.getResourceAsStream("mybatis-config.xml"));
        SqlSession sqlSession = sqlSessionFactory.openSession();
        CarMapper mapper = sqlSession.getMapper(CarMapper.class);

        // 页码
        Integer pageNum = 2;
        // 每页显示记录条数
        Integer pageSize = 3;
        // 起始下标
        Integer startIndex = (pageNum - 1) * pageSize;

        List<Car> cars = mapper.selectAllByPage(startIndex, pageSize);
        cars.forEach(car -> System.out.println(car));

        sqlSession.commit();
        sqlSession.close();
    }
获取数据不难,难的是获取分页相关的数据比较难。可以借助mybatis的PageHelper插件。

14.2 PageHelper插件
第一步:引入依赖
<dependency>
  <groupId>com.github.pagehelper</groupId>
  <artifactId>pagehelper</artifactId>
  <version>5.3.1</version>
</dependency>
第二步:在mybatis-config.xml文件中配置插件
typeAliases标签下面进行配置:
<plugins>
  <plugin interceptor="com.github.pagehelper.PageInterceptor"></plugin>
</plugins>
第三步:编写Java代码
List<Car> selectAll();
<select id="selectAll" resultType="Car">
  select * from t_car
</select>
关键点:
- 在查询语句之前开启分页功能。
- 在查询语句之后封装PageInfo对象。(PageInfo对象将来会存储到request域当中。在页面上展示。)
@Test
public void testPageHelper() throws Exception{
    SqlSessionFactory sqlSessionFactory = new SqlSessionFactoryBuilder().build(Resources.getResourceAsStream("mybatis-config.xml"));
    SqlSession sqlSession = sqlSessionFactory.openSession();
    CarMapper mapper = sqlSession.getMapper(CarMapper.class);

    // 开启分页
    PageHelper.startPage(2, 2);

    // 执行查询语句
    List<Car> cars = mapper.selectAll();

    // 获取分页信息对象
    PageInfo<Car> pageInfo = new PageInfo<>(cars, 5);

    System.out.println(pageInfo);
}
对执行结果进行格式化:
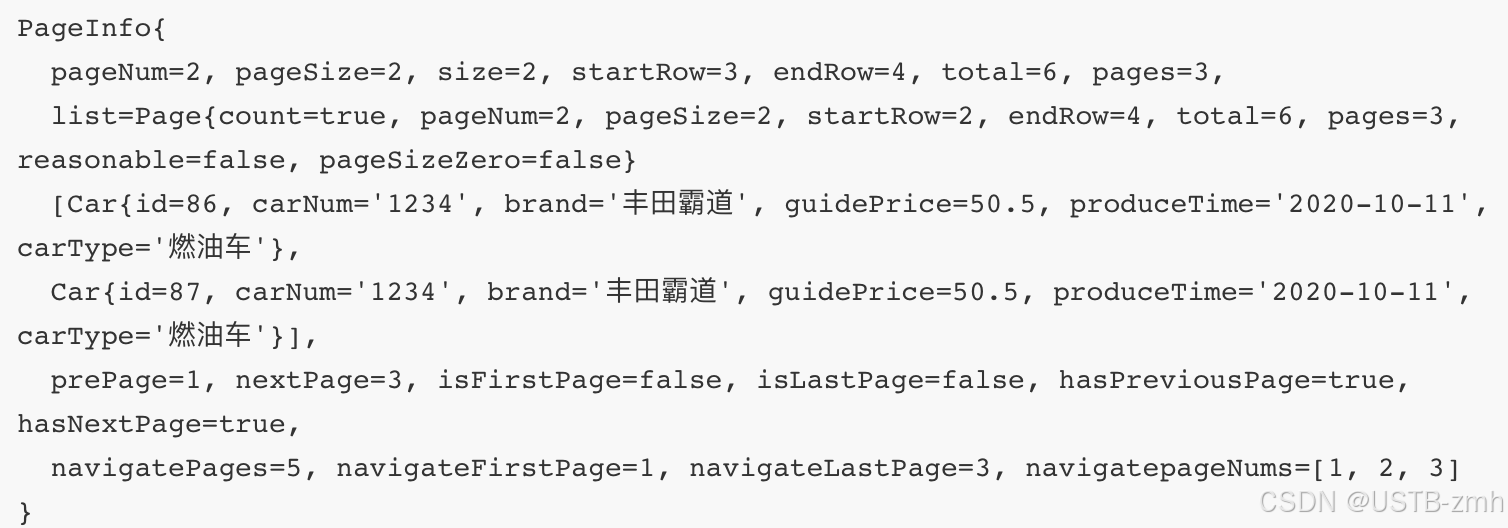
十五、 MyBatis的注解式开发
mybatis中也提供了注解式开发方式,采用注解可以减少Sql映射文件的配置。
当然,使用注解式开发的话,sql语句是写在java程序中的,这种方式也会给sql语句的维护带来成本。
官方是这么说的:
使用注解来映射简单语句会使代码显得更加简洁,但对于稍微复杂一点的语句,Java 注解不仅力不从心,还会让你本就复杂的 SQL 语句更加混乱不堪。 因此,如果你需要做一些很复杂的操作,最好用 XML 来映射语句。
15.1 @Insert
public interface CarMapper {

    @Insert(value="insert into t_car values(null,#{carNum},#{brand},#{guidePrice},#{produceTime},#{carType})")
    int insert(Car car);
}
15.2 @Delete
@Delete("delete from t_car where id = #{id}")
int deleteById(Long id);
15.3 @Update
@Update("update t_car set car_num=#{carNum},brand=#{brand},guide_price=#{guidePrice},produce_time=#{produceTime},car_type=#{carType} where id=#{id}")
int update(Car car);
15.4 @Select
@Select("select * from t_car where id = #{id}")
@Results({
    @Result(column = "id", property = "id", id = true),
    @Result(column = "car_num", property = "carNum"),
    @Result(column = "brand", property = "brand"),
    @Result(column = "guide_price", property = "guidePrice"),
    @Result(column = "produce_time", property = "produceTime"),
    @Result(column = "car_type", property = "carType")
})
Car selectById(Long id);
本站资源均来自互联网,仅供研究学习,禁止违法使用和商用,产生法律纠纷本站概不负责!如果侵犯了您的权益请与我们联系!
转载请注明出处: 免费源码网-免费的源码资源网站 » 【MyBatis---快速学习和复习】

发表评论 取消回复