一、简单介绍
1.1 简介
-
Knife4j是一款基于Swagger的开源文档管理工具,主要用于生成和管理 API 文档

二、使用步骤:
2.1 添加依赖:
<dependency>
    <groupId>com.github.xiaoymin</groupId>
    <artifactId>knife4j-spring-boot-starter</artifactId>
    <version>3.0.3</version>
</dependency>
2.2 yml数据源配置
spring:
  mvc:
    pathmatch: # Springfox使用的路径匹配是基于AntPathMatcher的
      # 所以需要配置此参数
      matching-strategy: ant_path_matcher
2.3 创建knife4j配置类
package com.example.knife4.config;
import springfox.documentation.builders.PathSelectors;
import springfox.documentation.builders.RequestHandlerSelectors;
import springfox.documentation.service.Contact;
import org.springframework.context.annotation.Bean;
import org.springframework.context.annotation.Configuration;
import springfox.documentation.builders.ApiInfoBuilder;
import springfox.documentation.spi.DocumentationType;
import springfox.documentation.spring.web.plugins.Docket;
import springfox.documentation.swagger2.annotations.EnableSwagger2;
@Configuration // 开启配置
@EnableSwagger2 // 启动Swagger2
public class Knife4jConfiguration {
@Bean
public Docket defaultApi2() {
String groupName = "1.0版本";
Docket docket = new Docket(DocumentationType.OAS_30)
// 是否启用Swagger,true启用,false不启用
.enable(true)
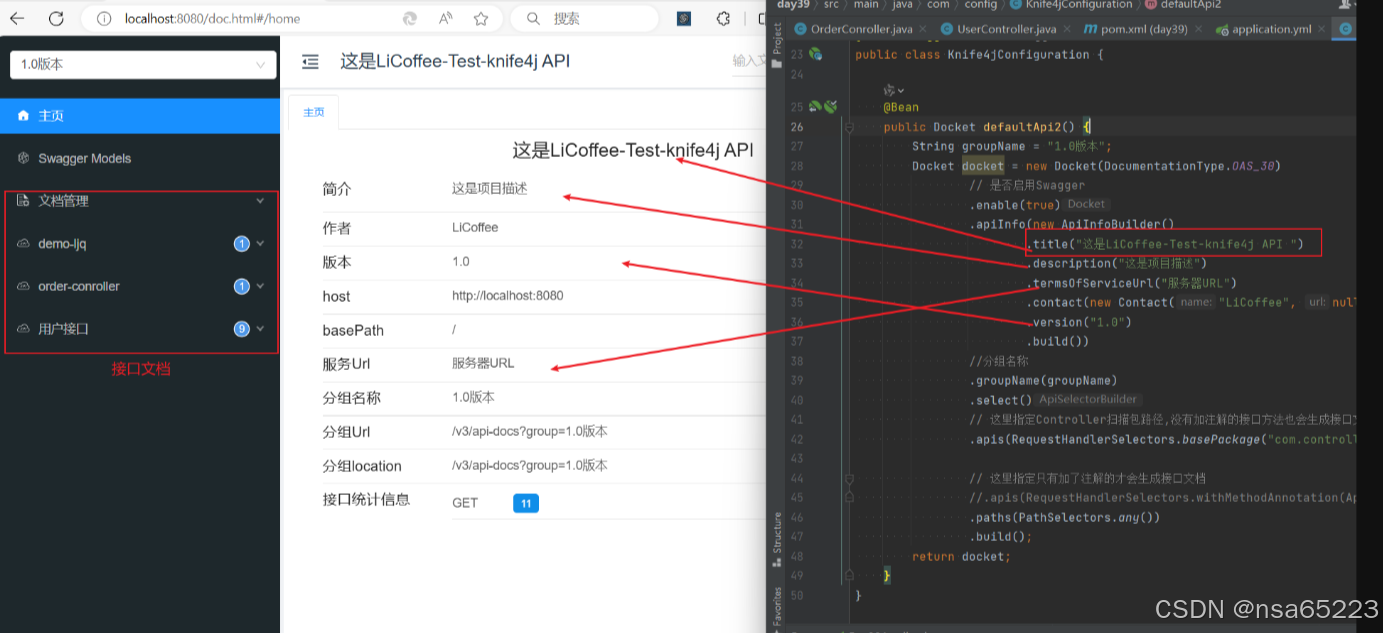
.apiInfo(new ApiInfoBuilder()
.title("这是LiCoffee-Test-knife4j API ")
.description("这是项目描述")
.termsOfServiceUrl("服务器URL")
.contact(new Contact("LiCoffee", null, "qiushiju0828@163.com"))
.version("1.0")
.build())
//分组名称
.groupName(groupName)
.select()
// 这里指定Controller扫描包路径,没有加注解的接口方法也会生成接口文档
.apis(RequestHandlerSelectors.basePackage("com.example.knife4.controller"))
// 这里指定只有加了注解的才会生成接口文档
//.apis(RequestHandlerSelectors.withMethodAnnotation(ApiOperation.class))
.paths(PathSelectors.any())
.build();
return docket;
}
}
以上就配置完了,还有一些小细节下在讲,通过访问http://127.0.0.1:8080/doc.html#/home
本站资源均来自互联网,仅供研究学习,禁止违法使用和商用,产生法律纠纷本站概不负责!如果侵犯了您的权益请与我们联系!
转载请注明出处: 免费源码网-免费的源码资源网站 » Knife4j 一款基于Swagger的开源文档管理工具

发表评论 取消回复