前言
扩展:
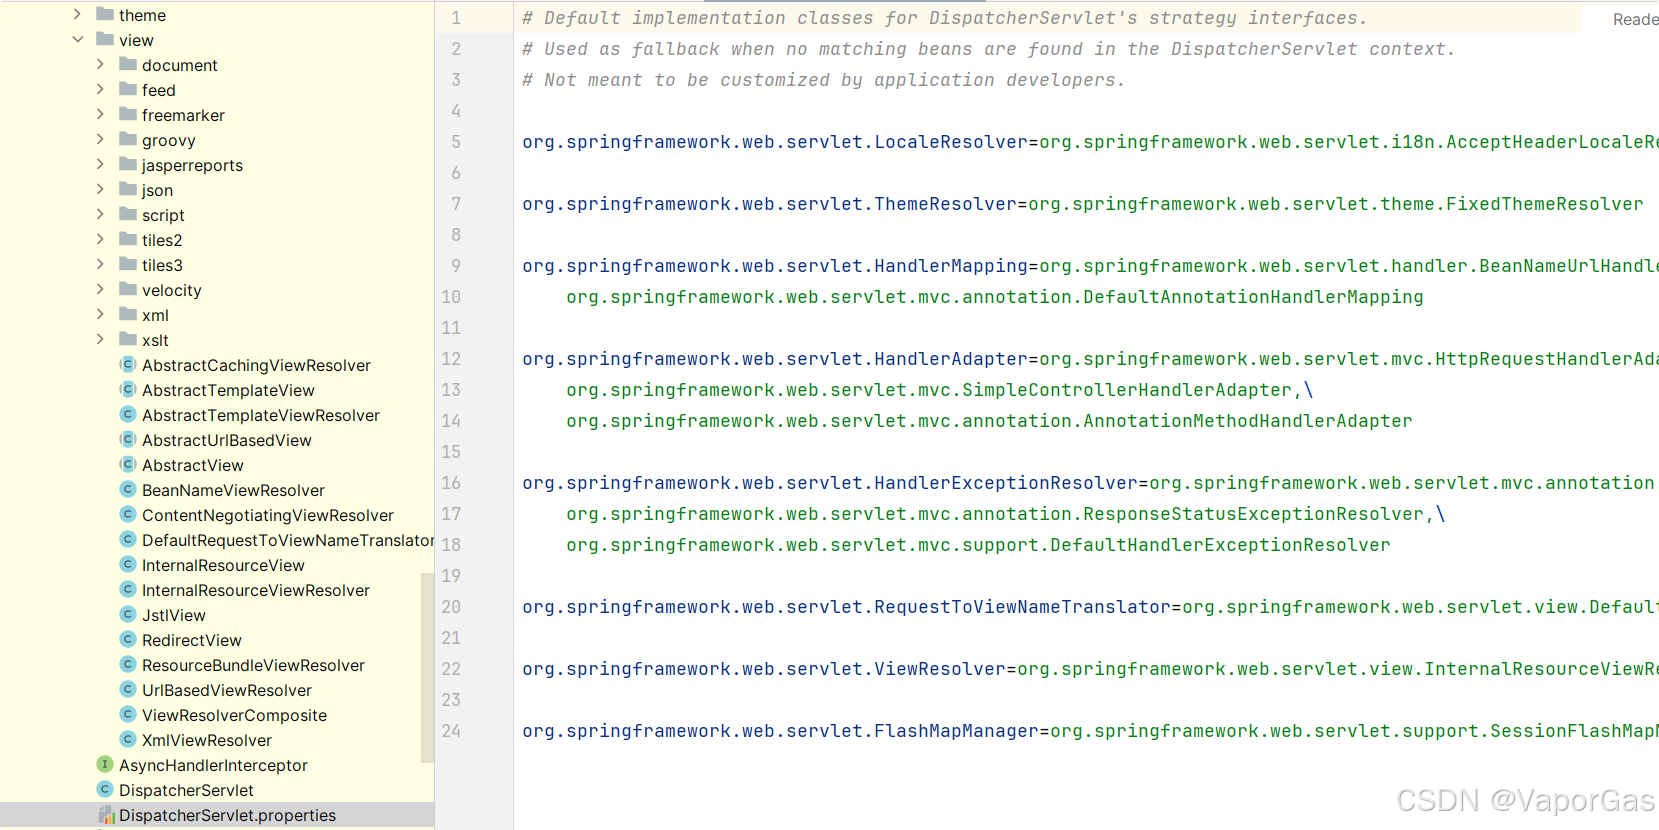
DispatcherServlet默认配置
- DispatcherServlet的默认配置在DispatcherServlet.properties(和DispatcherServlet类在一个包下)中,而且是当Spring配置文件中没有指定配置时使用的默认策略
注解式控制器简介
- Spring2.5之前,我们都是通过实现Controller接口或其实现来定义我们的处理器类。已经@Deprecated。
- Spring2.5引入注解式处理器支持,通过@Controller 和 @RequestMapping注解定义我们的处理器类。并且提供了一组强大的注解
- 使用注解前需要对配置文件添加扫描路径和注解驱动
注解式控制器配置
spring.xml
<?xml version="1.0" encoding="UTF-8"?>
<beans xmlns="http://www.springframework.org/schema/beans"
       xmlns:xsi="http://www.w3.org/2001/XMLSchema-instance"
       xmlns:p="http://www.springframework.org/schema/p"
       xmlns:mvc="http://www.springframework.org/schema/mvc"
       xmlns:context="http://www.springframework.org/schema/context"
       xmlns:util="http://www.springframework.org/schema/util"
       xsi:schemaLocation="http://www.springframework.org/schema/beans
            http://www.springframework.org/schema/beans/spring-beans-4.1.xsd
            http://www.springframework.org/schema/context
            http://www.springframework.org/schema/context/spring-context-4.1.xsd
            http://www.springframework.org/schema/mvc
            http://www.springframework.org/schema/mvc/spring-mvc-4.1.xsd
            http://www.springframework.org/schema/util
            http://www.springframework.org/schema/util/spring-util-4.1.xsd">
    <!-- 默认扫描的包路径 -->
    <context:component-scan base-package="com.csx"/>
    <!-- 添加注解驱动 -->
    <mvc:annotation-driven/>

    <!--处理器映射器-->
<!--    <bean class="org.springframework.web.servlet.handler.BeanNameUrlHandlerMapping"/>-->
    <!--处理器适配器-->
<!--    <bean class="org.springframework.web.servlet.mvc.SimpleControllerHandlerAdapter"/>-->

    <!--视图解析器-->
    <!-- 定义跳转的文件的前后缀 -->
    <bean class="org.springframework.web.servlet.view.InternalResourceViewResolver">
        <property name="prefix" value="/"/>
        <property name="suffix" value=".jsp"/>
    </bean>

<!--    <bean name="/hello" class="com.csx.HelloController" />-->

</beans>
- 注意:
- <bean class="org.springframework.web.servlet.view.InternalResourceViewResolver" p:prefix="/" p:suffix=".jsp"/>
- 等价上面的视图解析器写法
- 一旦使用了注解式控制器,就不需要书写处理器映射器和处理器适配器和控制器bean的xml配置
注解式控制器
- @Controller:用于标识是处理器类
- @RequestMapping:请求到处理器功能方法的映射规则
- @RequestParam:请求参数到处理器功能处理方法的方法参数上的绑定
- @ModelAttribute:请求参数到命令对象的绑定;
使用注解
HelloController
@Controller
public class HelloController {
  @RequestMapping("/hi")
    public ModelAndView hello(){
      ModelAndView mv =new ModelAndView();
      mv.setViewName("hello");
      mv.addObject("msg","oi,小伙学SpringMVC吗");
      return mv;
  }
}
- 可以通过在一个POJO类上放置@Controller或 现在的处理器无需实现/继承任何接口/类,只需要在相应的类/方法上放置相应的注解说明下即可,非常方便。
- 在方法上配置@RequestMapping("/h1"),配置映射路径,当我们使用localhost:8080/hi,就可以访问到这个控制器类
修改完以上配置,其他的书写和使用配置文件的方式是一样的。
使用注解进阶技巧
基于一个登录案例讲解:
登录案例
这里主要演示springmvc注解相关功能的使用技巧,不涉及数据库,因此我们的数据都“写死”。
定义一个实体类User:
User
public class User implements Serializable {
    private int user_id;
    private String user_name;
    private String password;

    public int getUser_id() {
        return user_id;
    }

    public void setUser_id(int user_id) {
        this.user_id = user_id;
    }

    public String getUser_name() {
        return user_name;
    }

    public void setUser_name(String user_name) {
        this.user_name = user_name;
    }

    public String getPassword() {
        return password;
    }

    public void setPassword(String password) {
        this.password = password;
    }
}
定义登录页面
login.jsp
<%--
  Created by IntelliJ IDEA.
  User: Administrator
  Date: 2024/10/8
  Time: 15:49
  To change this template use File | Settings | File Templates.
--%>
<%@ page contentType="text/html;charset=UTF-8" language="java" %>
<html>
<head>
    <title>Title</title>
</head>
<body>
<form action="/login" method="post">
    用户名: <input type="text" name="user_name"> <br/>
    密码: <input type="password" name="password"> <br/>
    <input type="submit" value="登录">
</form>
</body>
</html>
定义一个UserController控制器
UserController
完成登录和页面跳转等功能
@Controller
public class UserController {
    @RequestMapping("/login")
    public ModelAndView login(String user_name,String password){
        ModelAndView mv =new ModelAndView();
        if ("root".equals(user_name) && "123".equals(password)){
            mv.addObject("username",user_name);
            mv.setViewName("main");
        }else {
            mv.setViewName("login");
        }
        return mv;
    }
使用setViewName方法设置视图名,由视图解析器解析并跳转到指定页面
登录成功页面:
main.jsp
<%--
  Created by IntelliJ IDEA.
  User: 21038
  Date: 2024/10/9
  Time: 10:25
  To change this template use File | Settings | File Templates.
--%>
<%@ page contentType="text/html;charset=UTF-8" language="java" %>
<html>
<head>
    <title>Title</title>
</head>
<body>
${username},恭喜你,被我恭喜到了

</body>
</html>
注意事项总结
- 使用@RequestMapping注解直接定义访问路径,不需要在配置文件中添加配置,而且方法名、参数、返回值都可以任意定义。
- 使用@Controller注解,标注该类是控制器类,不需要实现Controller接口。
- 页面传递的参数名称要和方法参数名相同即可接收到。
- 在mv中保存属性,页面中可以直接通过el表达式取得。
本站资源均来自互联网,仅供研究学习,禁止违法使用和商用,产生法律纠纷本站概不负责!如果侵犯了您的权益请与我们联系!
转载请注明出处: 免费源码网-免费的源码资源网站 » SpringMVC框架:深入注解开发实践与基础案例优化解析

发表评论 取消回复